Paper Setup
Use paper that meets the specifications of the printer. Paper Roll Specifications
Caution
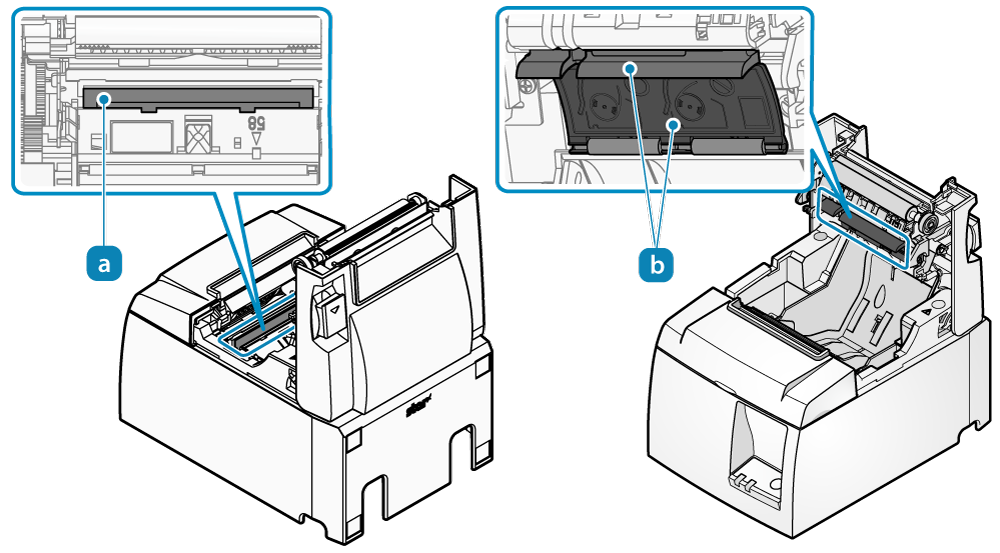
There is a printer head  inside the printer that becomes hot during printing or right after printing.
Do not touch the printer head when opening or closing the printer cover.
inside the printer that becomes hot during printing or right after printing.
Do not touch the printer head when opening or closing the printer cover.
Be careful not to forcibly pull or push the de-curl mechanism part  . The de-curl mechanism part may become damaged if strong force is applied.
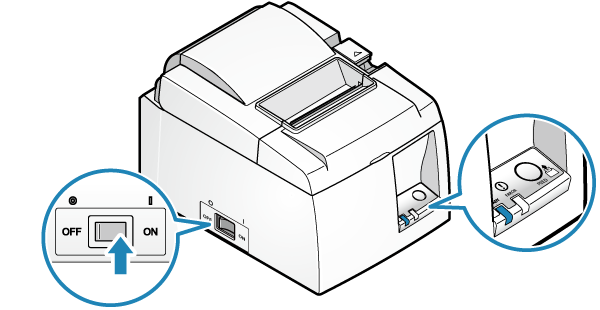
1. Turn power on
- Set the paper with the power on to automatically feed or cue paper.
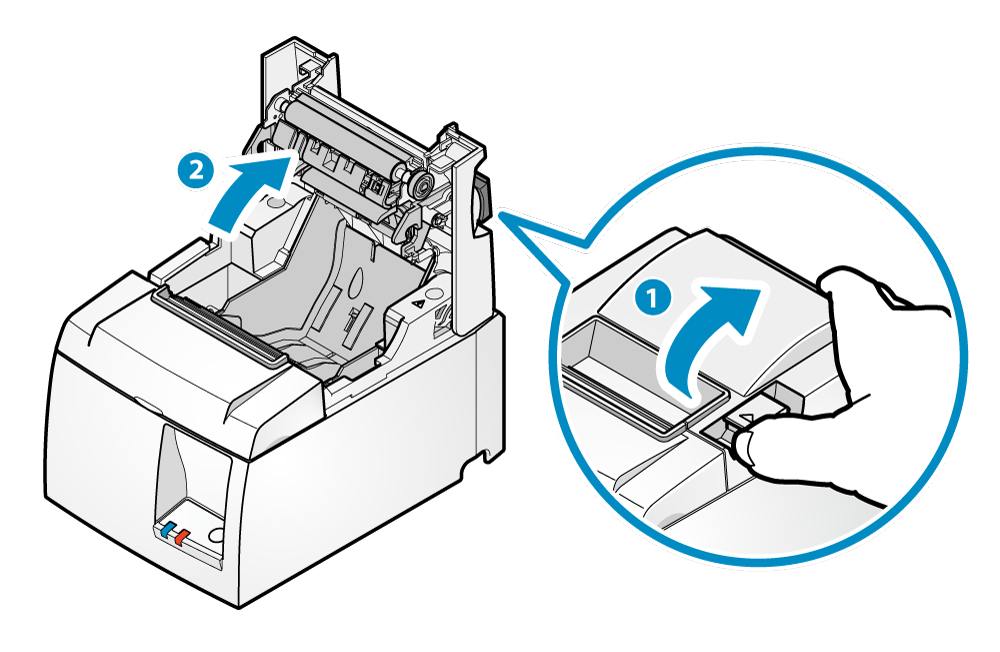
2. Open printer cover
- Push the opening lever
 to open the printer cover
 .
.
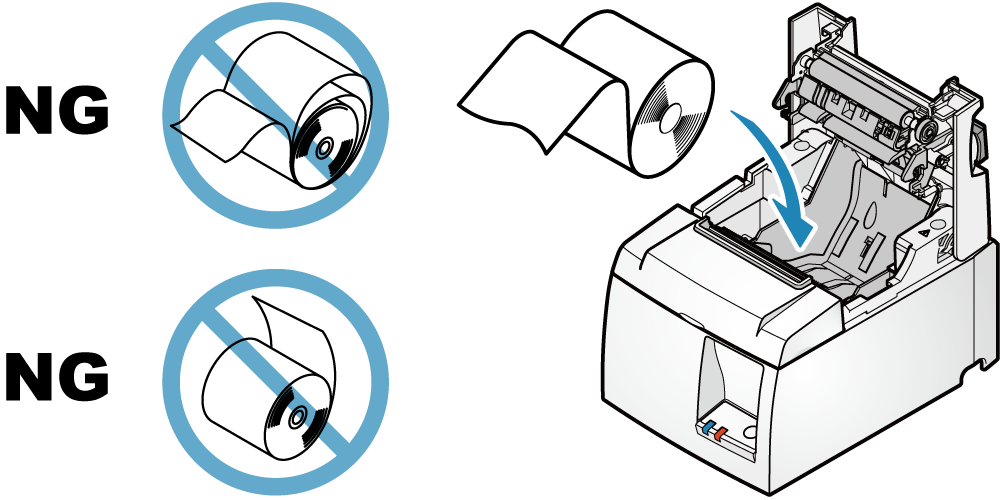
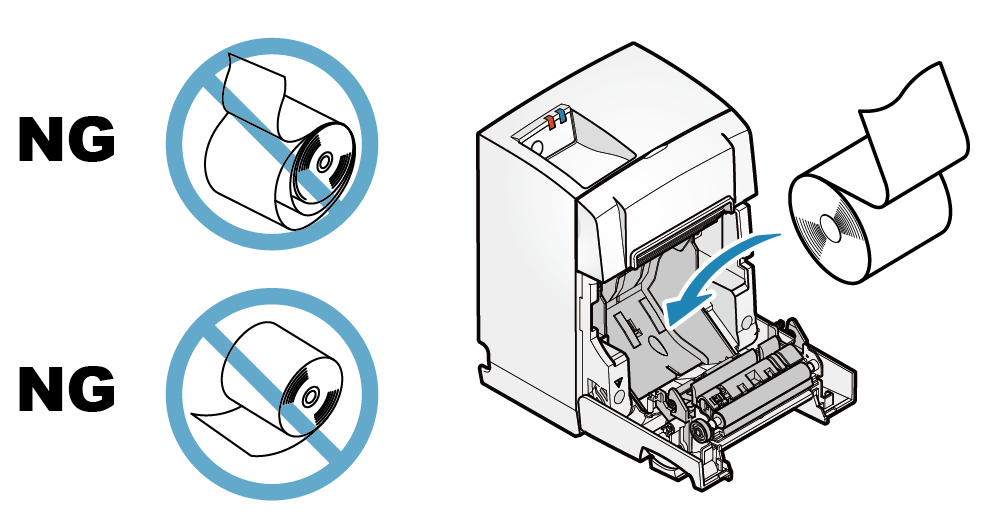
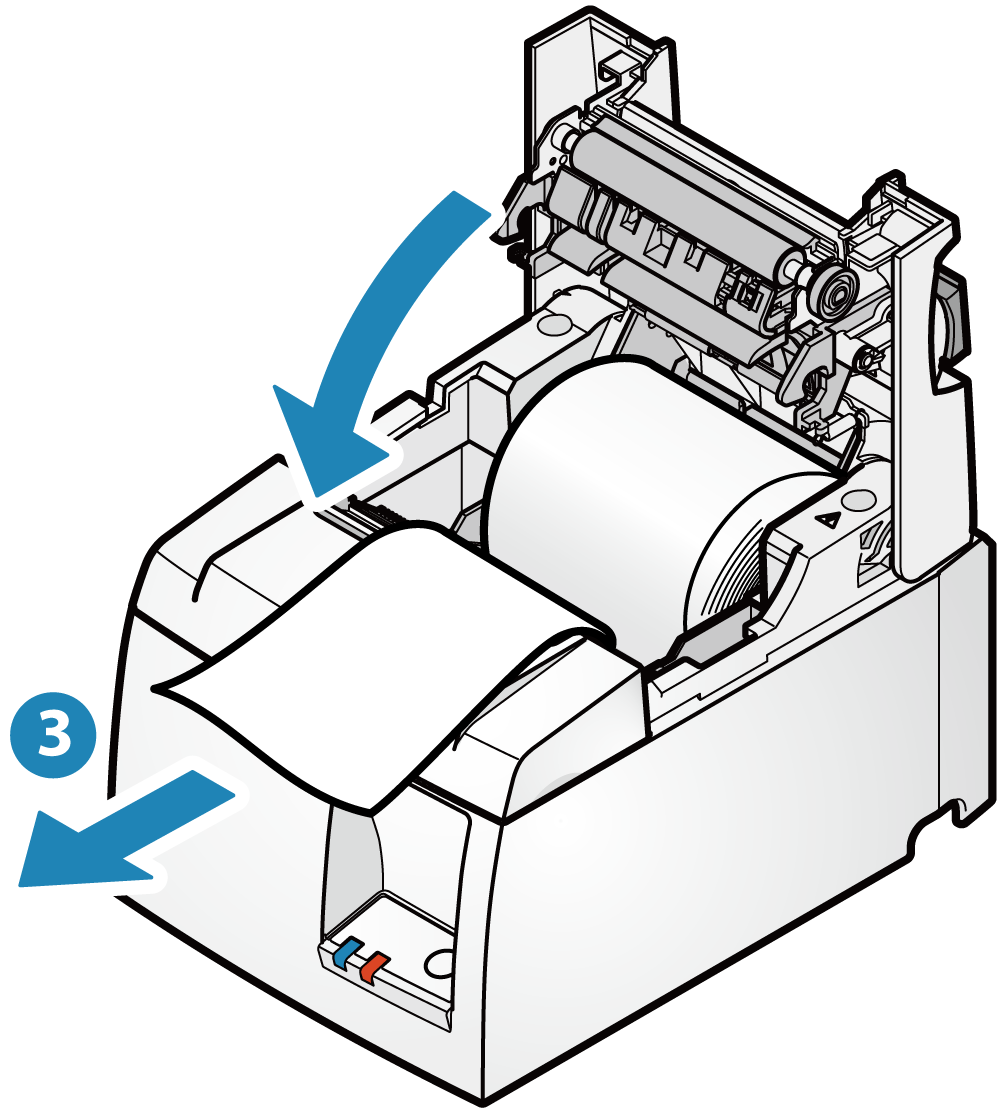
3. Paper setup
- Set the paper roll in the direction as shown in the illustration.
When using vertically
- If the unit is set up vertically with the attached mounting bracket or the vertical stand (option), set the paper roll as shown in the next illustration.
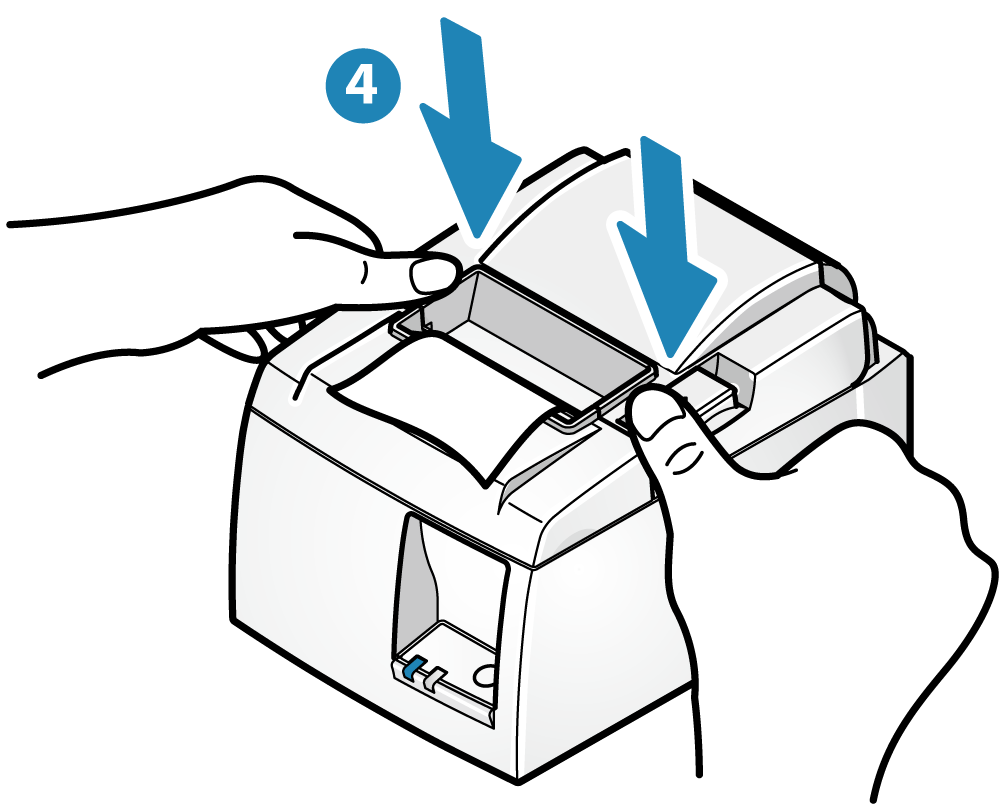
4. Close printer cover
- Pull the end of the paper straight out
 , sandwich the paper and close the printer cover .
The setting is completed when the paper is cut automatically.
- Push both sides as shown in the diagram and close the printer cover
 .
.
Note
Paper Roll Specifications
Use paper roll that complies to the following specifications.
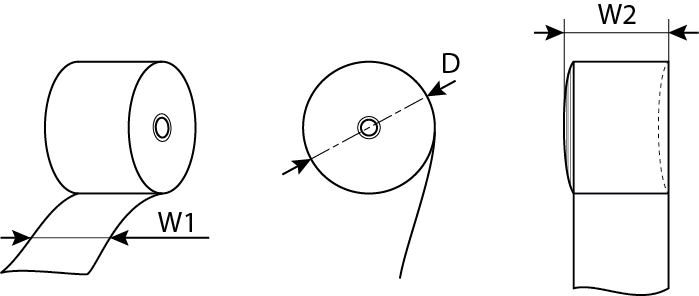
| Paper width (W1) | 79.5±0.5(mm) / When using attached paper roll guide: 57.5±0.5(mm) |
|---|---|
| Maximum roll diameter (D) | φ83 (mm) |
| Curling dimension (W2) | 80.0+0.5, -1(mm) / 58.0+0.5, -1(mm) |
| Paper thickness | 53~85 (μm) |
| Axial | Inner diameter: φ12±1 Outer diameter: φ18±1 (mm) |
| Color surface | Roll exterior |
| Termination process | Do not glue the paper roll and axial wrapper. |
For recommended paper rolls, refer to List of recommended paper rolls.