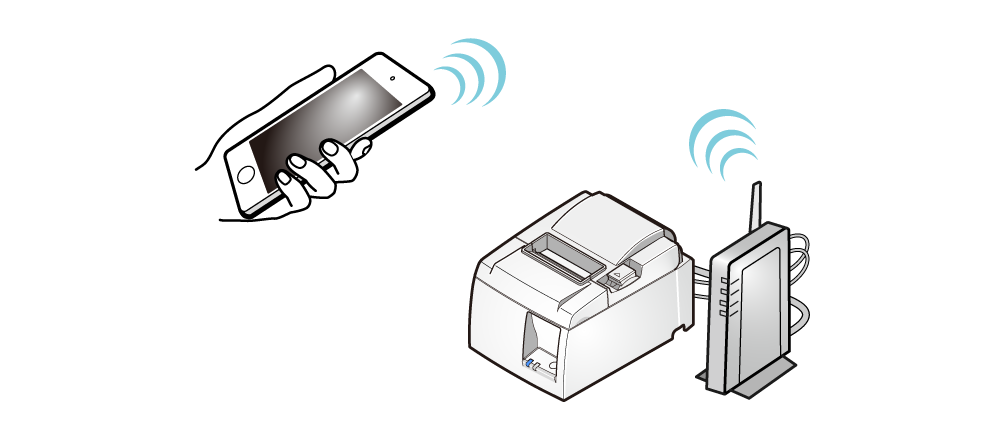
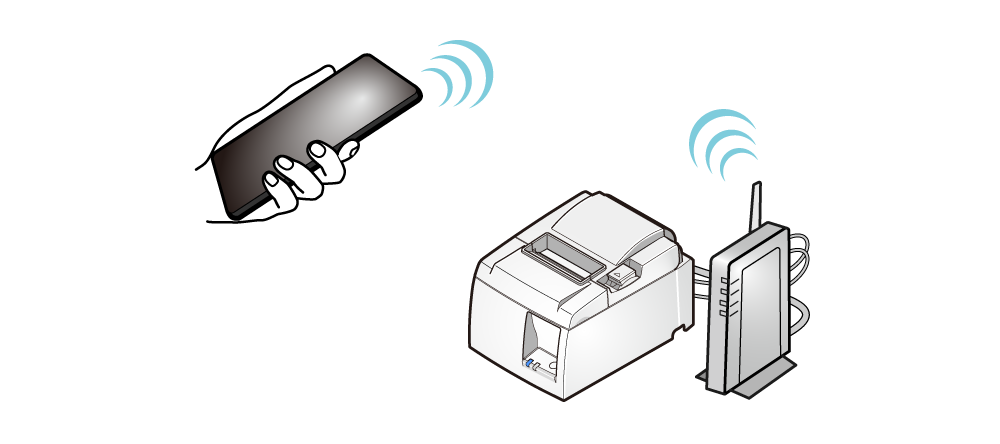
Connect Tablet/PC
Connect the printer and a tablet or PC, and set a fixed IP address to the printer.
Once a static IP address is assigned, IP address changes through the DHCP server will not occur, so the specified connection destination device can be used continuously once set.
The setting method depends on the OS of the device you are using.
iOS
Android
Windows
If you are using DHCP (If a fixed IP address is not set), then connect a LAN cable to simply complete the connection. By specifying the IP address output by self-printing, print settings can be configured.
When using an iOS/Android device in an environment without a DHCP server
To use an iOS/Android device in an environment without a DHCP server, you must first set the IP address of TSP100IIILAN from a PC that is connected to the same segment (network) as TSP100IIILAN.
Prepare the PC environment (Windows/Mac/Linux) and configure IP address settings according to the corresponding guideline.
Ethernet Usage Guideline for Windows
iOS
In order to use and configure an iOS device (iPad/iPhone), TSP100IIILAN and the iOS device must be connected to the same network (same segment).
The following steps must be performed after TSP100IIILAN is connected to a network and the power is turned on.
Connect LAN Cable
Turn ON Power
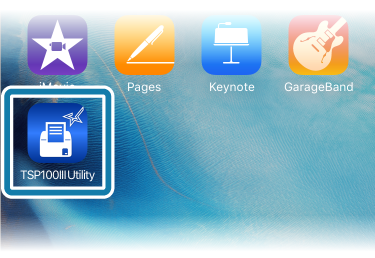
1. Prepare the Utility
- Use ”TSP100III Utility” to connect the printer and the tablet.
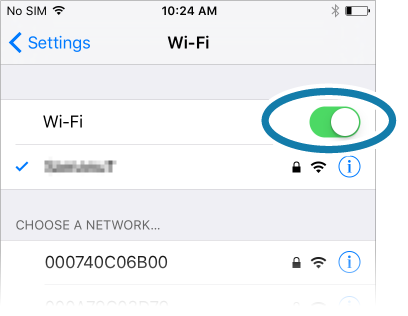
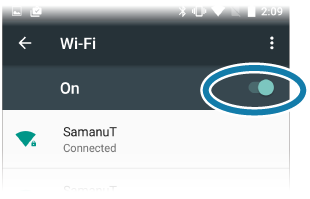
"TSP100III Utility" can be downloaded from the following link, Use App. - Open the setting screen of the tablet and select WiFi and turn it ON.
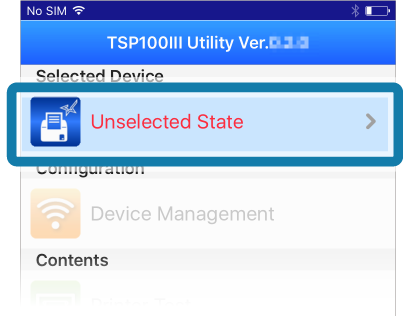
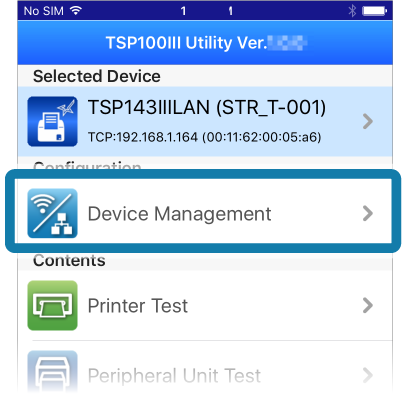
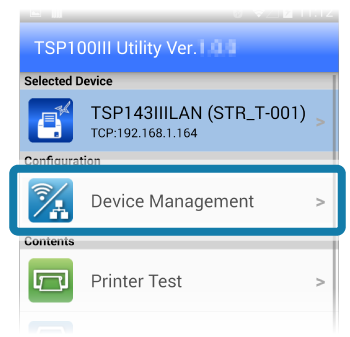
2. Select the printer from TSP100III Utility, and open the setting screen
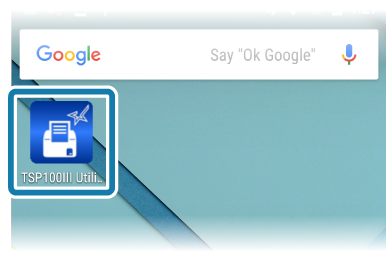
- Check the printer’s power is on, and open TSP100III Utility.
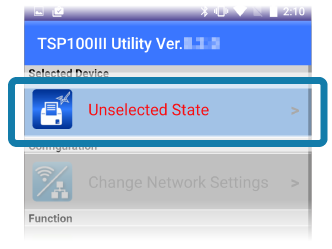
- Tap [Unselected State] from "Selected Device".
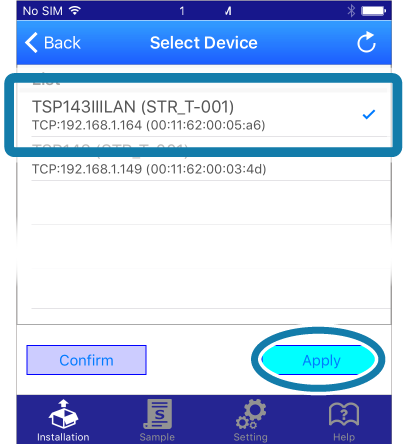
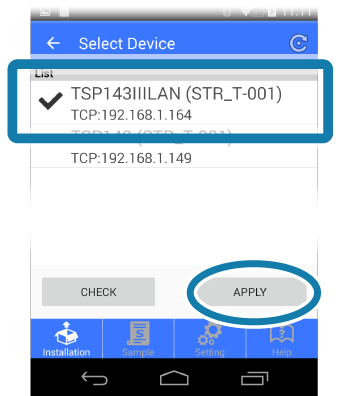
- From the Select Device list , select the device you want to connect and then tap [Apply].
- Tap [Change Network Settings].
This connects to the selected printer and opens the Web Configuration.
Note
If there is a printer that has already been selected, tap the printer that is displayed in "Selected Device".
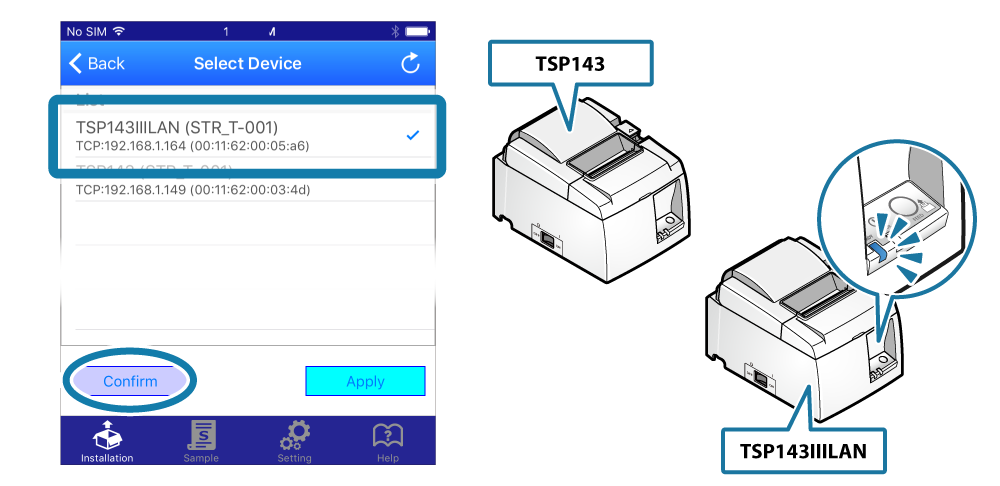
Note
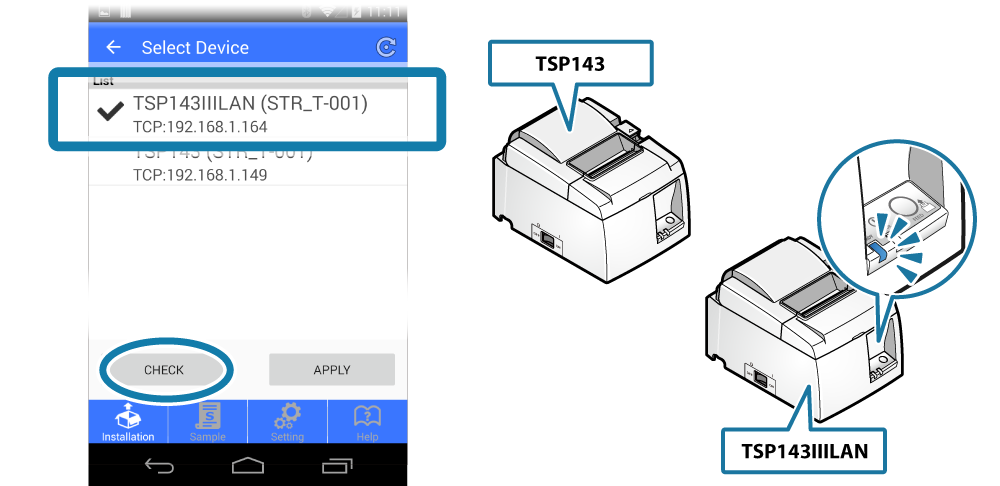
Tap [Confirm] and the printer’s LED (blue) will flash, and you can check the selected printer.
3. Set fixed IP address to the printer from Web Configuration
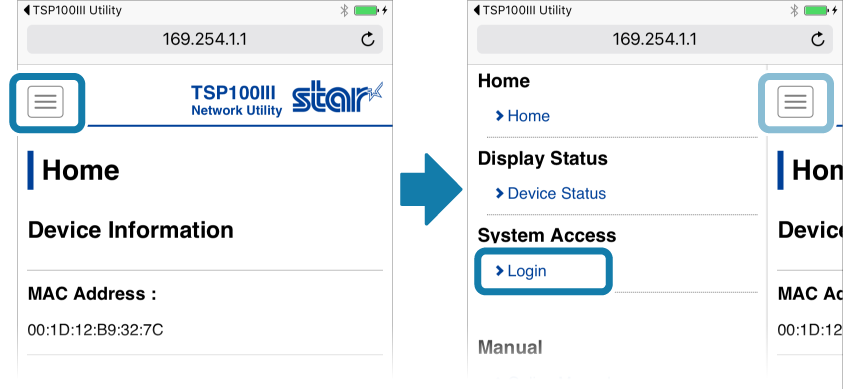
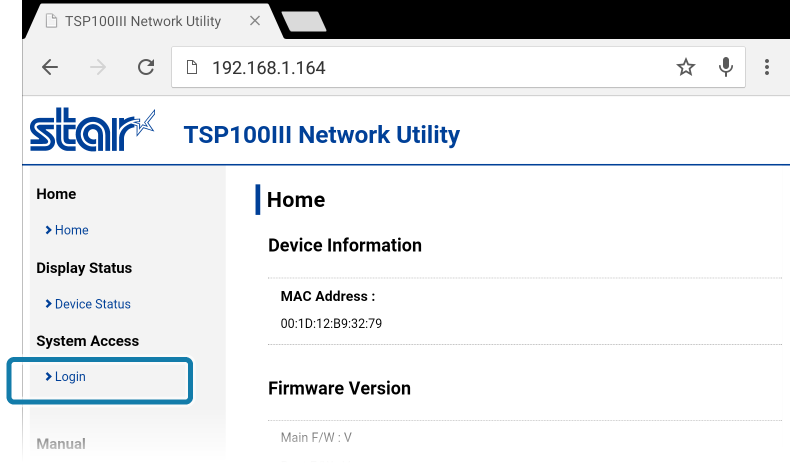
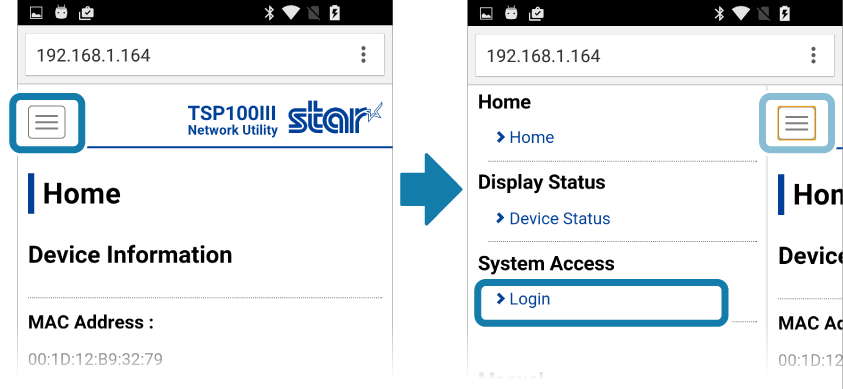
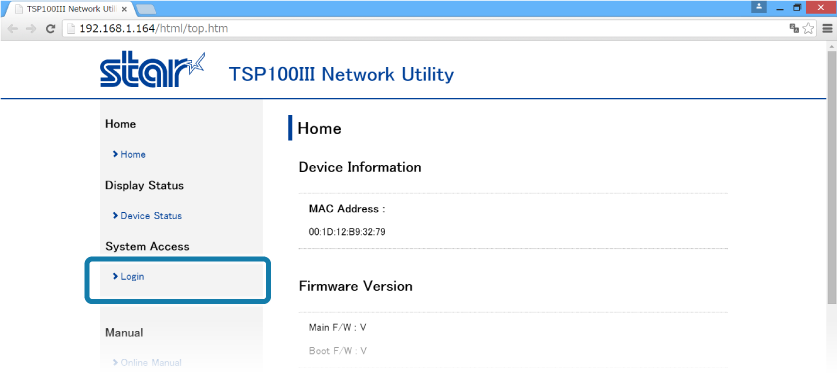
- If you have changed the password, open [Login] from the menu displayed on the left side of the setting screen, or the menu button
 displayed on the upper left, and login with:
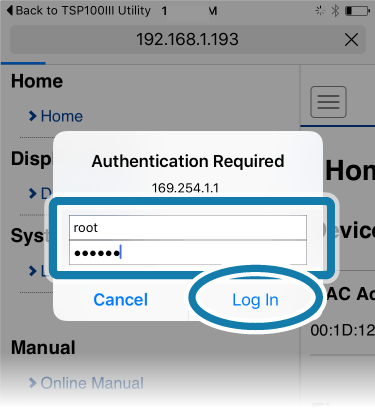
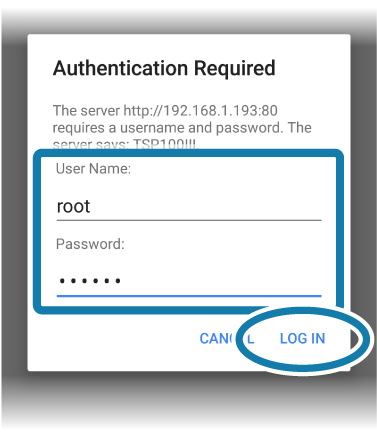
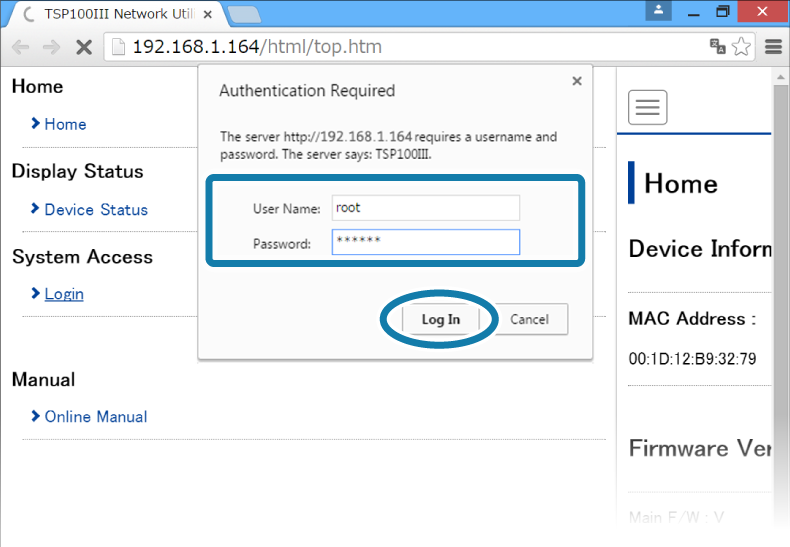
Login name: root / password: [Changed password or the default password (public)].
displayed on the upper left, and login with:
Login name: root / password: [Changed password or the default password (public)]. - The default login name and password are as follows:
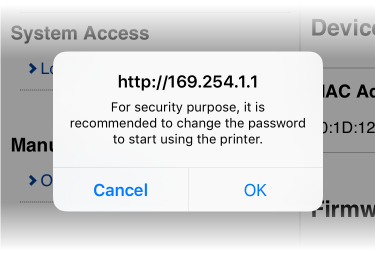
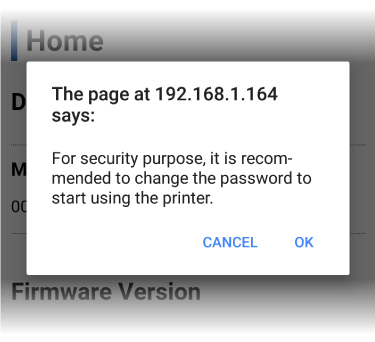
- The following message is displayed when you are using the default password.
Select [OK] to change the password or [Cancel] to not change the password.
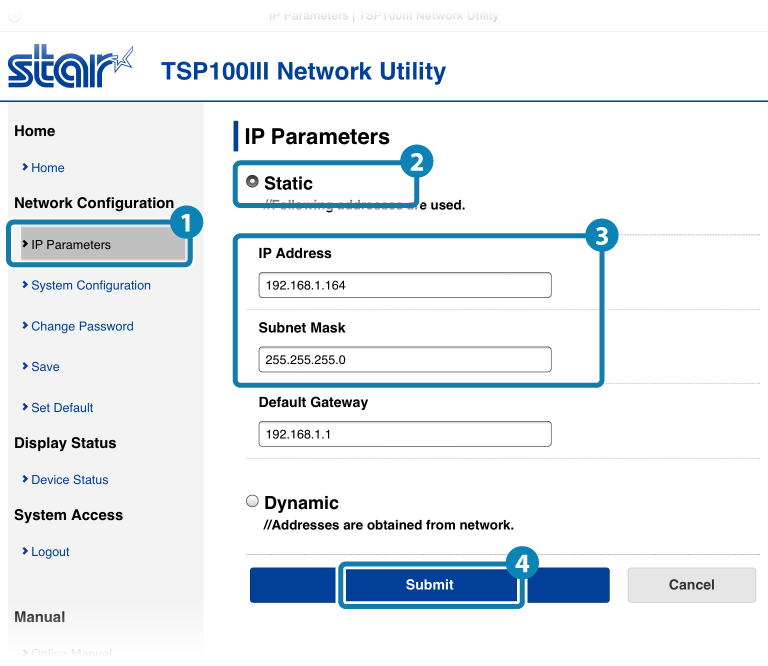
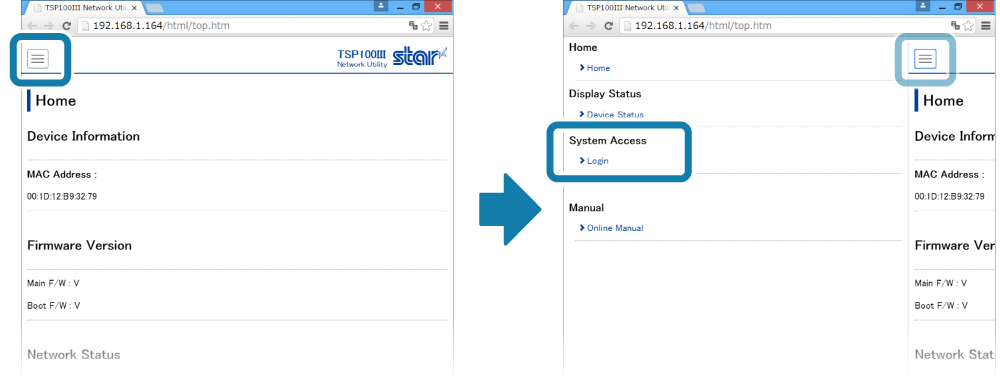
If [OK] is selected, a screen to change the password will open. After changing the password, return to the following step. - From the menu displayed on the left side of the setting screen or the menu button
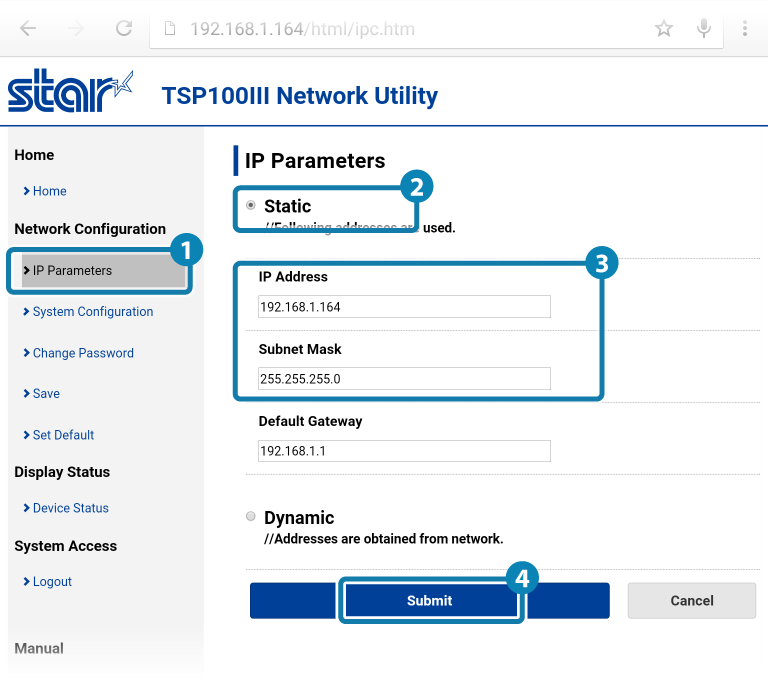
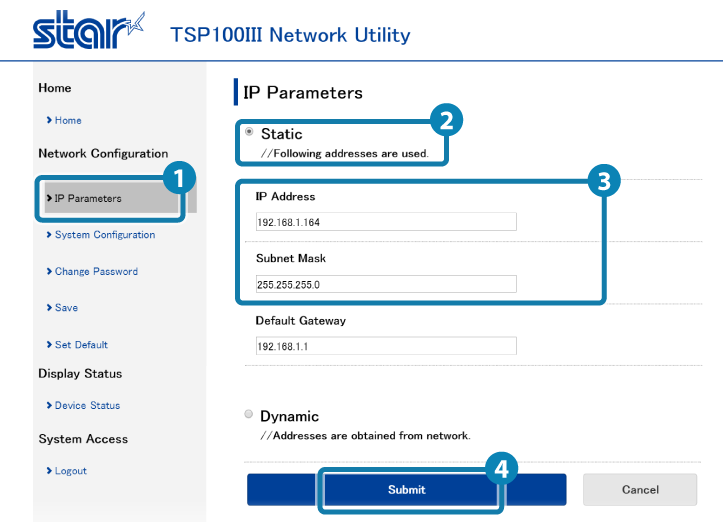
displayed on the upper left, open [IP Parameters]
 , select Static
  and enter the IP Address, Subnet Mask
 , and tap [Submit]
 .
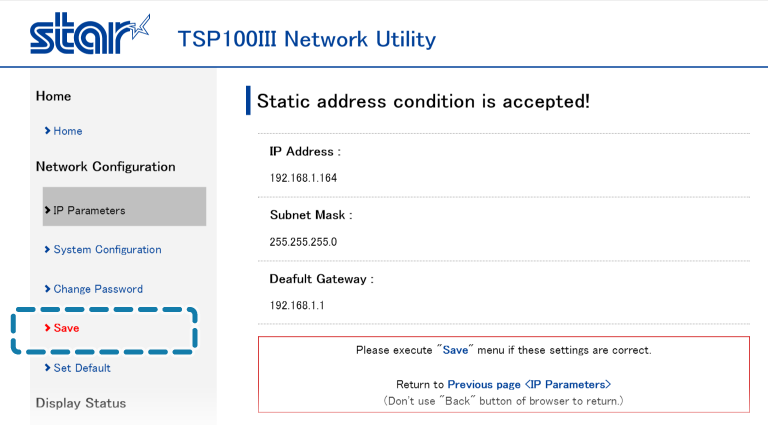
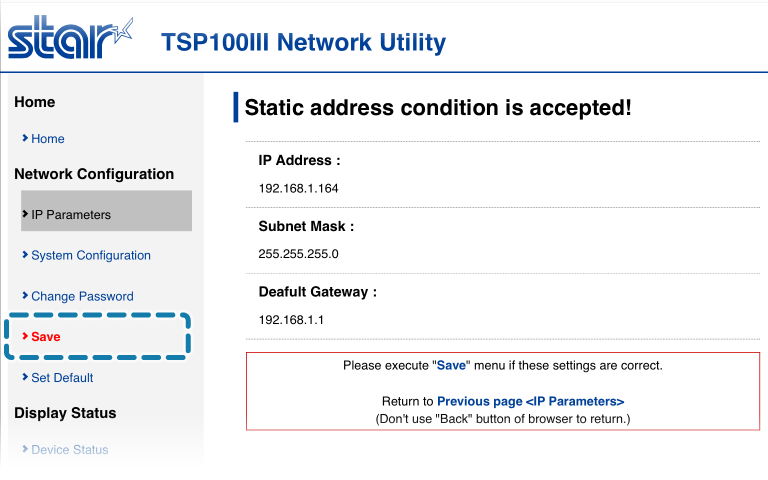
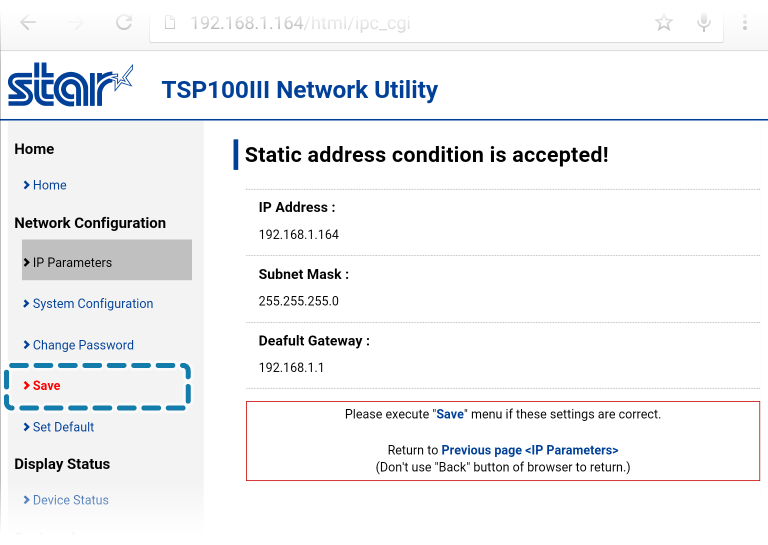
. - A screen where you can check and save the entered details will appear.
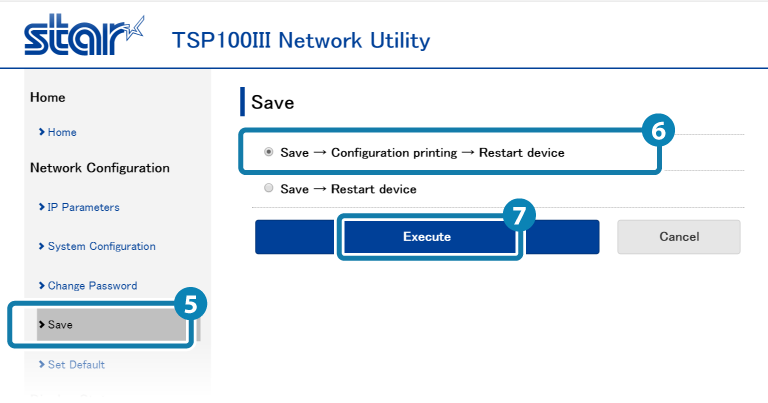
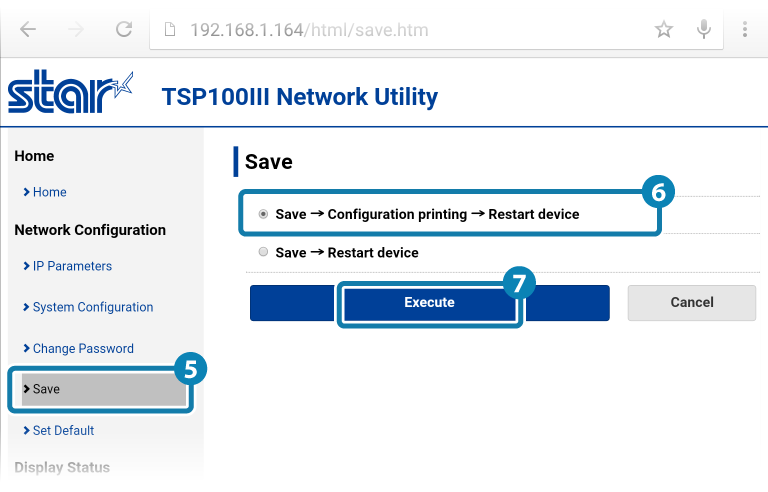
- From the menu or the menu button on the upper left, open [Save]
 , select SaveConfiguration PrintingRestart device
 , and tap [Execute]
 .
.
The settings are saved to the printer and printed out.

Note
Login name: root
Password: public
Note
For security purposes, it is recommended to change the password when using the printer.
Note
Ask your network administrator about the static IP address and subnet mask to use in the settings.

Android
In order to use and configure an Android device, TSP100IIILAN and the Android device must be connected to the same network (same segment).
The following steps must be performed after TSP100IIILAN is connected to a network and the power is turned on.
Connect LAN Cable
Turn ON Power
1. Prepare the Utility
- Use ”TSP100III Utility” to connect the printer and the tablet.
"TSP100III Utility" can be downloaded from the following link, Use App. - Open the setting screen of the tablet and select WiFi and turn it ON.
2. Select the printer from TSP100III Utility, and open the setting screen
- Check the printer’s power is on, and open TSP100III Utility.
- Tap [Unselected State] from "Selected Device".
- From the Select Device list , select the device you want to connect and then tap [Apply].
- Tap [Change Network Settings].
This connects to the selected printer and opens the Web Configuration.
Note
If there is a printer that has already been selected, tap the printer that is displayed in "Selected Device".
Note
Tap [Confirm] and the printer’s LED (blue) will flash, and you can check the selected printer.
4. Set fixed IP address to the printer from Web Configuration
- If you have changed the password, open [Login] from the menu displayed on the left side of the setting screen, or the menu button
displayed on the upper left, and login with:
Login name: root / password: [Changed password or the default password (public)].
- The default login name and password are as follows:
- The following message is displayed when you are using the default password.
Select [OK] to change the password or [Cancel] to not change the password.
If [OK] is selected, a screen to change the password will open. After changing the password, return to the following step. - From the menu displayed on the left side of the setting screen or the menu button displayed on the upper left, open [IP Parameters] , select Static and enter the IP Address, Subnet Mask, and tap [Submit].
- A screen where you can check and save the entered details will appear.
- From the menu or the menu button on the upper left, open [Save], select SaveConfiguration PrintingRestart device, and tap [Execute].
The settings are saved to the printer and printed out.
Note
Login name: root
Password: public
Note
For security purposes, it is recommended to change the password when using the printer.
Note
Ask your network administrator about the static IP address and subnet mask to use in the settings.
Windows
In order to configure settings, TSP100IIILAN and the Windows PC device must be connected to the same network (same segment).

The following steps must be performed after TSP100IIILAN is connected to a network and the power is turned on.
Connect LAN Cable
Turn ON Power
1. Prepare the Utility
- Use *Ethernet setting tool* for connection between the printer and the PC or tablet. It is installed at the same time as the Windows printer driver (futurePRNT) is installed, and "Ethernet setting tool" can also be downloaded and installed separately.
Download from the following link Use App - Windows.
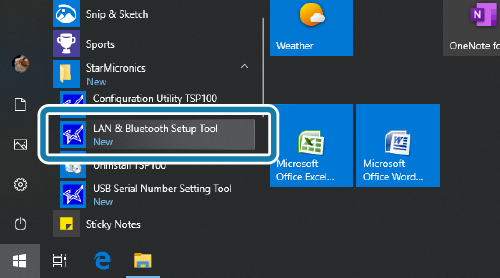
2. Select the printer from the LAN & Bluetooth Setting Tool and open the setting screen
- "LAN & Bluetooth setting tool" is opened.
- When the "User account control " is displayed, click or tap [Yes].
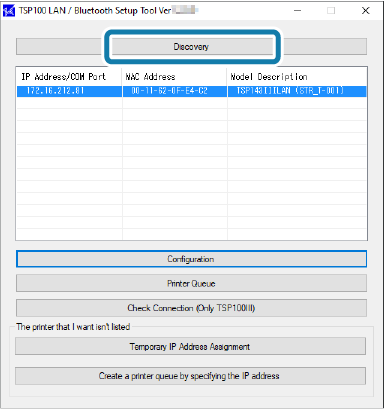
- When [Discovery] is clicked or tapped, the TSP100LAN/W/BI printers that can be connected is displayed on the list.
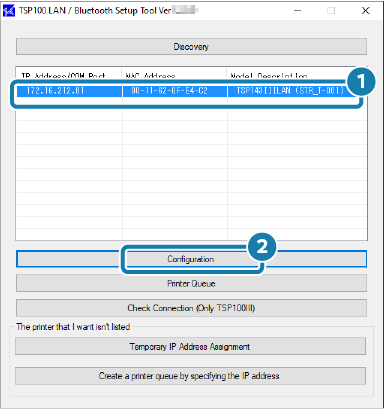
- From the destination device list, select the device to be connected to and click or tap on [Configuration].
This connects to the selected printer and opens the Web Configuration.
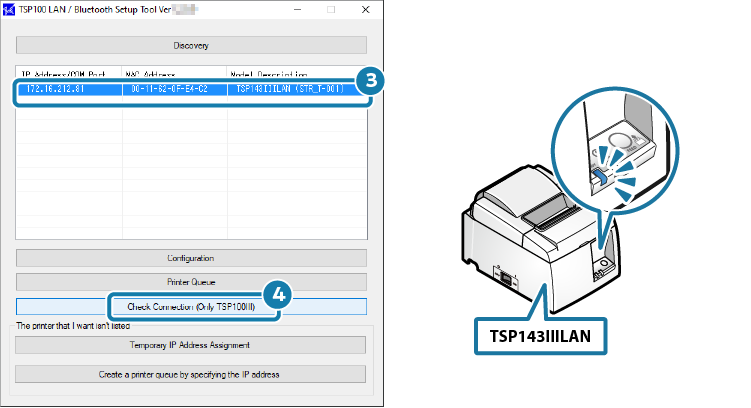
Note
Select the device, click or tap on [Check Connection], and the printer LED (blue) will blink and the selected printer can be confirmed.
3. Set fixed IP address to the printer from Web Configuration
- Open [Login] from the menu displayed on the left side of the setting screen, or the menu button
displayed on the upper left, and login with:
Login name: root / password: [Changed password or the default password (public)].
- The following message is displayed when you are using the default password.
Select [OK] to change the password or [Cancel] to not change the password.
If [OK] is selected, a screen to change the password will open. After changing the password, return to the following step. - From the menu displayed on the left side of the setting screen or the menu button displayed on the upper left, open [IP Parameters] , select Static and enter the IP Address, Subnet Mask, and tap [Submit].
- A screen where you can check and save the entered details will appear.
- From the menu or the menu button on the upper left, open [Save], select SaveConfiguration PrintingRestart device, and tap [Execute].
The settings are saved to the printer and printed out.
Note
The default login name and password are as follows:
Login name: root
Password: public

Note
For security purposes, it is recommended to change the password when using the printer.
Note
Ask your network administrator about the static IP address and subnet mask to use in the settings.