Connect USB Cable
Connects the USB cable.
The connection method depends on the operating system of the device (PC/smartphone/tablet) you are using.
Refer to the section that corresponds to your operating system.
Windows
iOS
Android
Windows
To print from a Windows PC or tablet, please connect by following the steps below.
Caution
Before connecting the USB cable, make sure the Windows driver has been installed.
If the USB cable is connected and the driver is not installed, the operating system may not properly recognize the printer.
1. Prepare a USB cable
- Use the USB cable (A-B) included with the printer.
 | Port on printer | USB-B |
 | Port on device | USB-A |
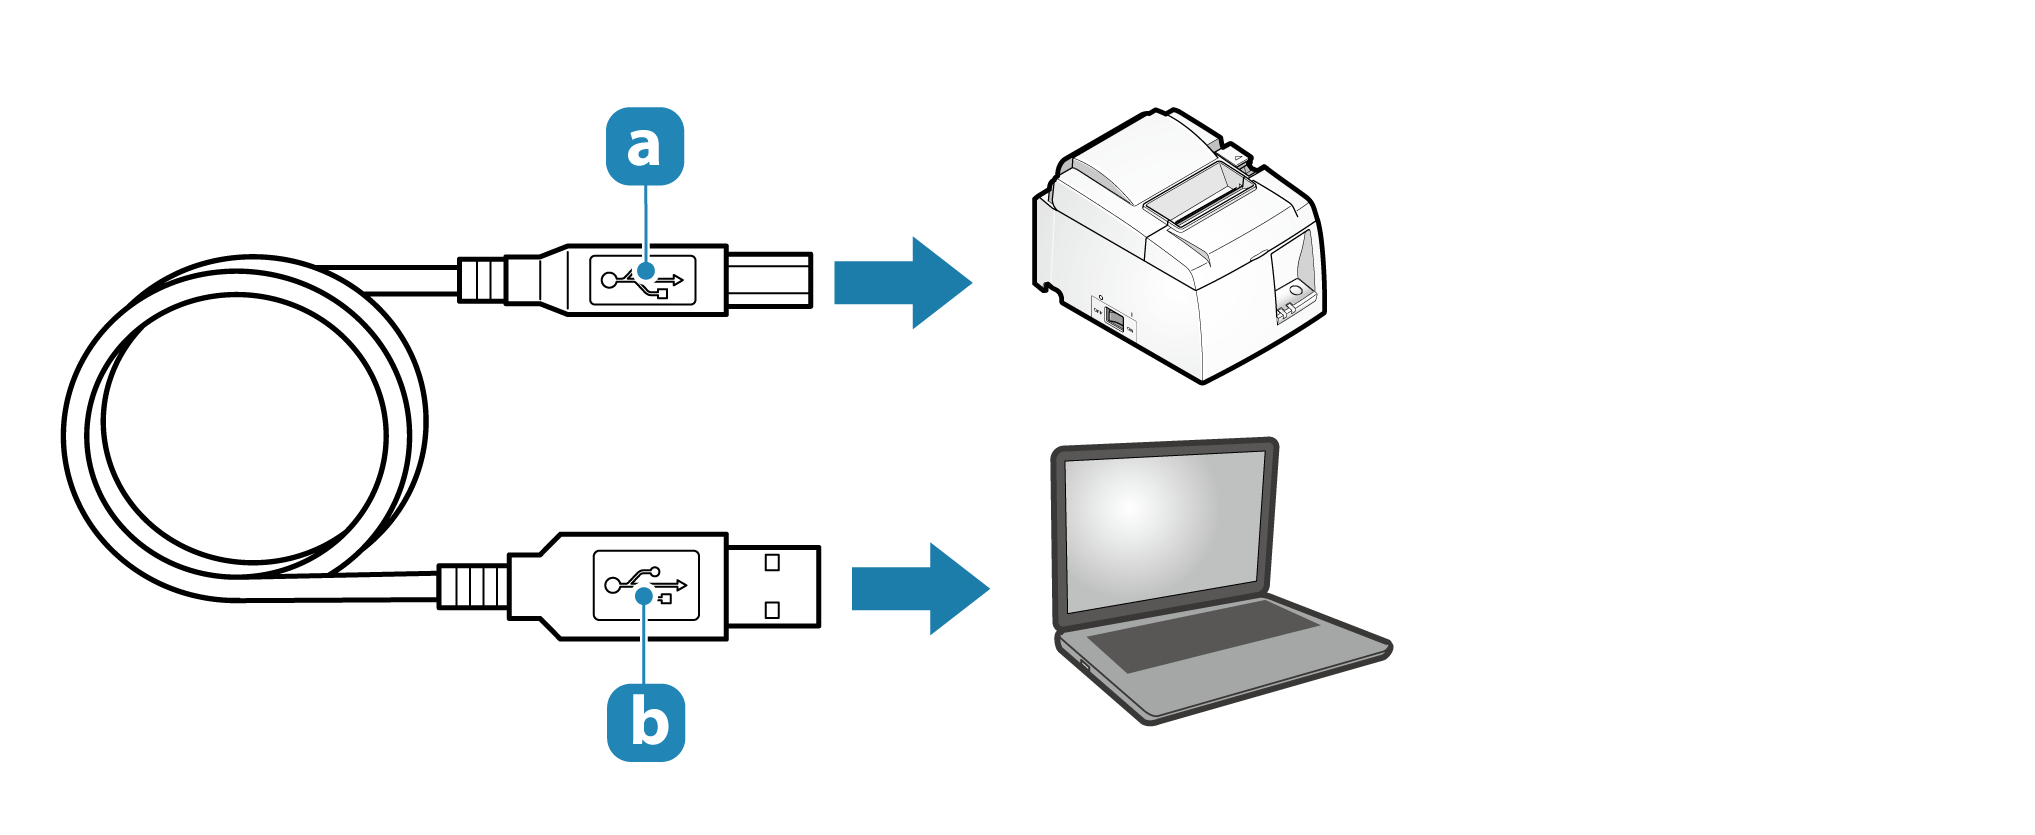
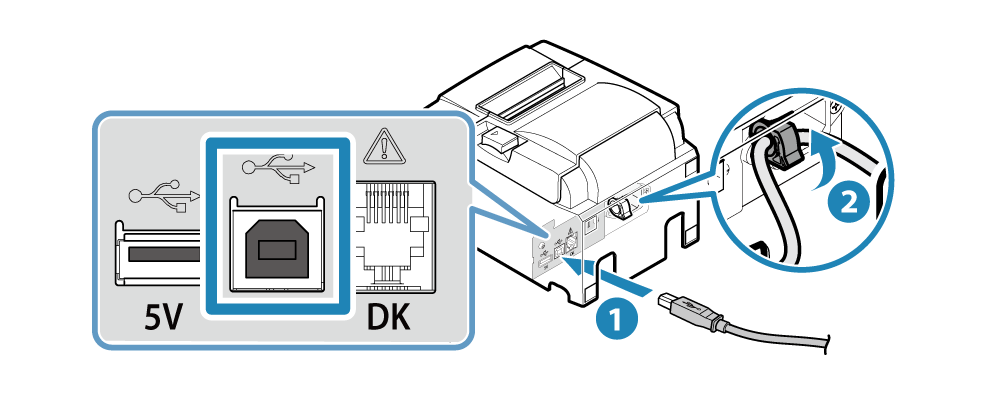
2. Connect the USB cable to the printer
- Connect the USB cable to the USB-B port of the printer
 and then secure it with the cable hook
  .
. - For instructions on removing the cable hook, refer to How to remove the USB cable hook.
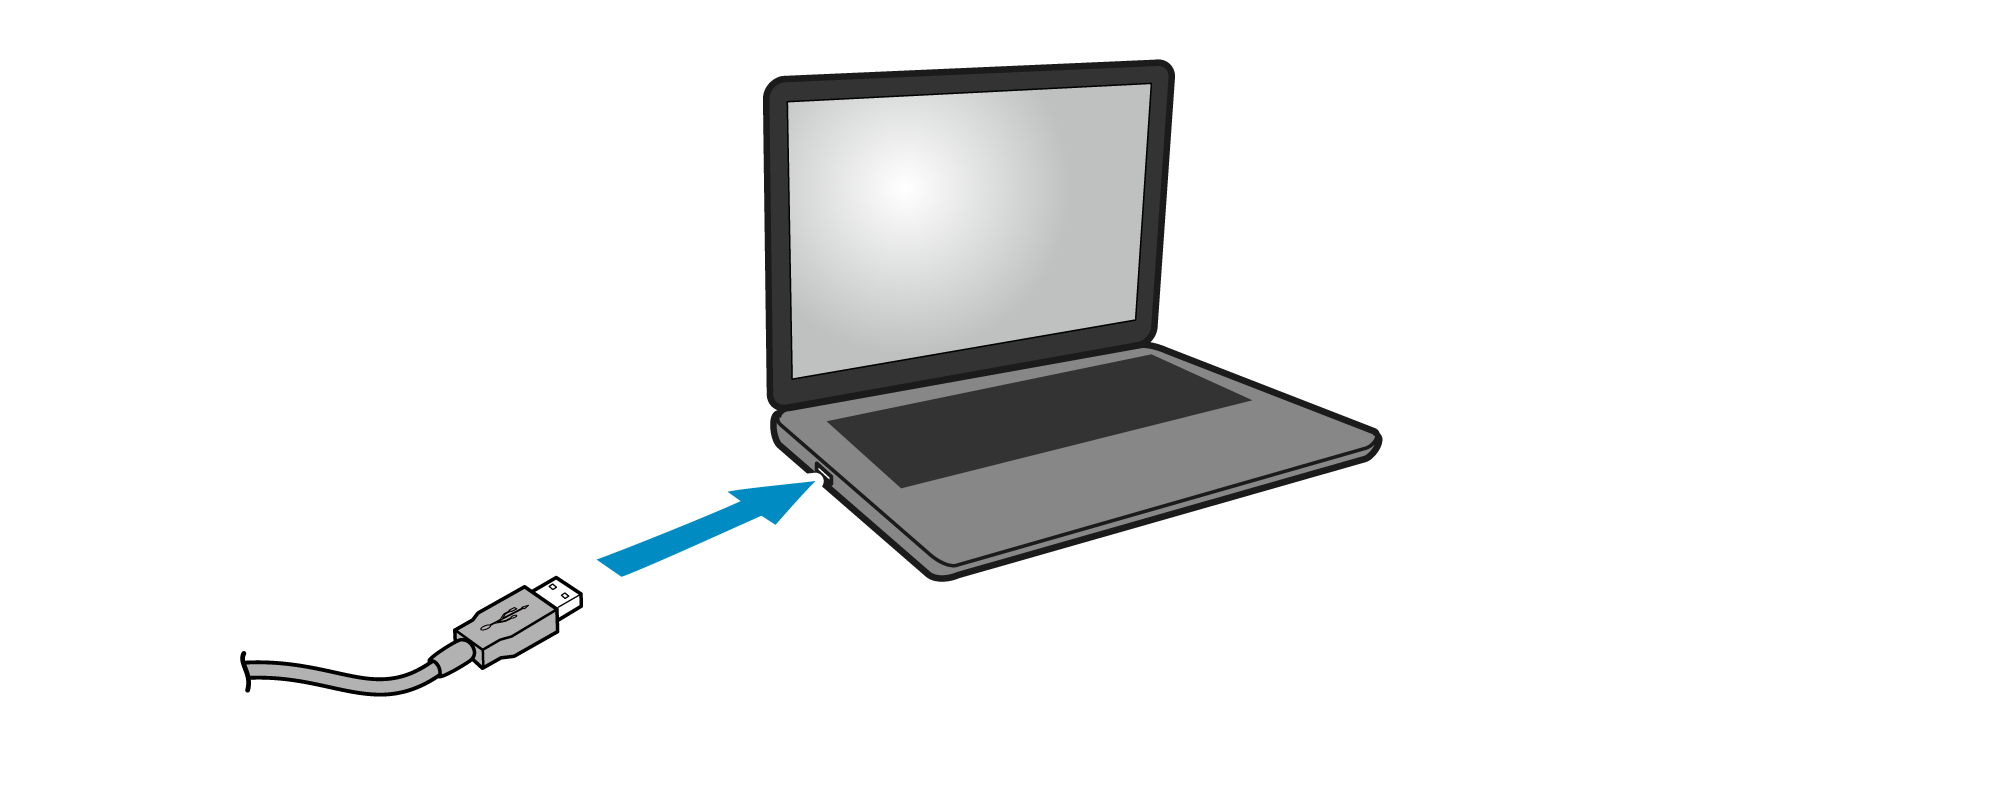
3. Connect the USB cable to the PC/tablet
- Connect the other end of the cable to the PC/tablet.
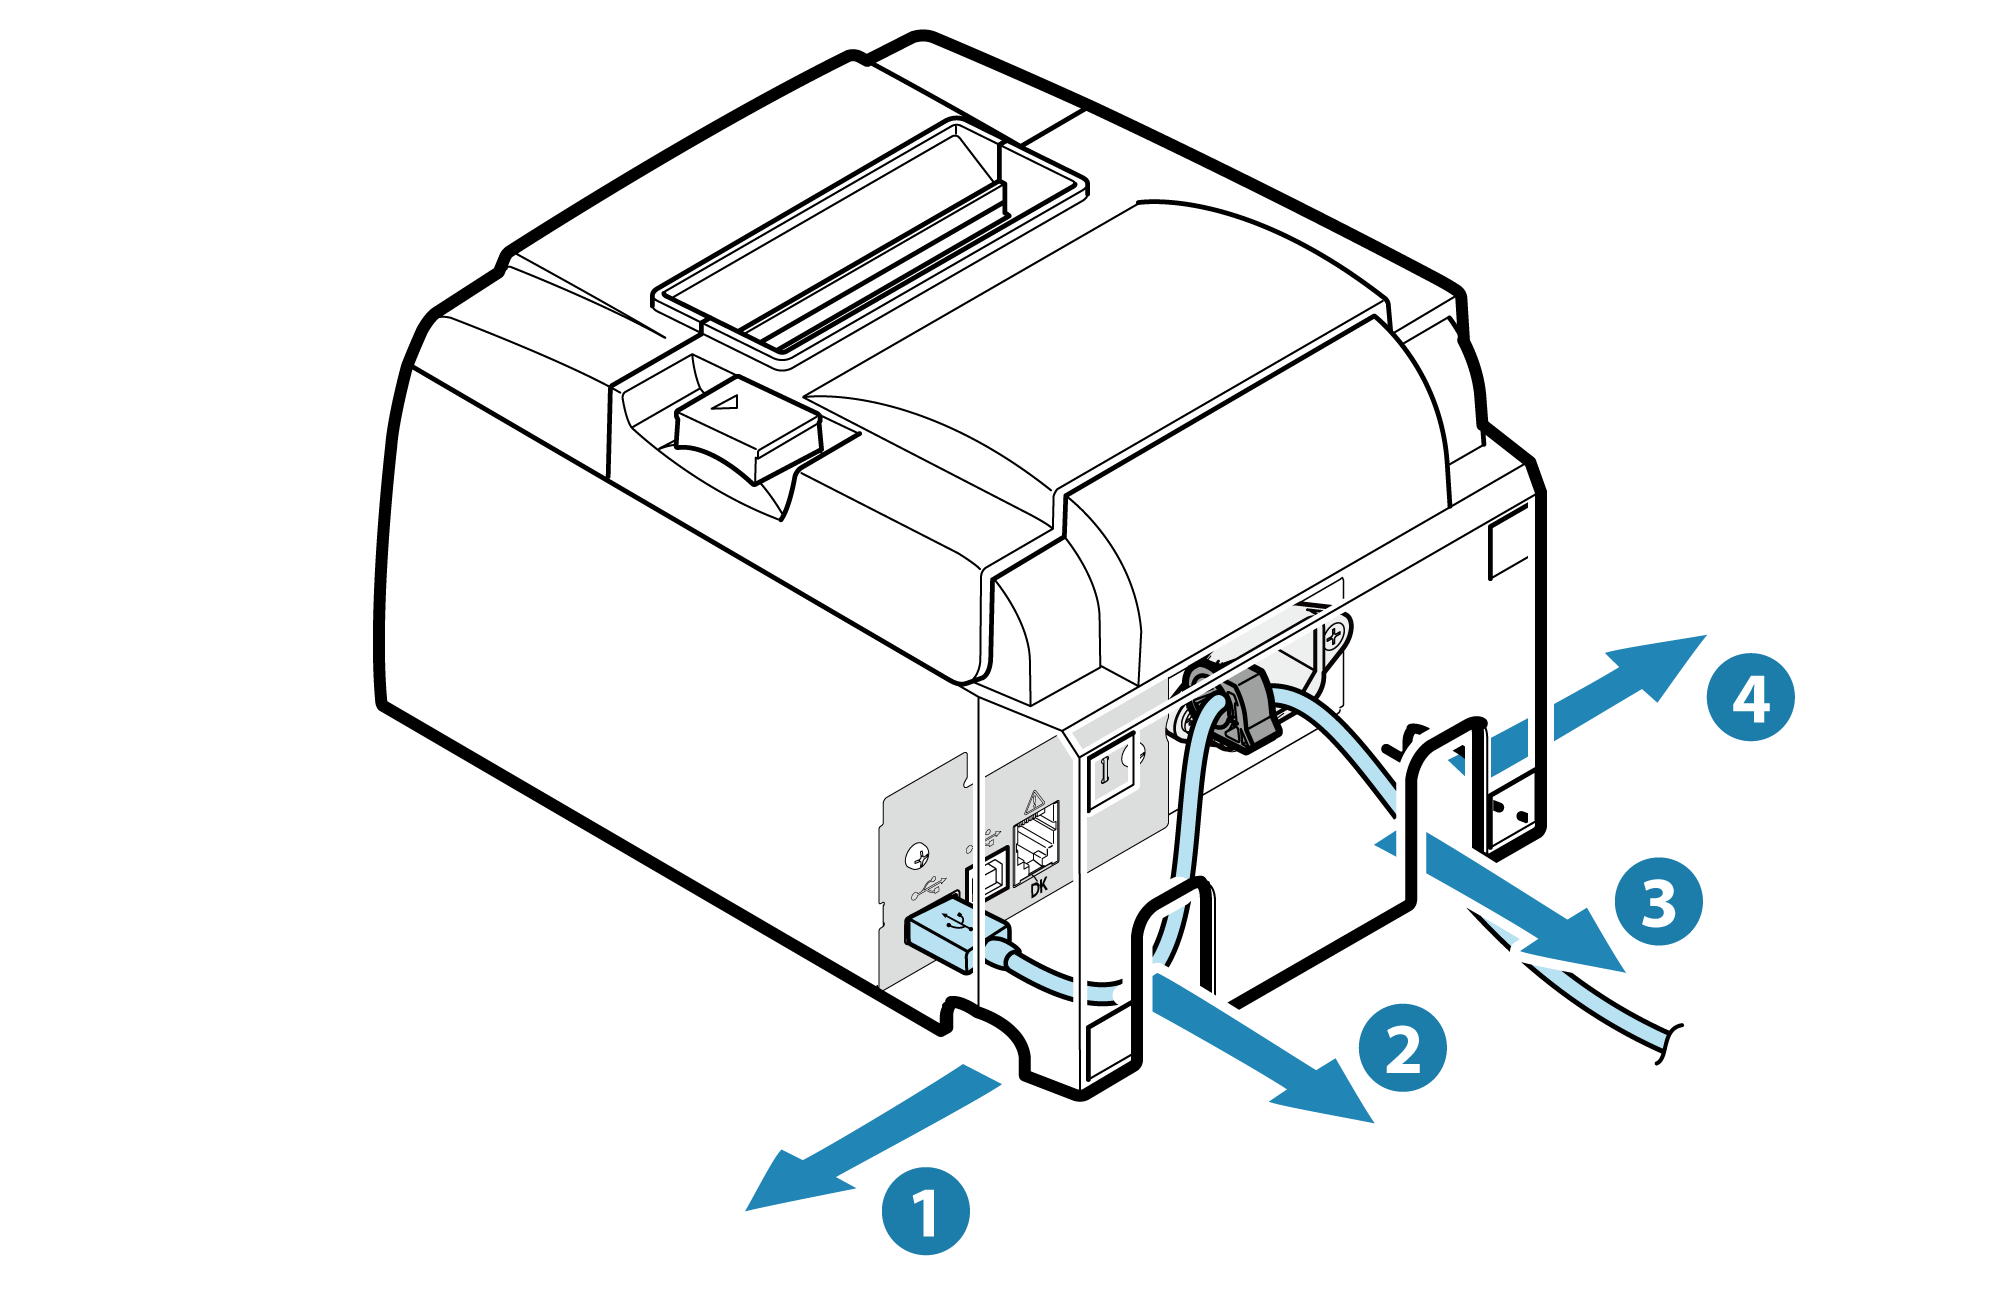
4. Wire the USB cable
- There are 4 cable outlets to the right/left/back, and it can be wired according to where the device is placed.

Note
iOS
To print from an iPad, iPhone or iPod touch, please connect by following the steps below.
iPad, iPhone or iPod touch devices that use a Lightning connector are supported.
Caution
In the case that a Lightning cable that is not MFi certified or an extension cable is used, data transfers and charging may not work properly.
1. Prepare a Lightning cable
- Use a Lightning cable that is commercially available or one that is included with your smartphone/tablet.
| Port on printer | USB-A |
| Port on device | Lightning |
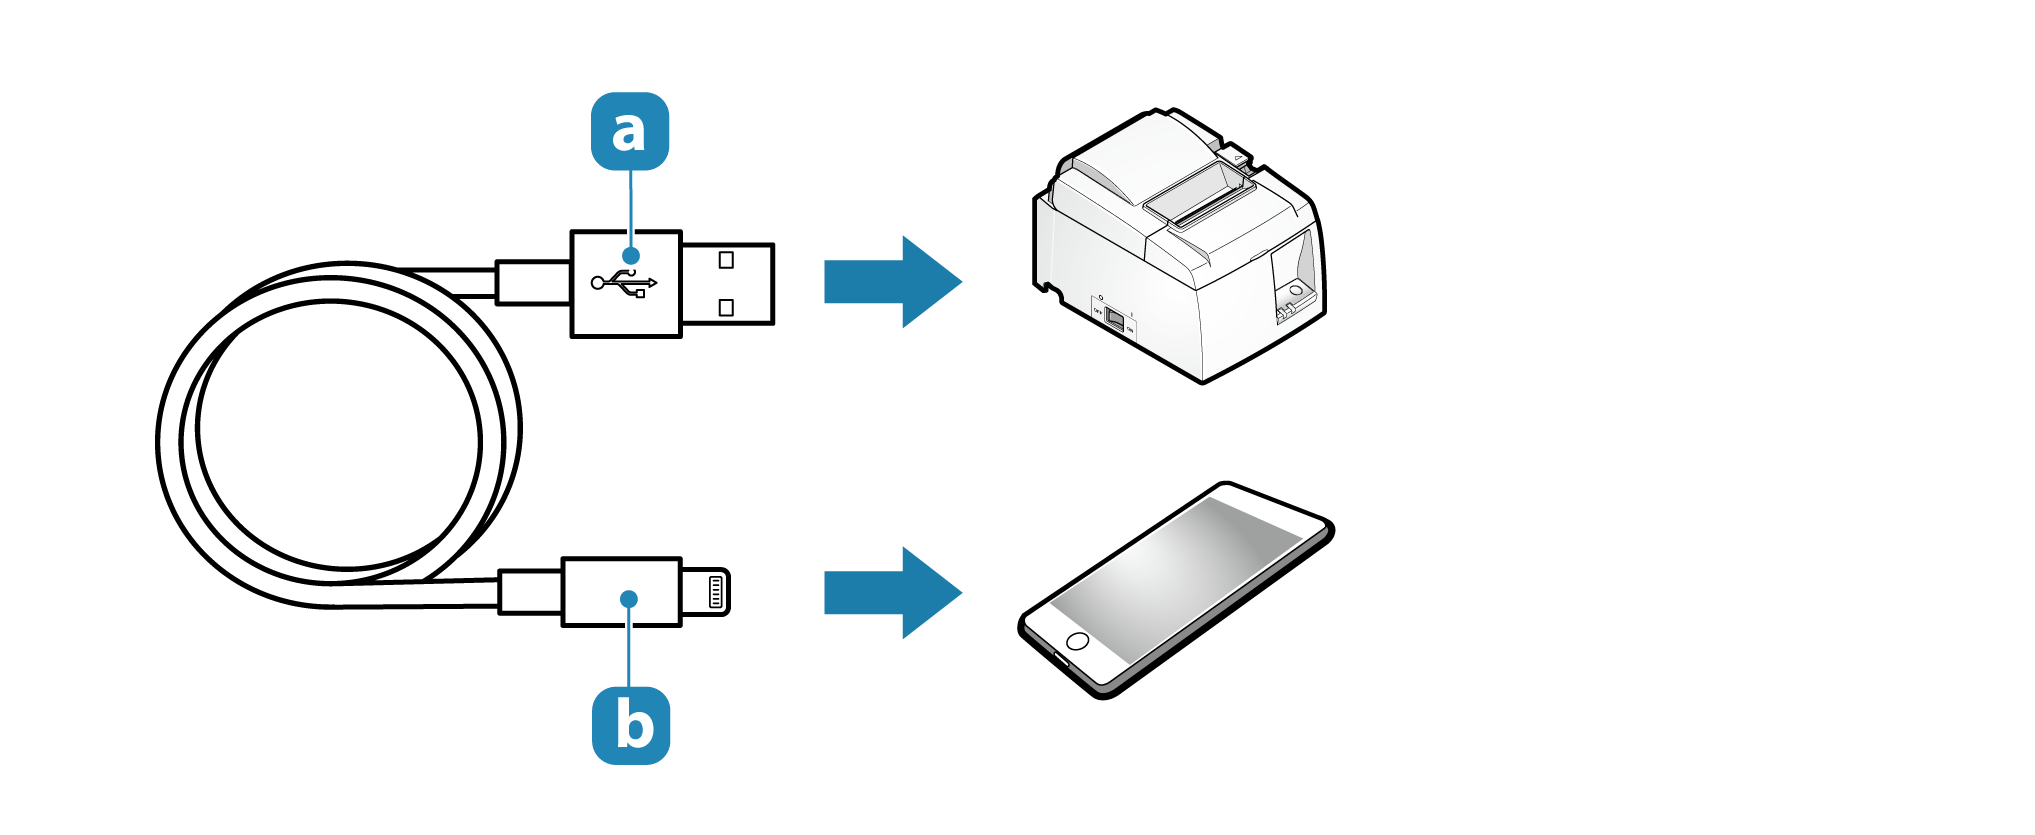
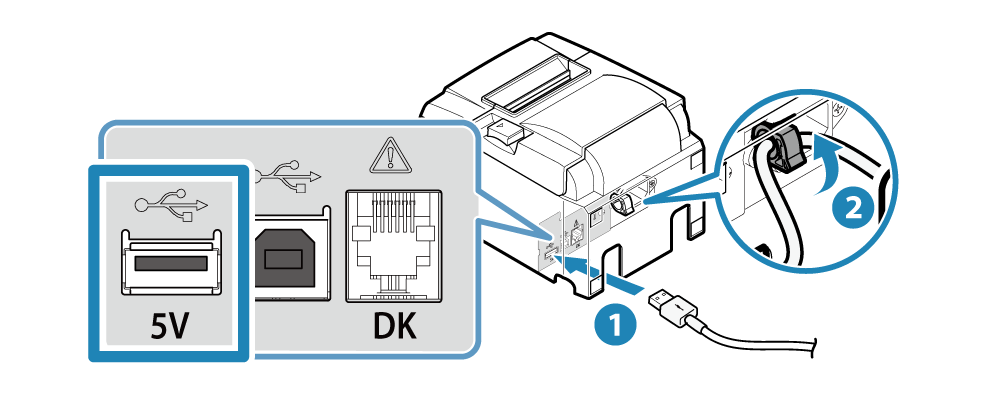
2. Connect the Lightning cable to the printer
- Connect the Lightning cable to the USB-A port of the printer and then secure it with the cable hook .
- For instructions on removing the cable hook, refer to How to remove the USB cable hook.
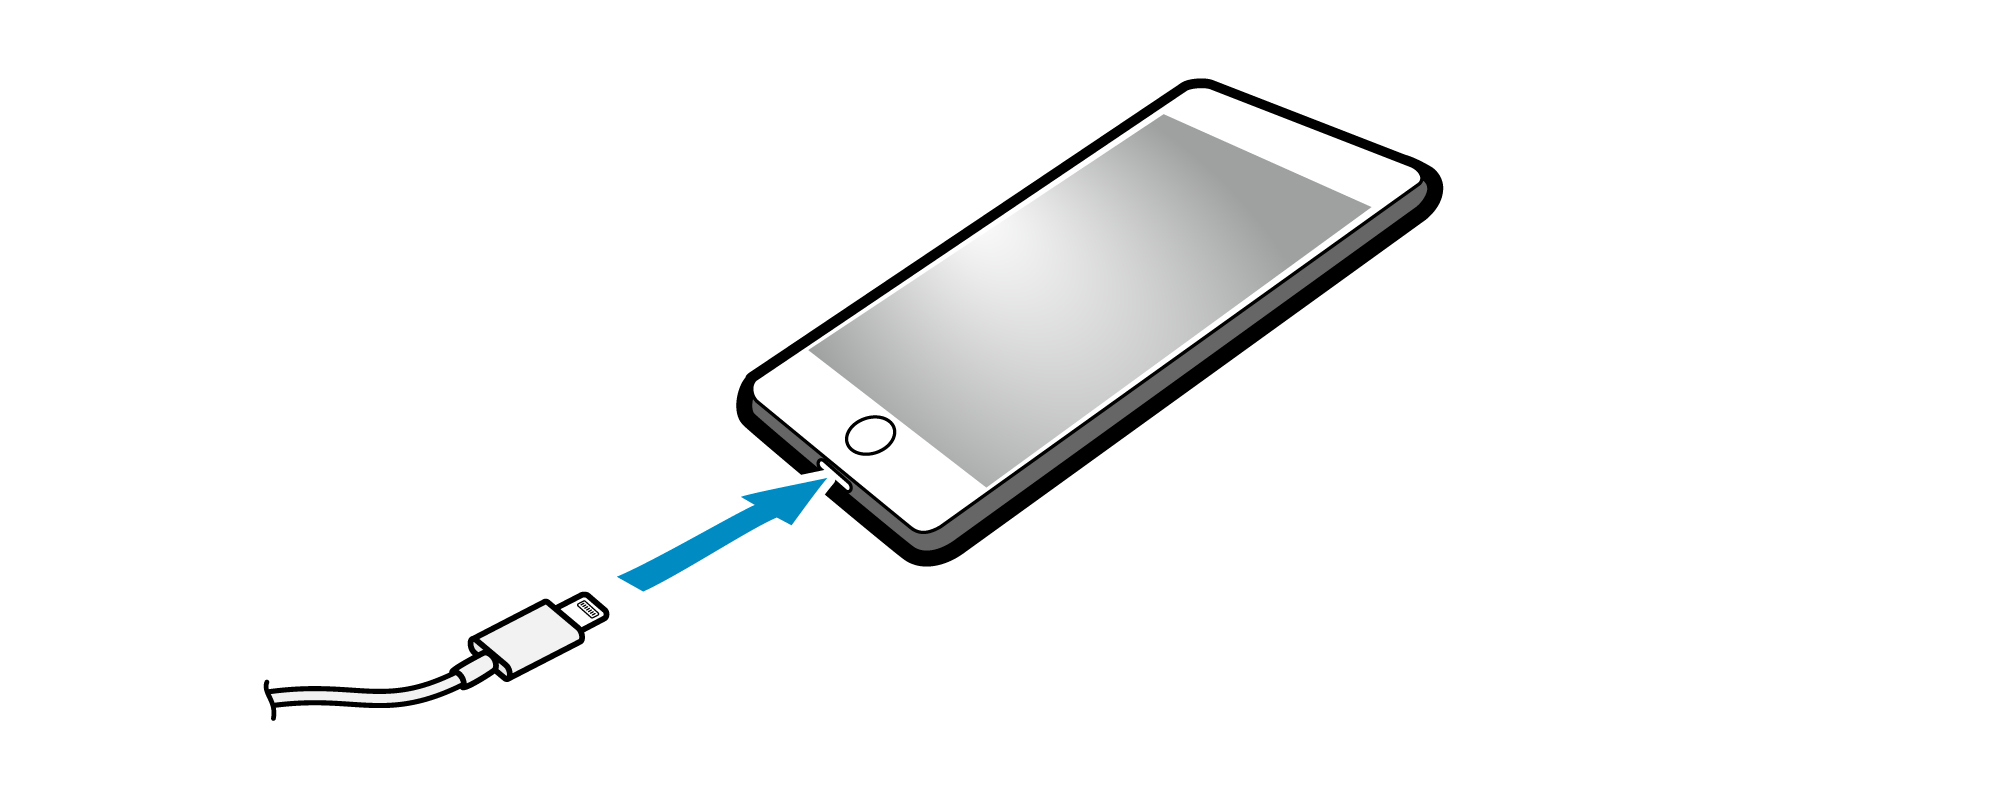
3. Connect the Lightning cable to the smartphone/tablet
- Connect the other end of the cable to the smartphone/tablet.
4. Wire the Lightning cable
- There are 4 cable outlets to the right/left/back, and it can be wired according to where the device is placed.
Note
Android
To print from a Android tablet or smartphone, please connect by following the steps below.
Caution
When performing USB communication with a device equipped with USB micro-B, it is necessary to use a USB adapter.
Some devices may not support the use of a USB adapter. Be sure to perform full operation checks in advance before using.
1. Prepare a USB cable and USB adapter (if necessary)
- Prepare a USB cable and USB adapter (if necessary) according to the connector of your smartphone/tablet.
| Port on printer | USB-B |
| Port on device | One that matches the device that is used |
 | USB adapter | Prepare if necessary |
Connection example
- Using a USB cable that is commercially available or one that is included with your smartphone/tablet
- Using the USB cable (A-B) included with the printer
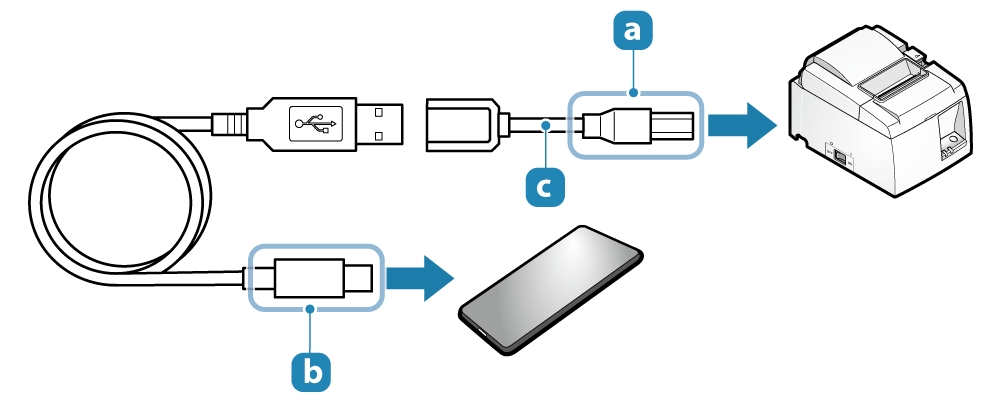
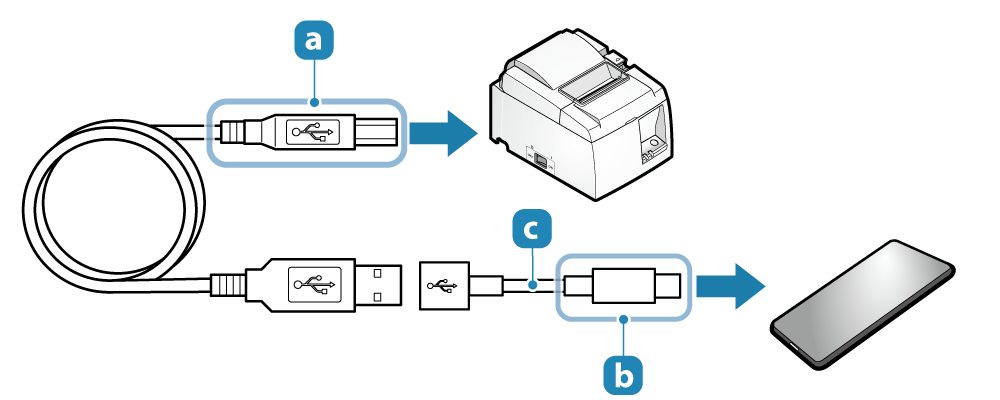
2. Connect the USB cable to the printer
- Connect the USB cable to the USB-B port of the printer and then secure it with the cable hook .
- For instructions on removing the cable hook, refer to How to remove the USB cable hook.
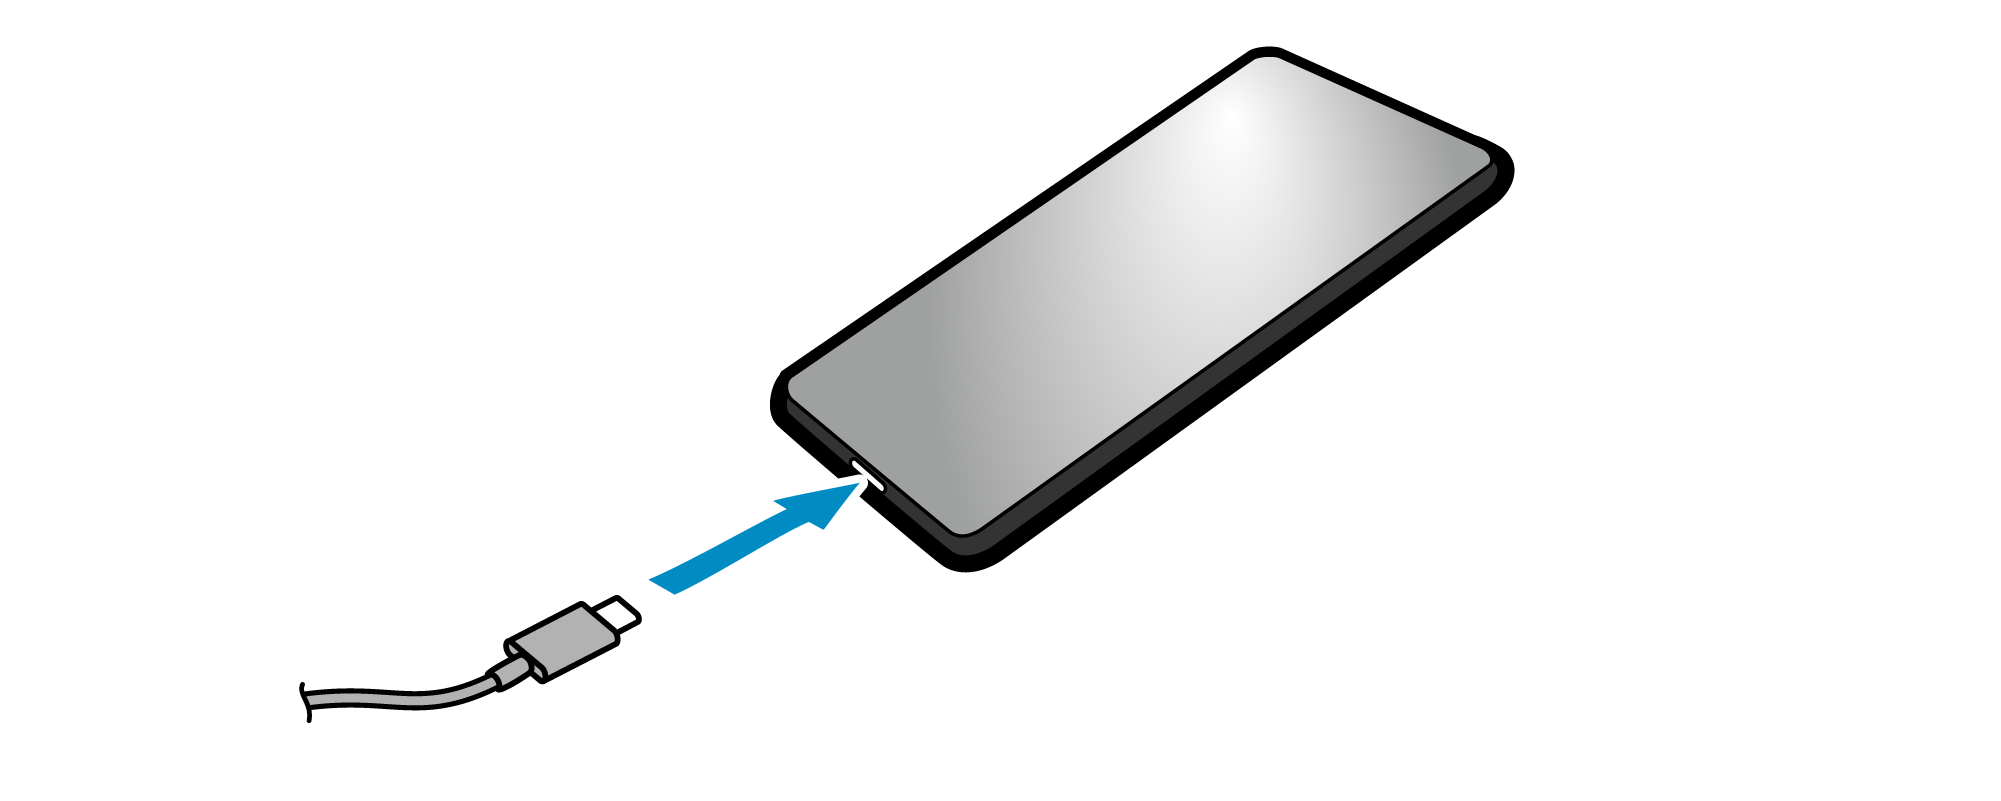
3. Connect the USB cable to the smartphone/tablet
- Connect the other end of the cable to the smartphone/tablet.
4. Wire the USB cable
- There are 4 cable outlets to the right/left/back, and it can be wired according to where the device is placed.
Note
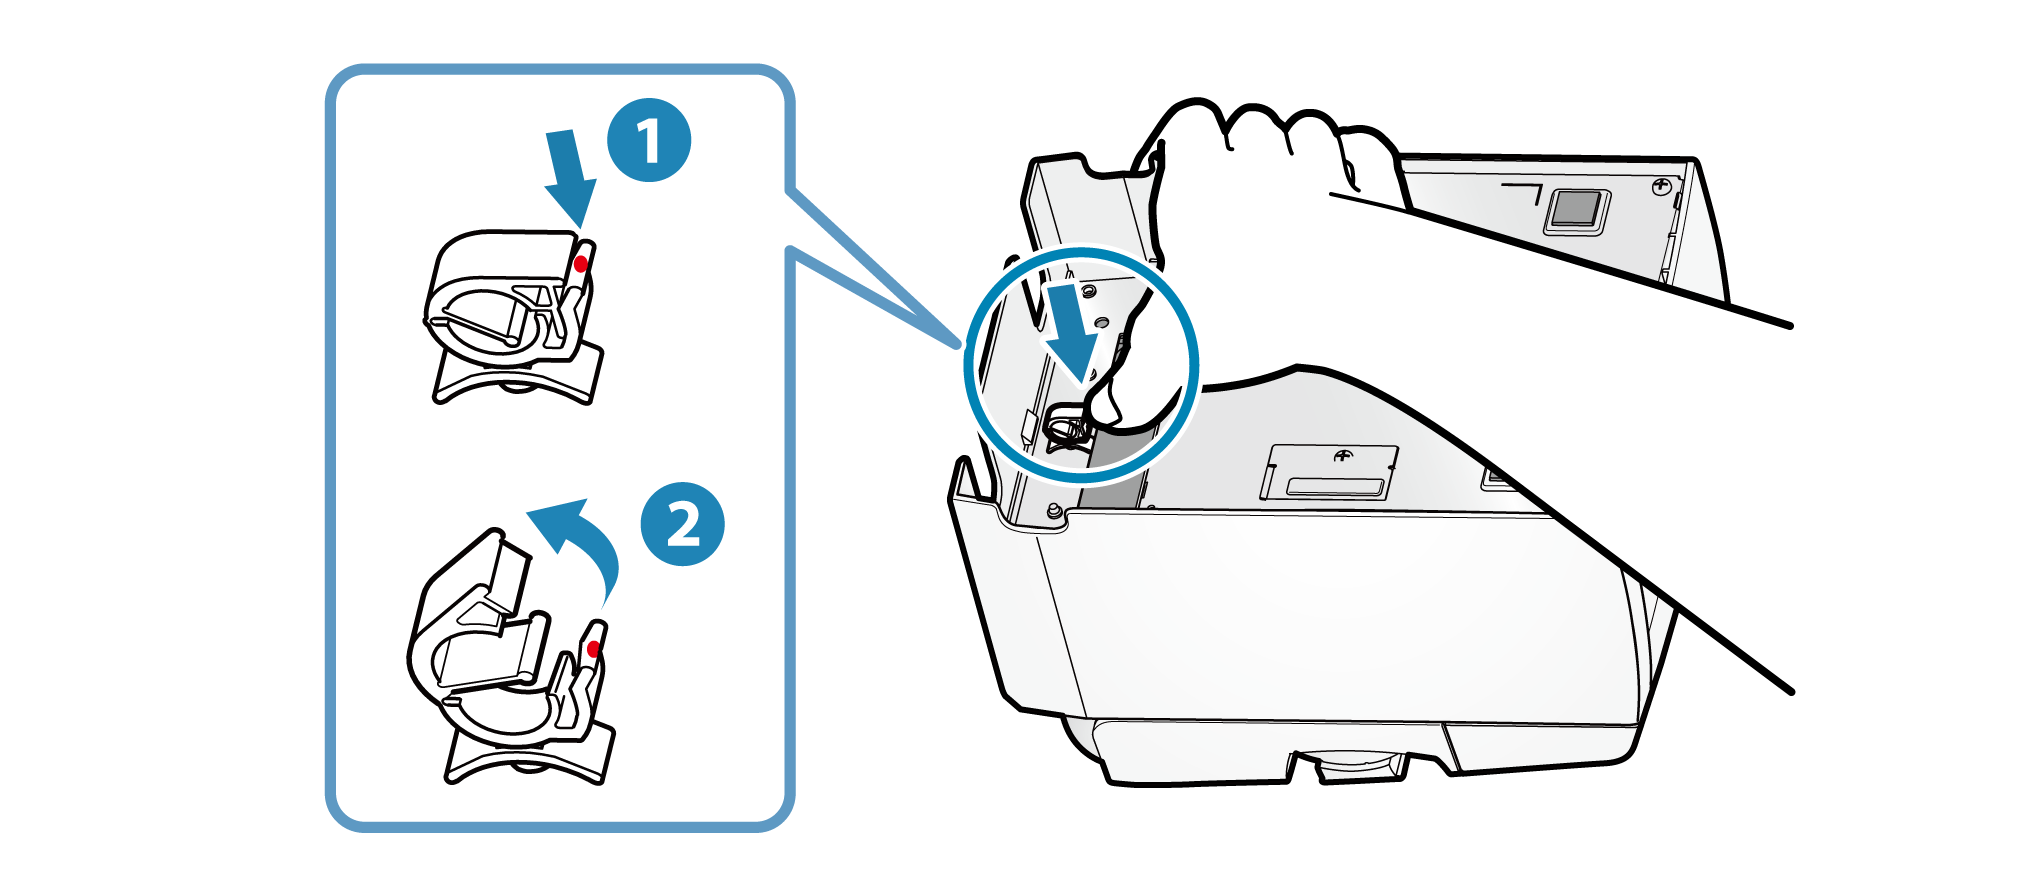
How to remove the USB cable hook
The USB cable hook can be removed by pressing the part indicated in red below.
 Return to link source