Star webPRNT User's Manual
How to use Star Micronics Cloud (Android) -Star webPRNT Browser -
Star Micronics Cloud enables you to upload data to be printed by the Star webPRNT Browser (iOS/Android) to the Star Micronics Cloud and you can refer to uploaded receipt data by using the AllReceipts app.
- To use Star Micronics Cloud, you are required to register your Star Micronics Cloud account in advance. You can complete your registration from the following web site.
Star Micronics Cloud (www.starmicronicscloud.com)
- Check if the device you are using is connected to the internet.
A network connection is required to use Star Micronics Cloud. Depending on the connection state, a printed receipt sometimes cannot be uploaded on the Star Micronics Cloud even though it is provided with a QR code. - Follow the steps of “How to use -Star webPRNT Browser- “on the following web site and try printing.
How to use -Star webPRNT Browser -
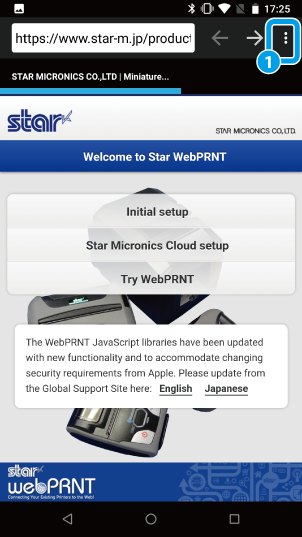
- Tap the menu icon
 and select ”Settings"
 from the menu.
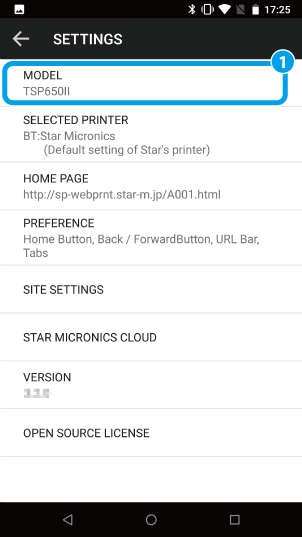
 - Check the printer model.
When using SM-S or SM-T series, please select StarPRNT emulation. ESC/POS emulation does not support Star Micronics Cloud. - Configure receipt upload settings for Star Micronics Cloud.
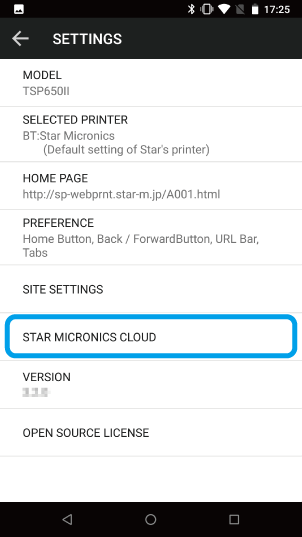
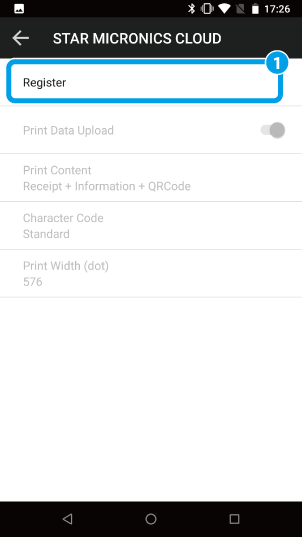
Select "STAR MICRONICS CLOUD" from the Settings menu. - Log in to Star Micronics Cloud and register a device.
Tap the Register to display a registration dialog.
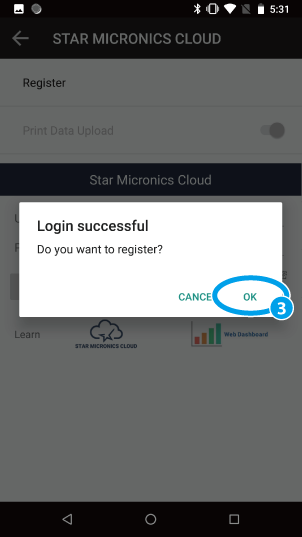
Enter your username and password and tap “Register”.
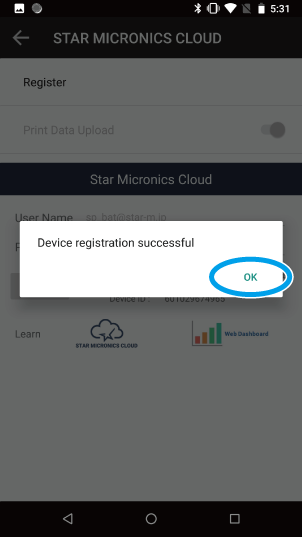
After logging in successfully, register a device.  After the device registration is complete, you can configure the receipt upload settings.

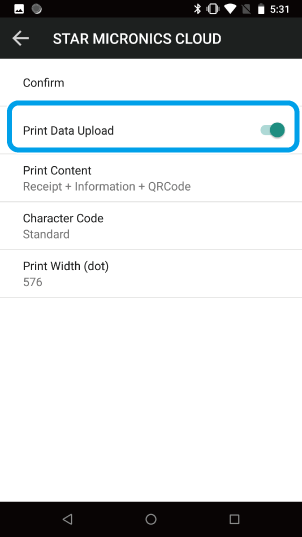
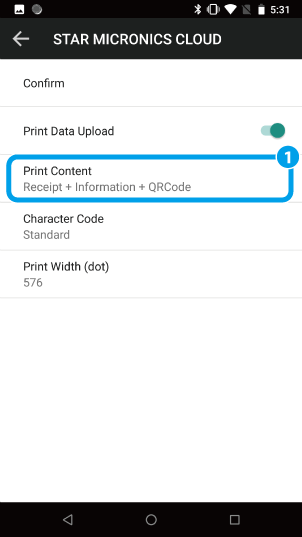
- Set whether receipt data should be uploaded or not.
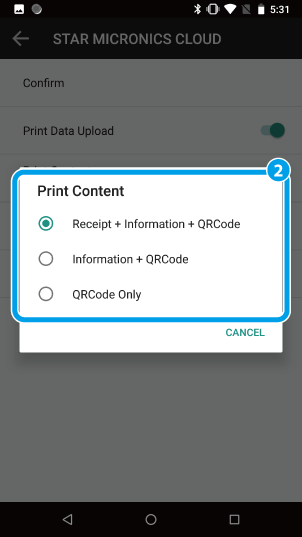
When “Print Data Upload” is set to ON, a QR code will be applied on a printed receipt and print data will be uploaded to the Star Micronics Cloud. - Set a print content to be printed by the Star webPRNT Browser.
- Receipt + Information + QRCode
- prints receipt data, information logo and a QR code.
- Information + QRCode
- prints information logo and a QR code.
- QRCode Only
- prints a QR code only.
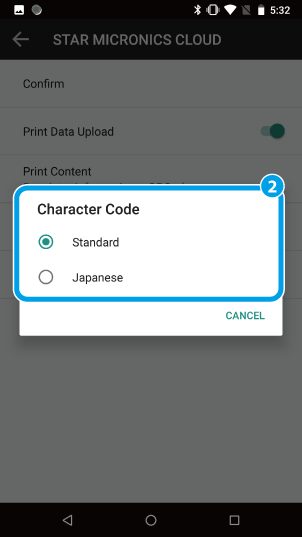
- Set a character code of receipt data to be uploaded.
- Standard
- for upload in English, French, Portuguese, Spanish or German.
- Japanese
- for upload in Japanese.
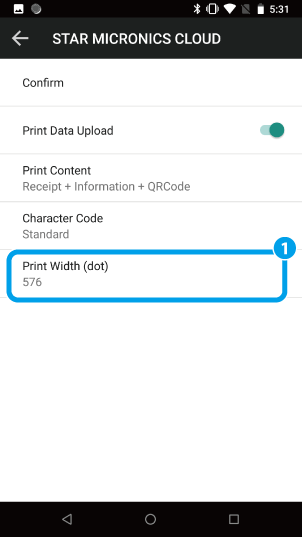
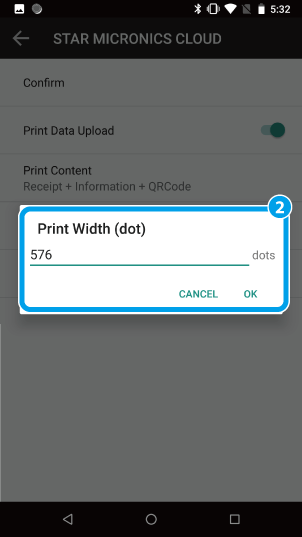
- Set the print width of the printer, if necessary.
It is not necessary to change the print width normally, which is automatically set to the default value when you select a printer model. If you have changed the print width of the printer, enter the print width value (dot).
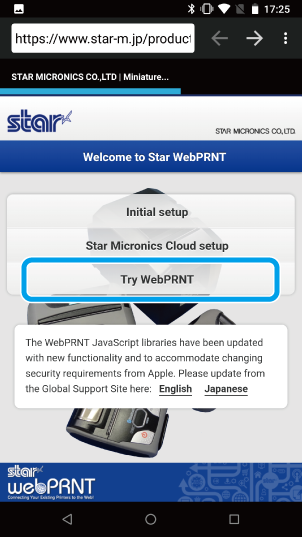
Different print width settings may cause a failure of uploaded receipt data. - Return to the top page and print a sample receipt from “Try Star webPRNT”.
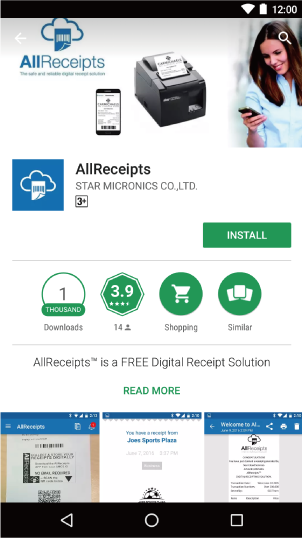
- Install the “AllReceipts” from PlayStore.
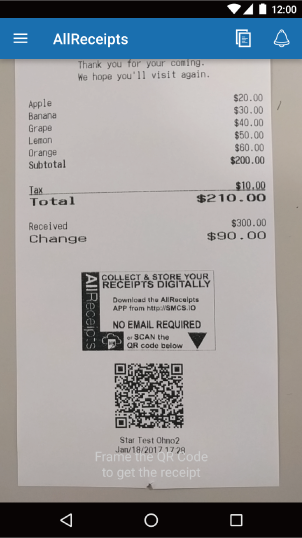
- Scan a QR code on the receipt by the AllReceipts app and refer to the uploaded receipt data.