TSP100IV SK is equipped with the hold print sensor.
The hold print sensor detects whether the printed label is removed from the paper exit of the printer.
When the hold print sensor is enabled, printing of the next label will not start until the printed label is removed.
The next label printing is possible after the printed label is removed.
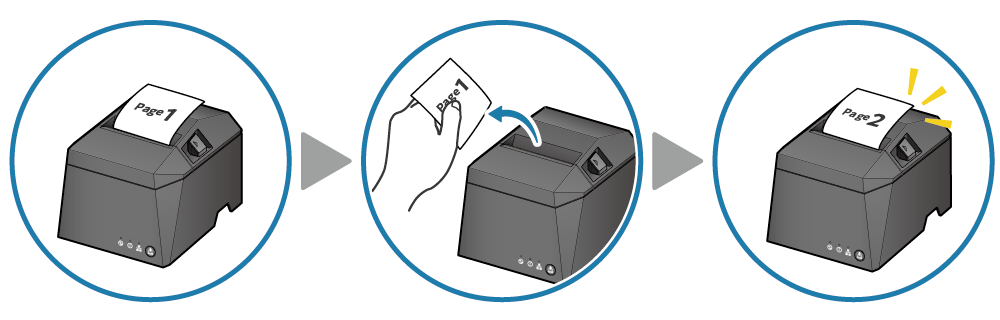
This function prevents troubles, such as consecutively printed labels being stuck to each other.
The default setting for the hold print sensor function is “Enabled”.
It is recommended to use the device with the function “Enabled” to prevent troubles such as paper jamming.
If you want to continuously print without holding papers, set the hold print sensor to “Disabled” by referring to the procedure described below.
Caution
If you print consecutively with the hold print sensor function set to “Disabled”, a trouble may occur, such as the ejected labels becoming stuck to each other or a label sticking to the printer or mounting surface.
Be sure to fully verify operation before beginning actual use.
You can change the setting of the hold print sensor function by using the app or by operating the printer.
Make settings by the method that is effective and suits your operation environment.
Setting by Using App
Setting by Printer Operation
Setting by Using App
To change the settings, use Star Quick Setup Utility.
Install Star Quick Setup Utility.
Use App
1. Connect to the target printer
- Start Star Quick Setup Utility and connect to the printer you want to setup.
2. Set up the hold print sensor function
- Open [Change Printer Settings] - [Memory Switch Settings].
- Toggle the settings of “Hold Print Control” and “Hold Print Status” to “Disabled” or “Enabled”.
- Tap [Apply].
Note
When setting the hold print sensor function, change both the setting values of “Hold Print Control” and “Hold Print Status” together.
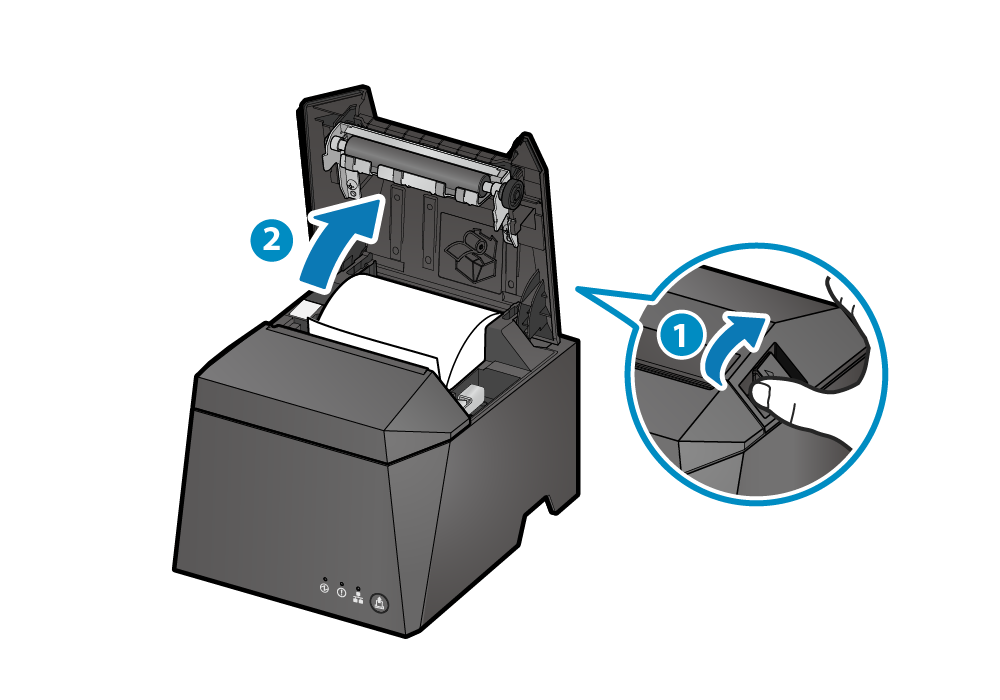
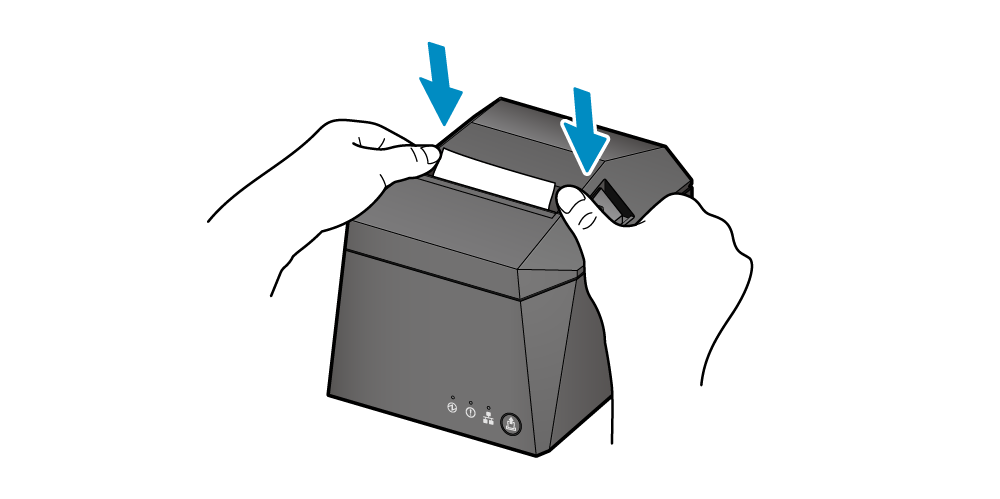
 to open the printer cover
  .
.
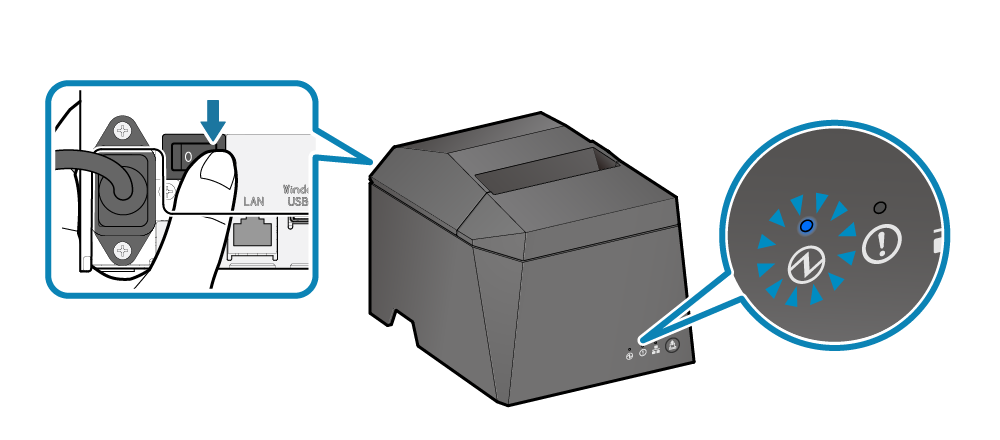
 until the Power LED (blue) begins flashing
  , then release it.
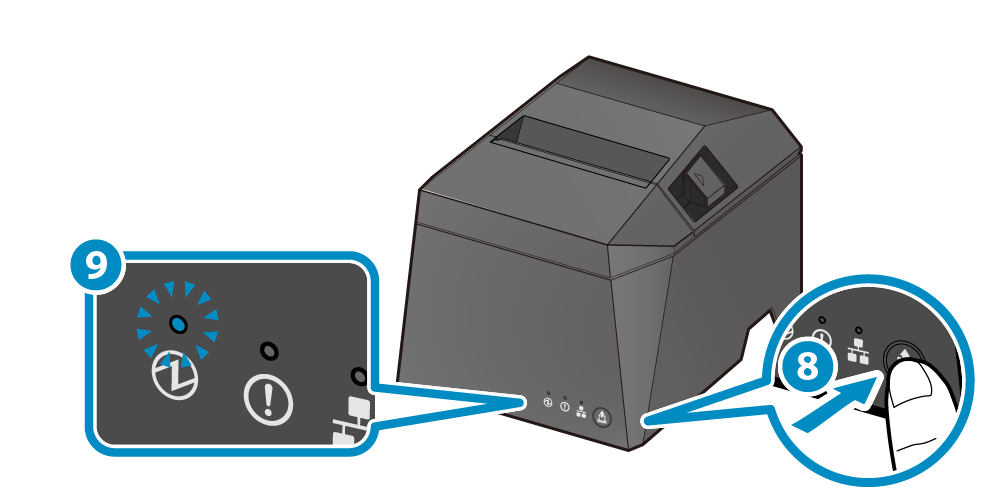
 until only the Error LED*1 (red) is shown flashing.
 .
.
 is pressed, the LED display content changes.
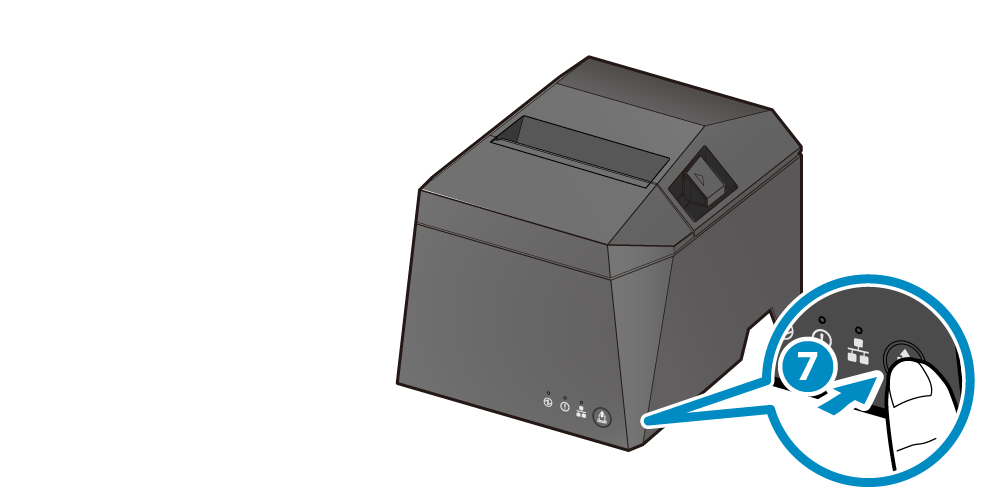


 , and then release the button once the Power LED (blue) changes to continuous lighting
  .
.