Use Accessories/Mount on Wall
The following accessories are included with this product for use when required.
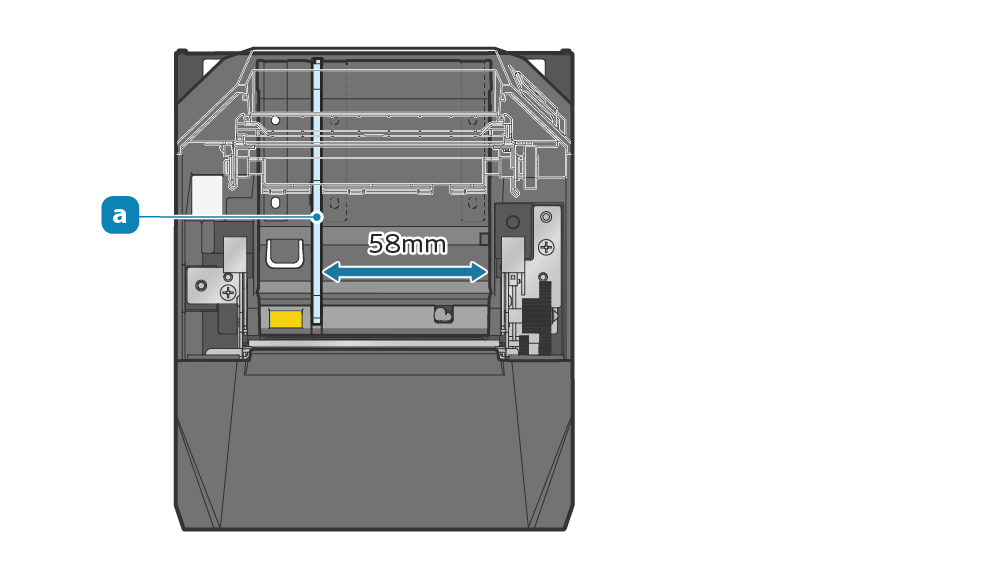
It is necessary to use a 58mm wide paper roll.
Paper roll guide
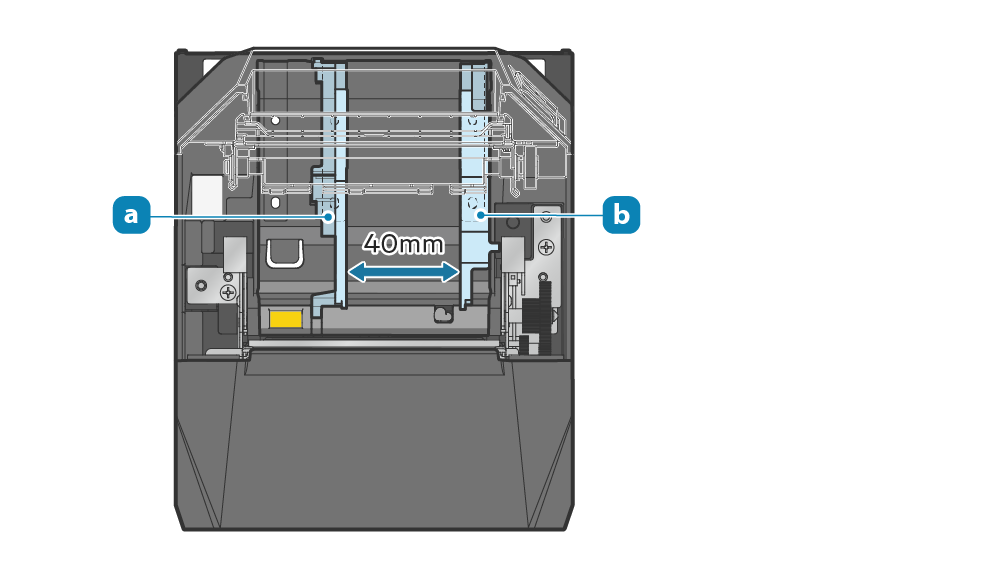
These are necessary to use a 40mm wide label paper roll.
Paper roll guide A and B
These are required if you want to use the printer standing vertically.
Rubber feet
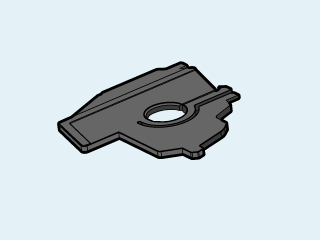
Paper roll guide
Before using a 58mm paper roll, always mount the paper roll guide  .
.
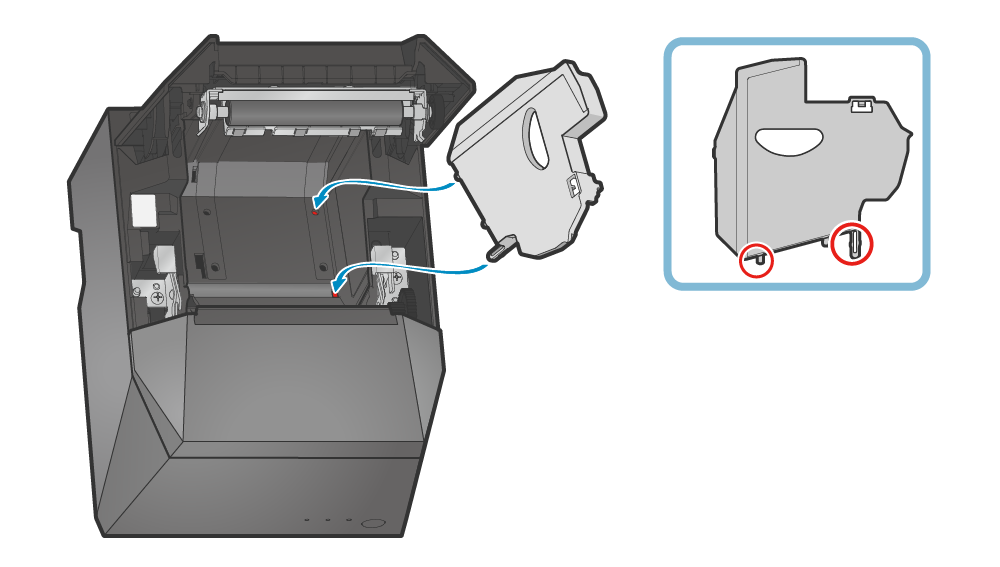
1. Mount the paper roll guide
- Refer to the figure and align the parts of the paper roll guide indicated by the red circles with the holes and grooves marked in red on the main unit.
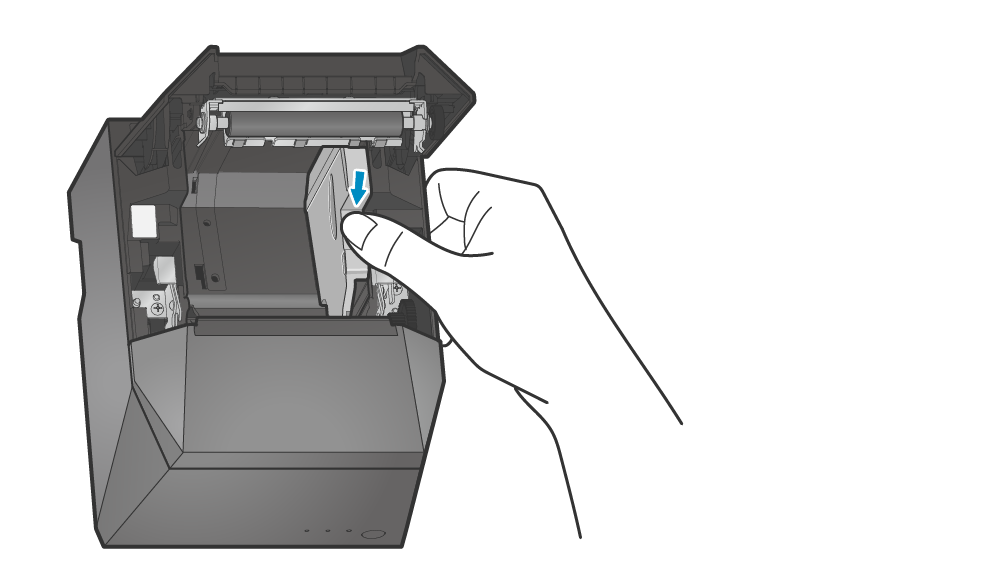
- Mount by pressing in the paper roll guide until a clicking sound is heard.
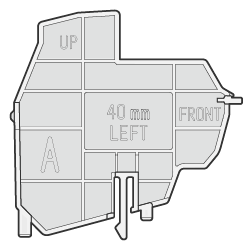
- To change the paper width, it is necessary to change the memory switch setting. Use the specified application and change the setting for the “printing width”.
Use App - Do not change the paper width after starting to use the product.
The friction of the head, rubber rollers, and cutters varies depending on the paper width, which may cause problems related to printing or cutting operations.
Caution
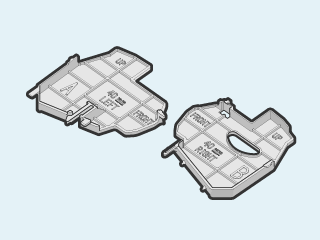
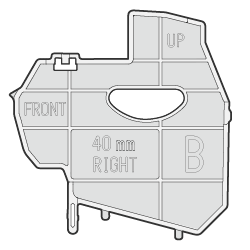
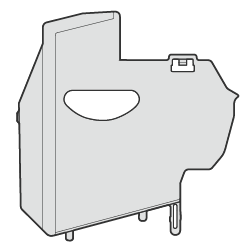
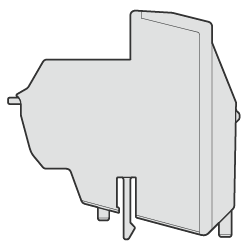
Paper roll guide A and B
Before using a 40mm label paper roll, always mount the paper roll guide A and paper roll guide B  .
.
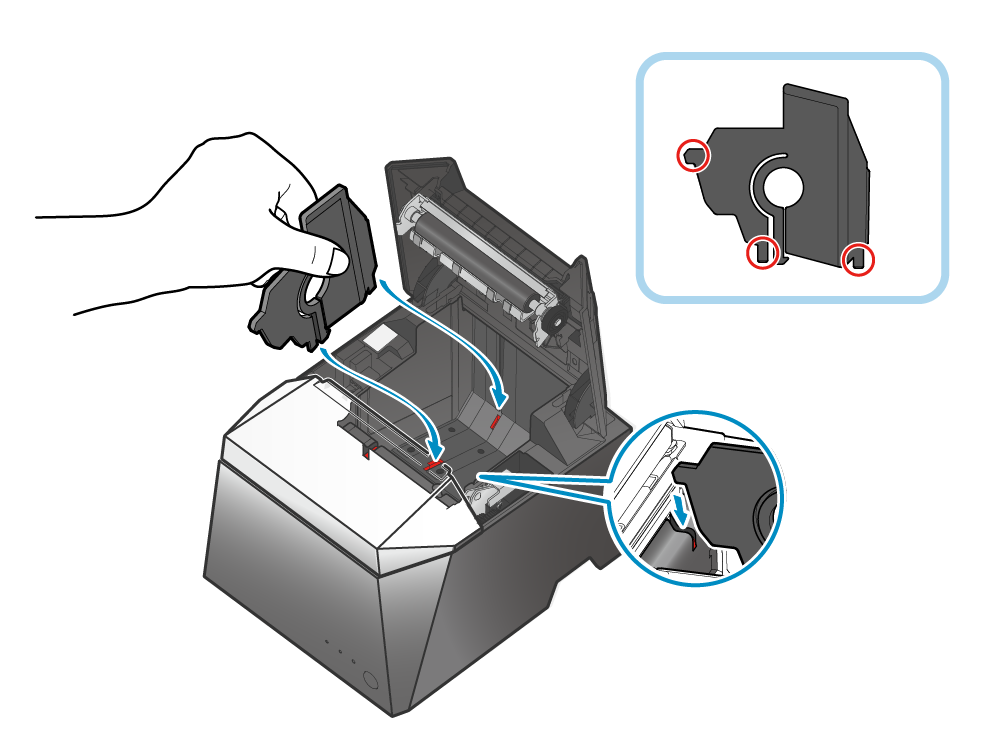
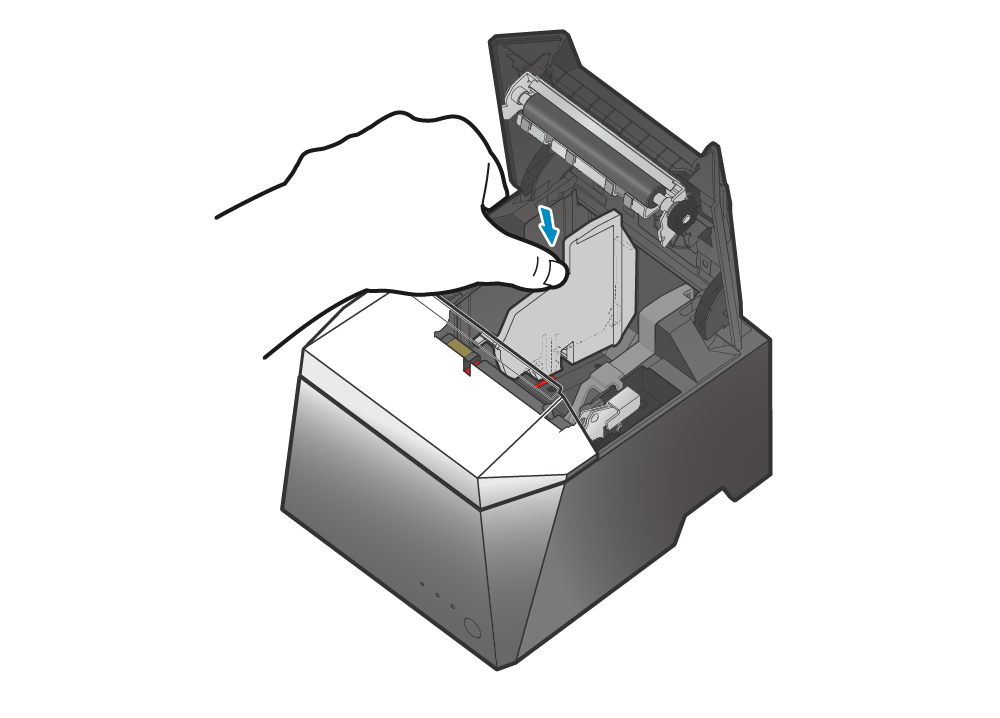
1. Mount the paper roll guide B
Paper roll guide B rear face
Paper roll guide B front face
- Refer to the figure, and by placing along the right wall of the paper roll holder, align the parts of the paper roll guide B indicated by the red circles with the holes marked in red on the main unit.
- Mount by pressing in the paper roll guide B until a clicking sound is heard.
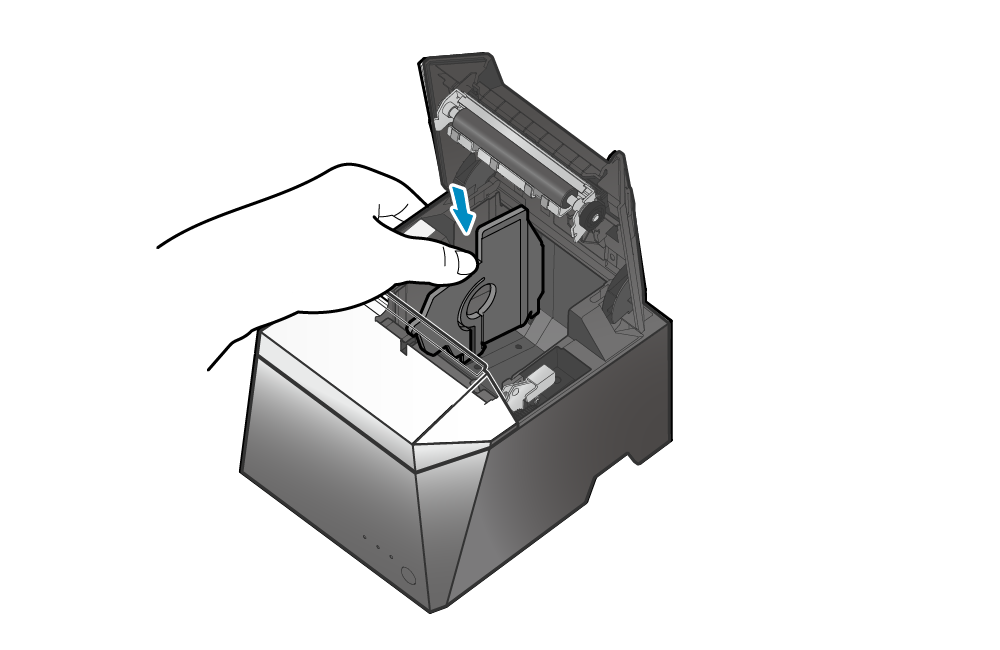
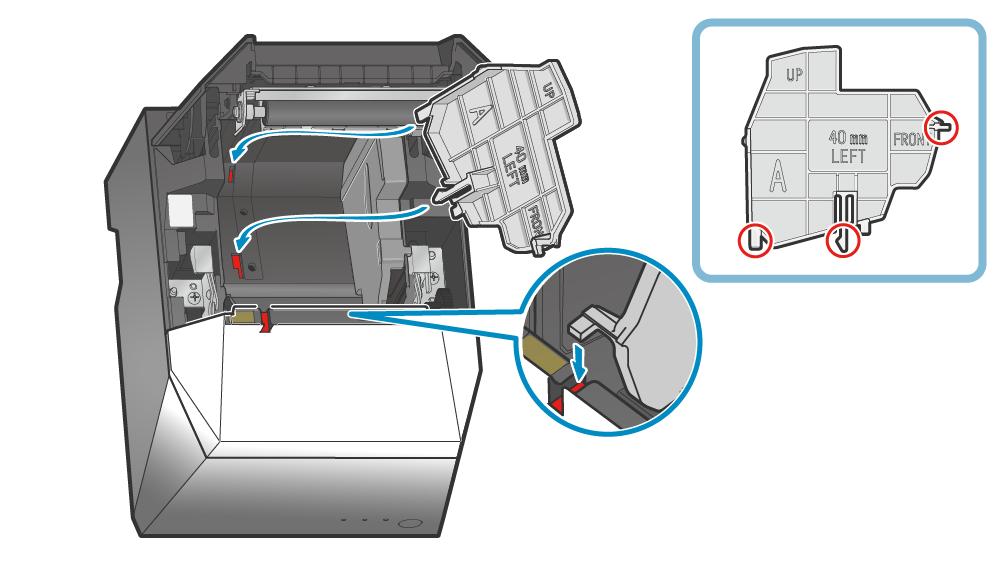
2. Mount the paper roll guide A
Paper roll guide A rear face
Paper roll guide A front face
- Refer to the figure and align the parts of the paper roll guide A indicated by the red circles with the holes and grooves marked in red on the main unit.
- Mount by pressing in the paper roll guide A until a clicking sound is heard.
- To change the paper width, it is necessary to change the memory switch setting. Use the specified application and change the setting for the “printing width”.
Use App - Do not change the paper width after starting to use the product.
The friction of the head, rubber rollers, and cutters varies depending on the paper width, which may cause problems related to printing or cutting operations.
Caution
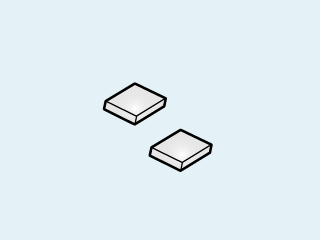
Rubber feet
The use of rubber feet is supported only when using label paper roll.
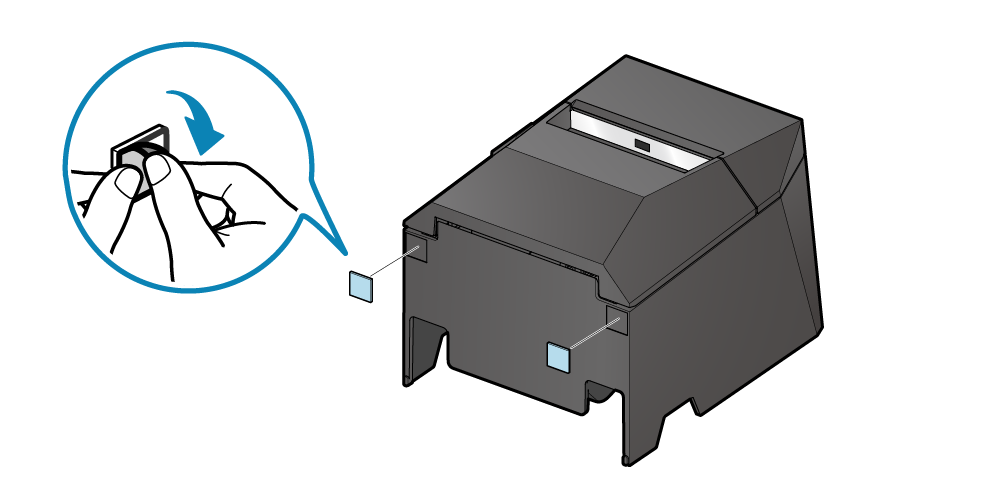
1. Attach the rubber feet to the printer
- Peel off the release paper on the back of the rubber feet, and paste the rubber feet on the two places on the back of the printer.
Wipe away any dirt from the location where it will be placed, before pasting.
2. Paper setup
- Pay attention to the direction of the label paper roll and set the label paper roll.
Set the paper roll (when in vertical position)
Mount on Wall
Wall mounting is supported only when using label paper roll.
Secure the printer to the wall by hooking the wall-mounting holes on the bottom face of the printer onto the screws which were attached to the wall.
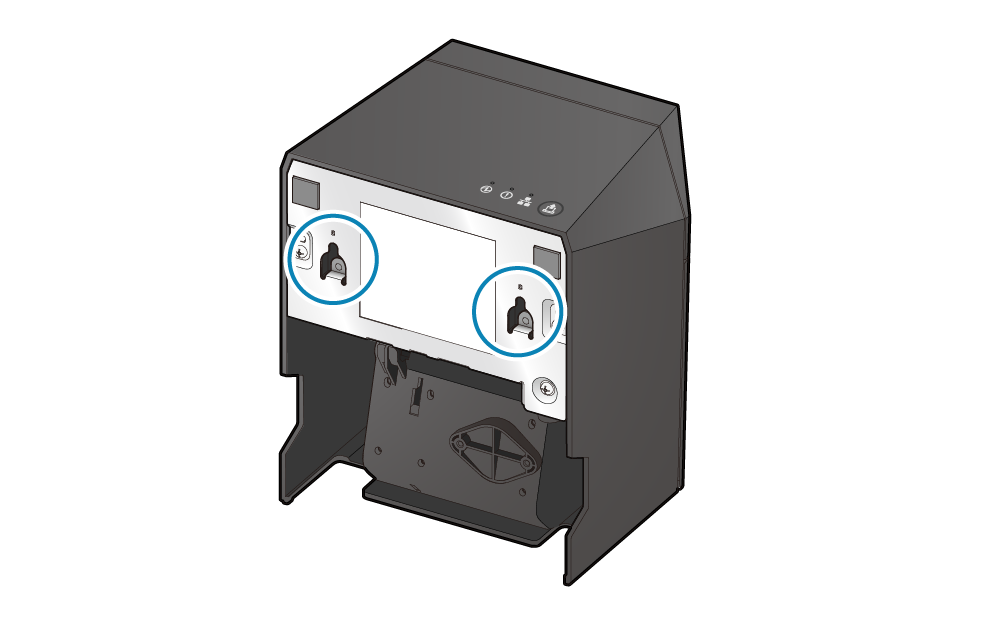
Screws for mounting on the wall are not included.
Prepare two screws available commercially (screw diameter: 4 mm) that are suitable for the wall material (wood, steel, concrete, etc.).
Refer to Safety Information before mounting.
Caution
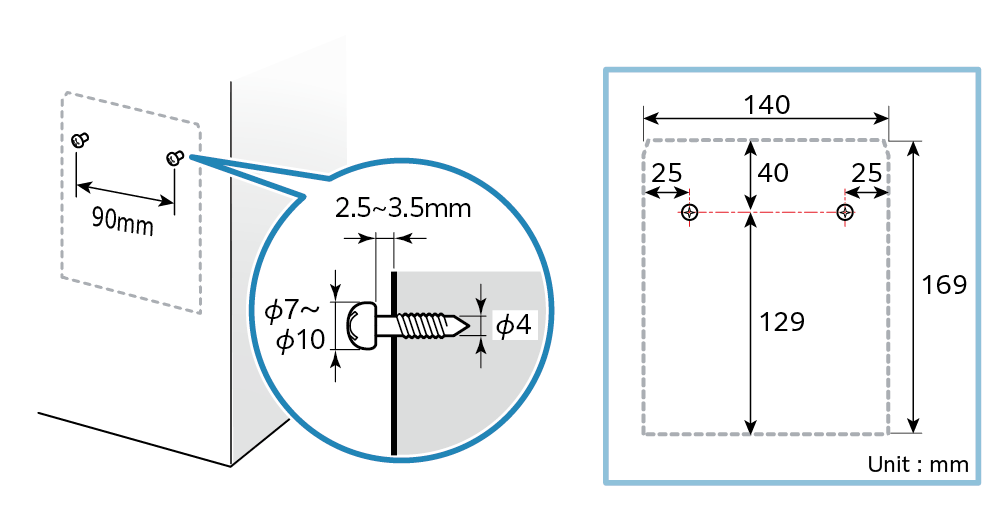
The weight of the printer will be approx. 2.4 kg, including the weight of the label paper roll.
The screws that attach to the wall must have shear strength that can withstand a pull strength of more than 12 kgf (118 N).
1. Attach the screw for mounting the printer on the wall
- Prepare the two screws to match the wall material and attach them to the wall with the following dimensions.
- Make sure to attach the two screws horizontally.
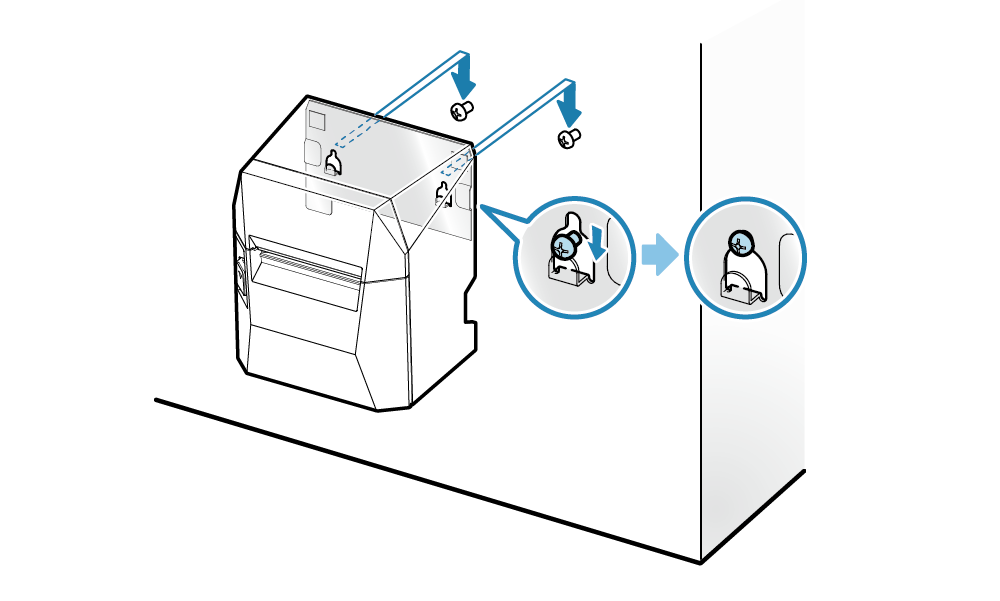
2. Mount the printer on the wall
- Align the wall-mounting holes with the two screws that were installed in step 1, and hook the printer onto them.
3. Set label paper roll
- Pay attention to the direction of the label paper roll and set the label paper roll.
Set the paper roll (when in vertical position)