Star webPRNT SDK
This SDK contains HTML files and JavaScript files.
The HTML files are the sample program to introduce the total procedures to print via a web browser by using the
WebPRNT functions.
Learn how to control your printer by actually running it.
The JavaScript files are the library files for embedding WebPRNT functions provided by Star.
Don't modify them, and they can be loaded from the HTML file.
Example of system configuration
Star Printer with Star webPRNT
* When you put your mouse cursor on the following sentences (each step), the illustration changes and shows detailed information.
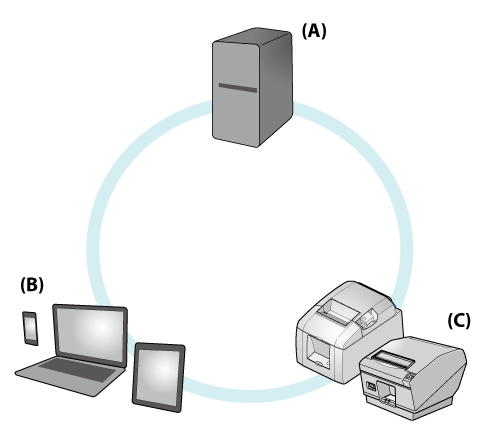
- Prepare a Web server(A), an input device to display a web browser(B) and a Star POS printer(C), and enable them to communicate each other.
- Copy the sample program in the SDK onto the Web server(A).
- Display the sample program via a Web browser(B), and configure the IP address of the Star POS printer(C).
- Send print data to the Star POS printer(C).
- The Star POS printer(C) prints and returns the printer status to the input device(B).
Star webPRNT Browser + Star Bluetooth® Printer
* When you tap the following sentences (each step), the illustration changes and shows detailed information.
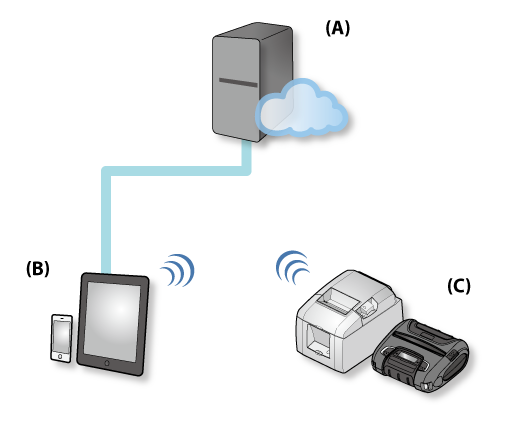
- Prepare a local server or a cloud server(A) and an iOS device in which the Star webPRNT Browser is installed(B), and enable them to communicate each other.
- Pair the iOS device(B) and a Star Bluetooth printer(C).
- Copy the sample program in the SDK onto the Web server(A).
- Display the sample program via the Star webPRNT Browser(B).
- Send print data to the Star Bluetooth printer from the sample program displayed via the Star webPRNT Browser(B).
- The Star Bluetooth printer(C) prints and returns the printer status to the Star webPRNT Browser(B).
 to Top
Sample Program List
HTML File
| Name | Description |
| ComparisonReceiptDesign.html | Confirms if it is possible to print with device fonts and Canvas drawing |
JavaScript File
| Name | Description |
| StarWebPrintBuilder.js | Creates Star webPRNT Request Element |
| StarWebPrintTrader.js | Sends Star webPRNT Request Element and checks status from received Star webPRNT Request Element |
| StarBarcodeEncoder.js | Creates barcode module for drawing to a HTML5 Canvas 2D context |
| StarWebPrintExtManager.js | Watches the barcode reader and printer status by StarWebPRNTExtManager request element and StarWebPRNTExtManager response element. |
| StarWebPrintDisplayBuilder.js | Creates Star webPRNT display request element |
* The JavaScript files are the library files for embedding WebPRNT functions provided. Don't modify them, and they can be loaded from the HTML file.
Web Server Registration
Copy all sample program files for the Public folder according to the Web server operating manual.
How to use
- Star HE07x/08x Interface Printer, mC-Print3 and mC-Print2
- Star webPRNT Browser + Star Bluetooth Printer (iOS)
- Star webPRNT Browser + Star Bluetooth Printer (Android)
Star HE07x/08x Interface Printer, mC-Print3 and mC-Print2
- Open CompariosReceiptDesign.html on your server and check if the JavaScript/Canvas works properly with your browser.
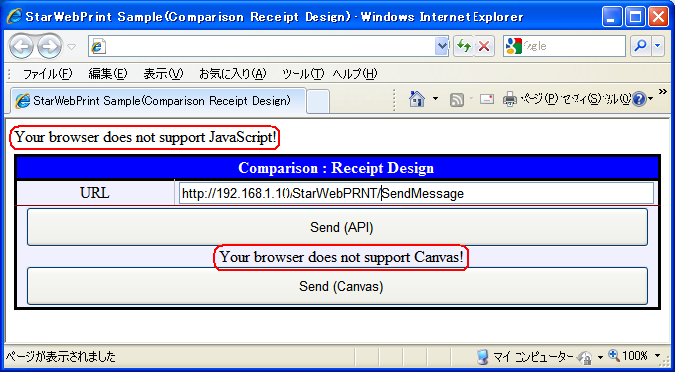
* If the message "Your browser does not support JavaScript!" appears on your browser, check the JavaScript setting and make it valid.
* If the message "Your browser does not support Canvas!" appears on your application, change (or upgrade) your browser to one which supports Canvas function.
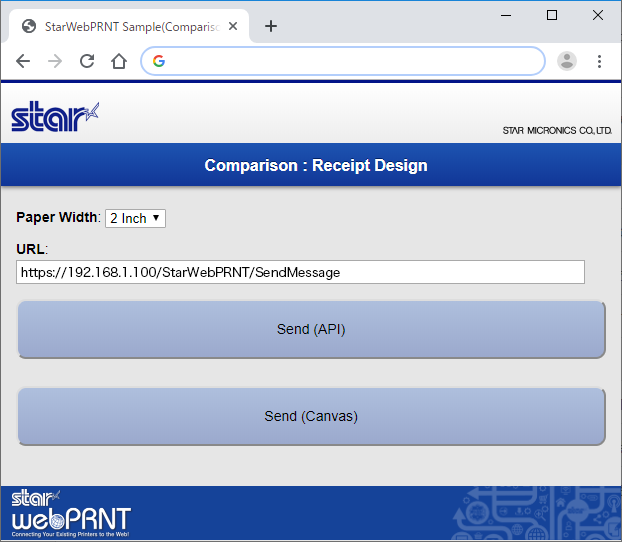
- Edit the StarWebPRNT end point URL in accordance with the IP address of the printer.
If you publish your web app on https, please use https encrypted communication with SSL/TLS to send a print request from the web app to the printer.
Example: https://192.168.1.100/StarWebPRNT/SendMessage
If the request is sent by http communication without encryption, it will fail due to the cross scheme (https ⇔ http) limitation of the browser, and printing will also fail.
mC-Print3 and mC-Print2 supports SSL/TLS communication when it is used only for printing processes.
HE07x/08x supports SSL/TLS communication if a “S” mark is stamped on the interface chassis.
When using Chrome or Edge, the HE07X/08X interface firmware version must be 4.1 or later.
When performing HTTPS encrypted communication using SSL/TLS, it is necessary to set certificates both at the printer and at the browser which is used. For details about the setting procedure, refer to the following.
Printer Settings HE07x/08x IFBD-HE07/08-BE07 User's Manual mC-Print3 mC-Print3 Online Manual : Use Star webPRNT mC-Print2 mC-Print2 Online Manual : Use Star webPRNT Browser Settings Setting the certificate for the client side - Press the “Send (API)” button to check if it is possible to print with device fonts
- Press the “Send (Canvas)” button to check if it is possible to print with Canvas drawing.
Setting the certificate for the client side
When using the self-signed certificate that is set for the printer or a CA-signed certificate which you issued yourself, it is necessary to set the certificate at the client side.
Windows10(Edge)
- 1-A) Specifying a self-signed certificate file
- 1-B) Specifying a CA-signed certificate file
- 2) Import the certificate
Specifying a self-signed certificate file
- Download the certificate from the settings screen (Web Configuration) of the printer which is used.
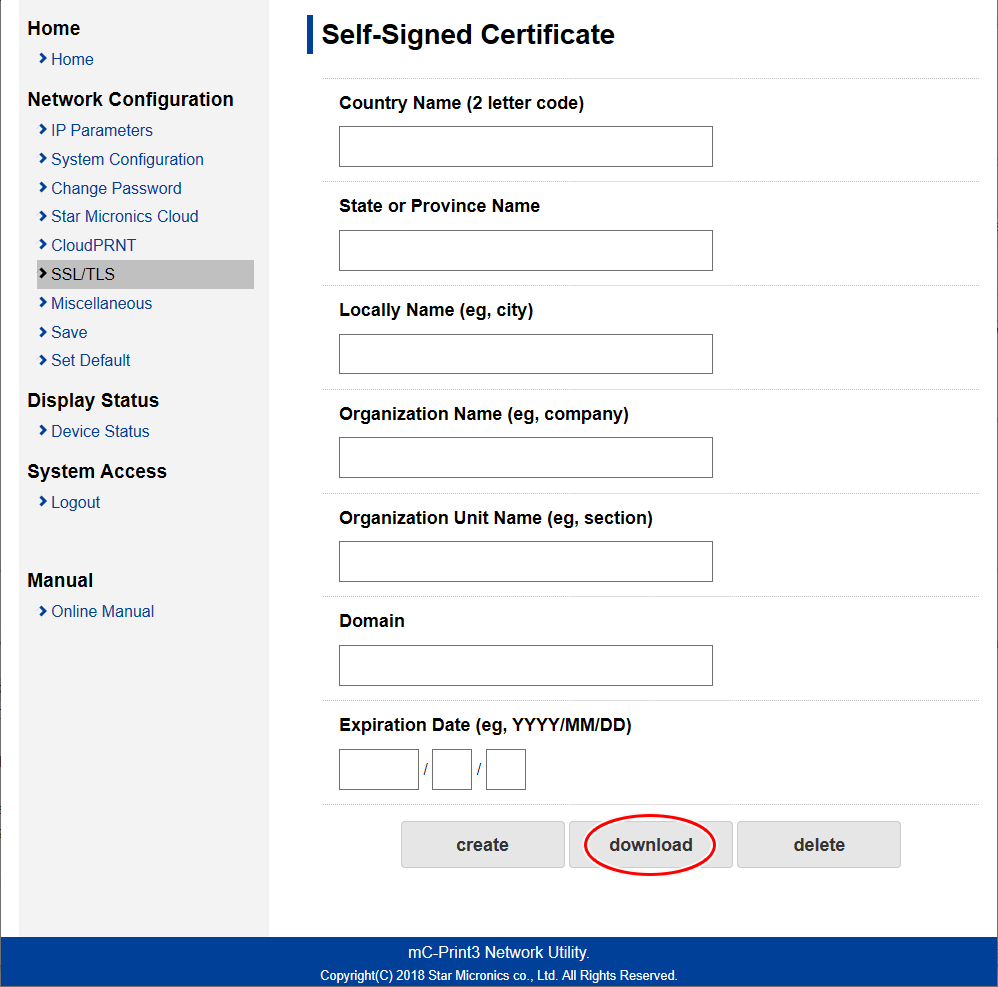
* Configure the printer-side settings in advance.
- Click [Open] from the pop-up menu.

- Click [Open].
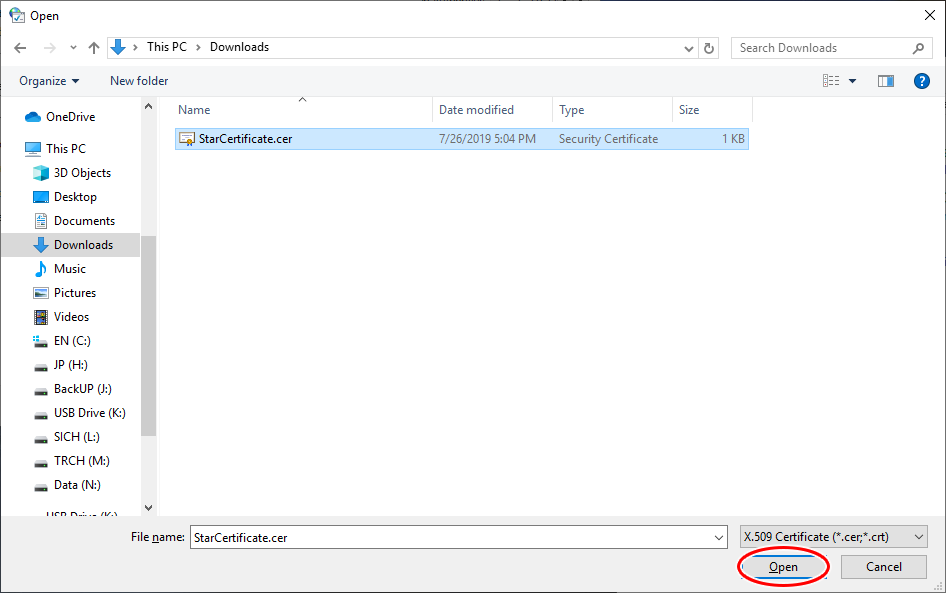
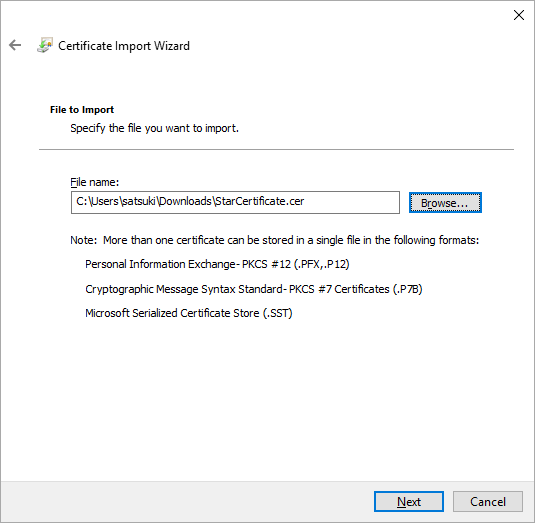
- Select the downloaded certificate file and open “Certificate Import Wizard”.
- Import the certificate.
- Import the certificate
Specifying a CA-signed certificate file
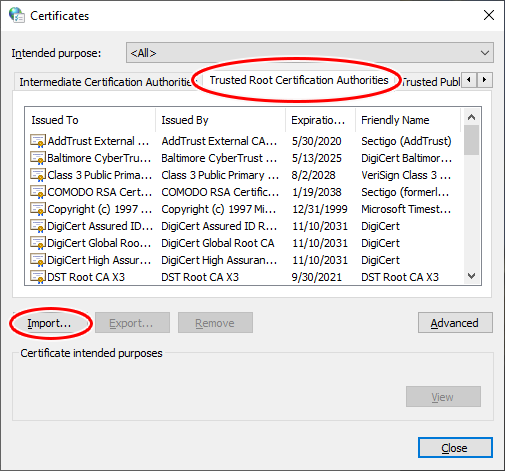
- Open [Control Panel] - [Internet Properties], and click "Certificates" on the "Content" tab.
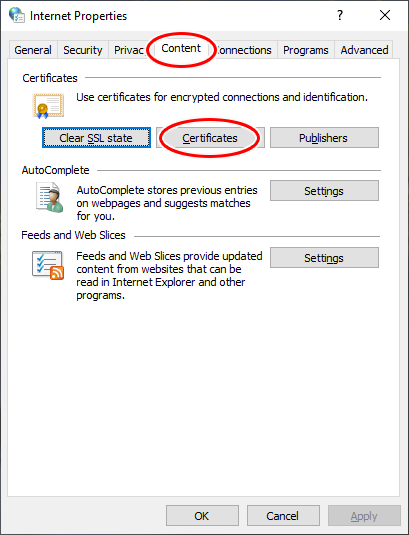
- Select the "Trusted Root Certification Authorities" tab, and click [Import].
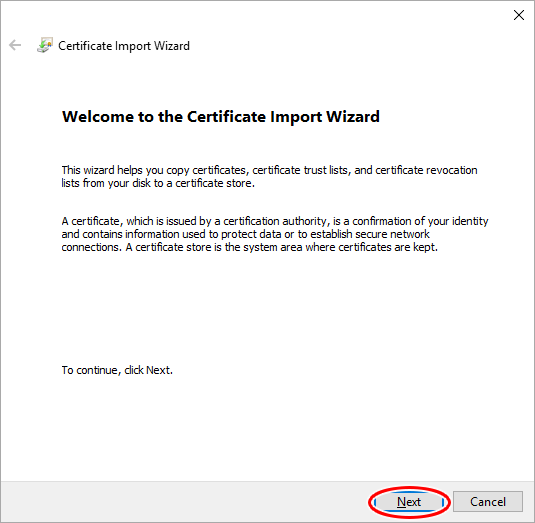
- Click [Next].
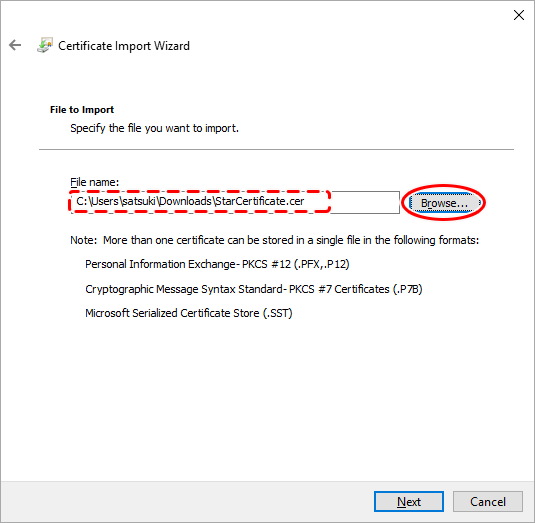
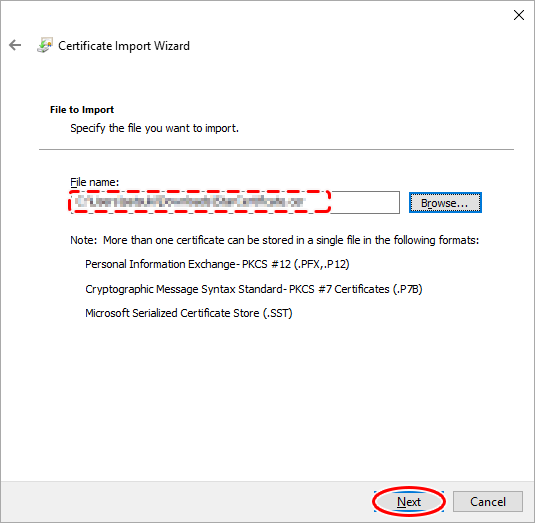
- Click [Browse] and select the CA-signed certificate file.
- Import the certificate.
- Import the certificate
Import the certificate
- Click [Next].
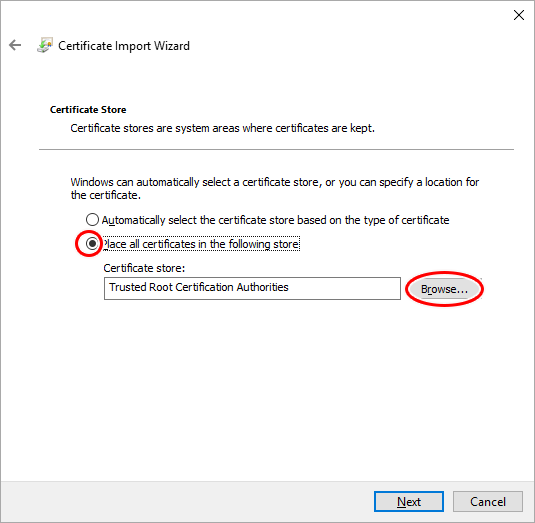
- Select [Place all certificates in the following store], and click [Browse].
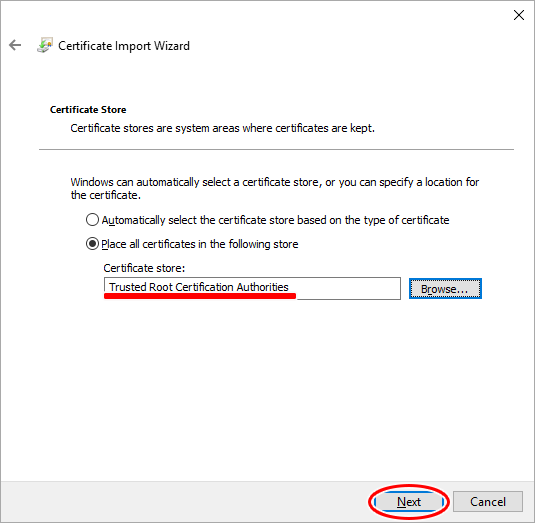
- Select "Trusted Root Certification Authorities", and click [OK].

- Click [Next].
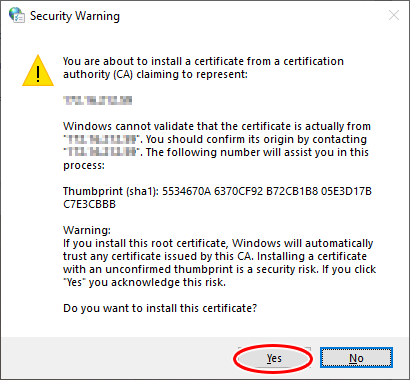
- Click [Finish] to import the certificate.

- If there is no problem with the warning contents, click [Yes].
- Click [OK] to exit the wizard.
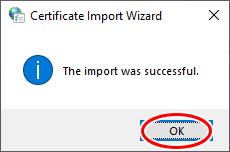
- The imported certificate is added to the list of trusted root certification authorities.
Turn on the printer power again, and check that it is possible to access the printer web screen with an address beginning with "https:⁄⁄"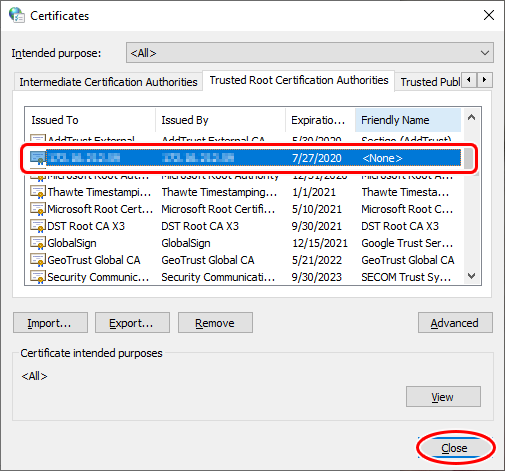
iOS(Safari)
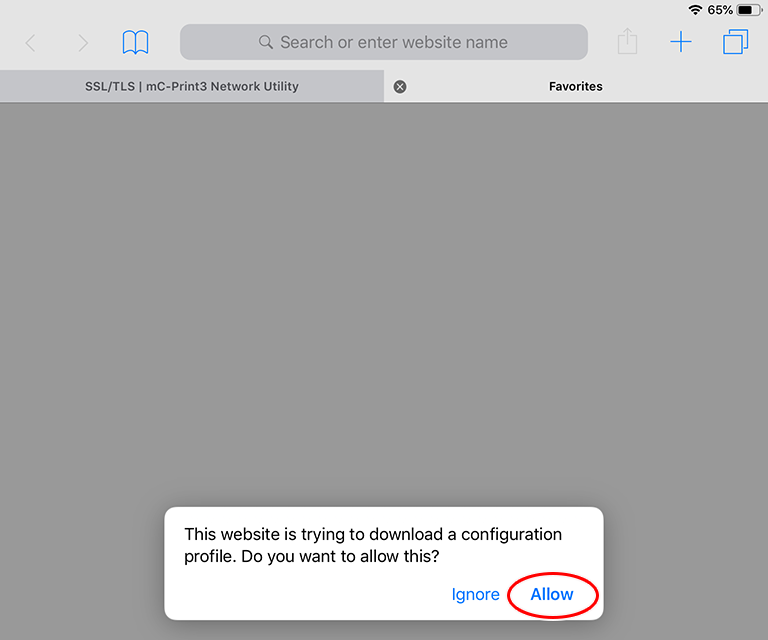
When setting the certificate for the iOS device, use Safari and download the certificate.
- When the certificate is downloaded, the following message will appear.
Tap [Allow].
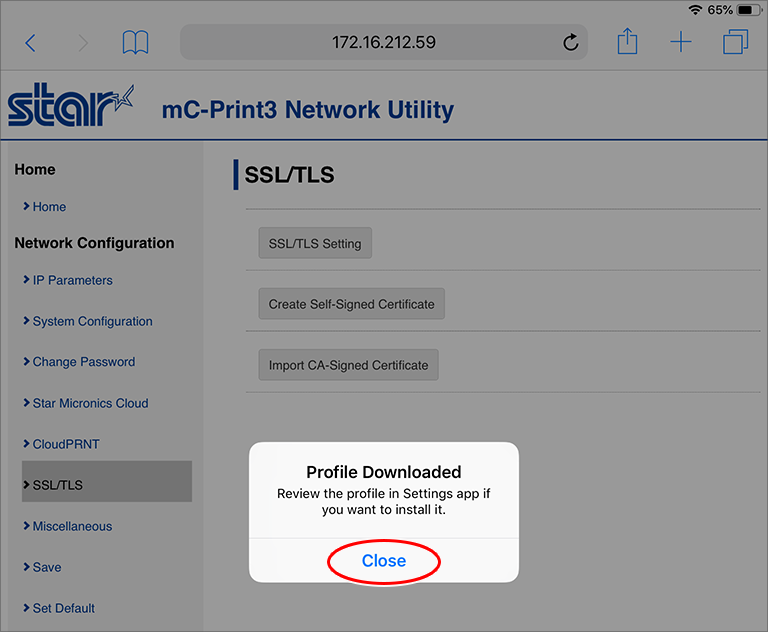
- Tap [Close].
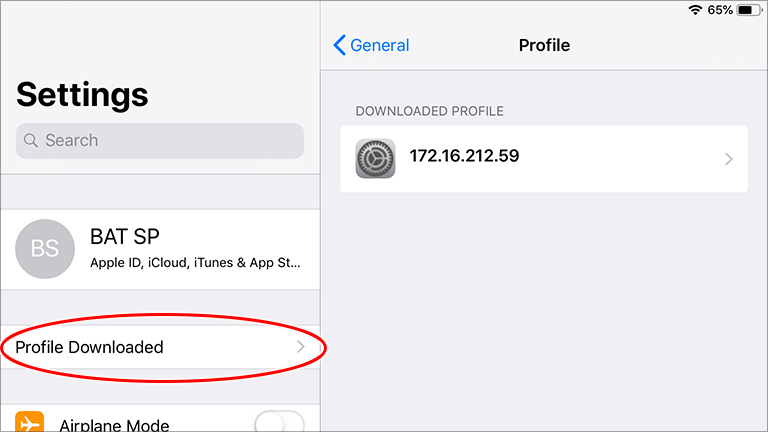
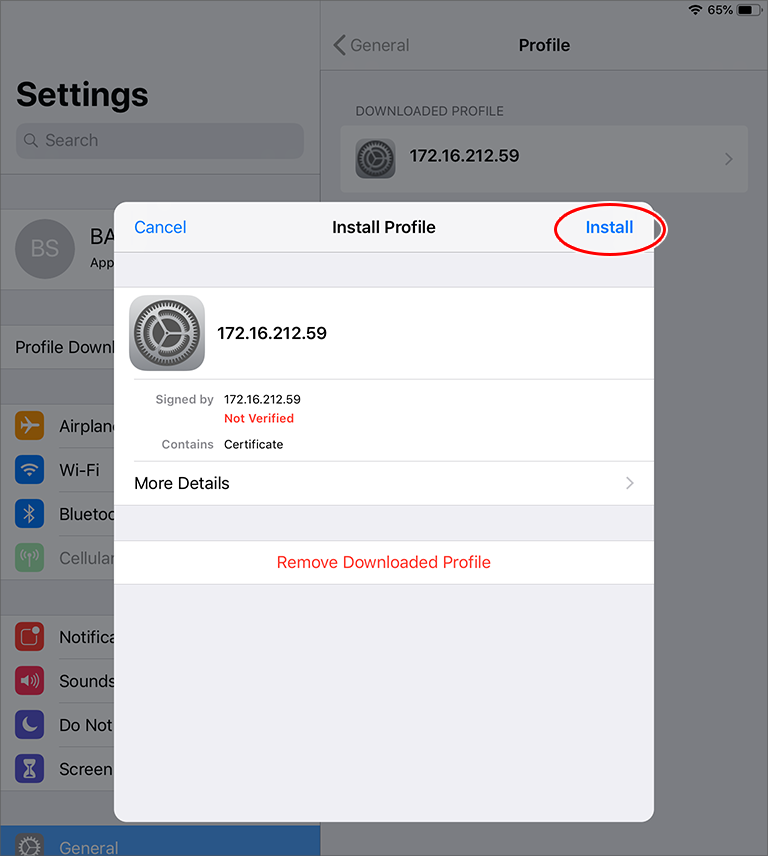
- Open the "Settings", and tap [Profile Downloaded].
- Tap "Install".
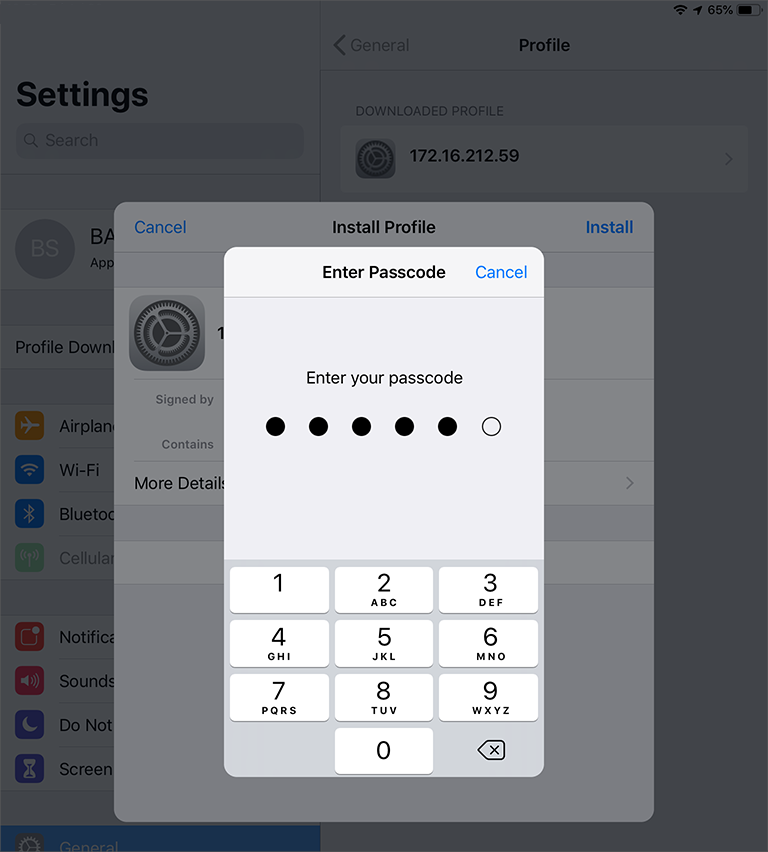
- Enter your passcode.
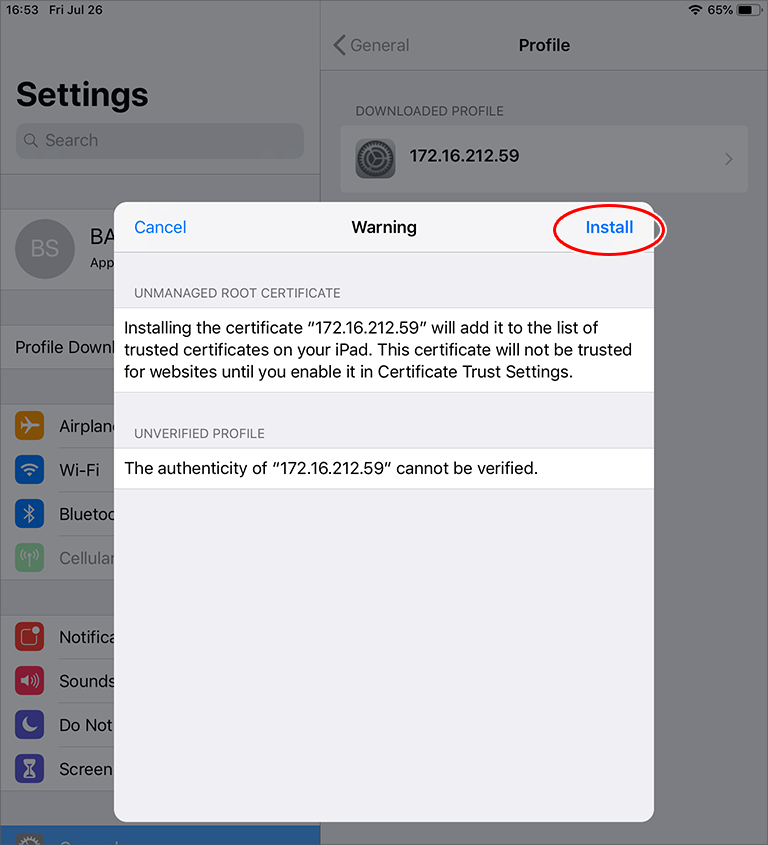
- Tap "Install".
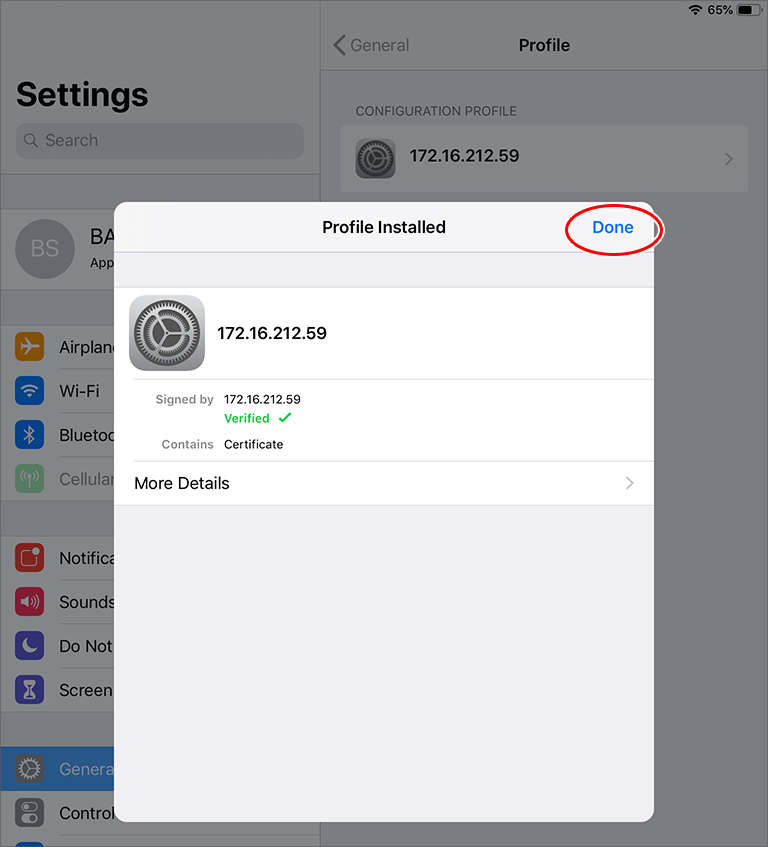
- Tap [Install].
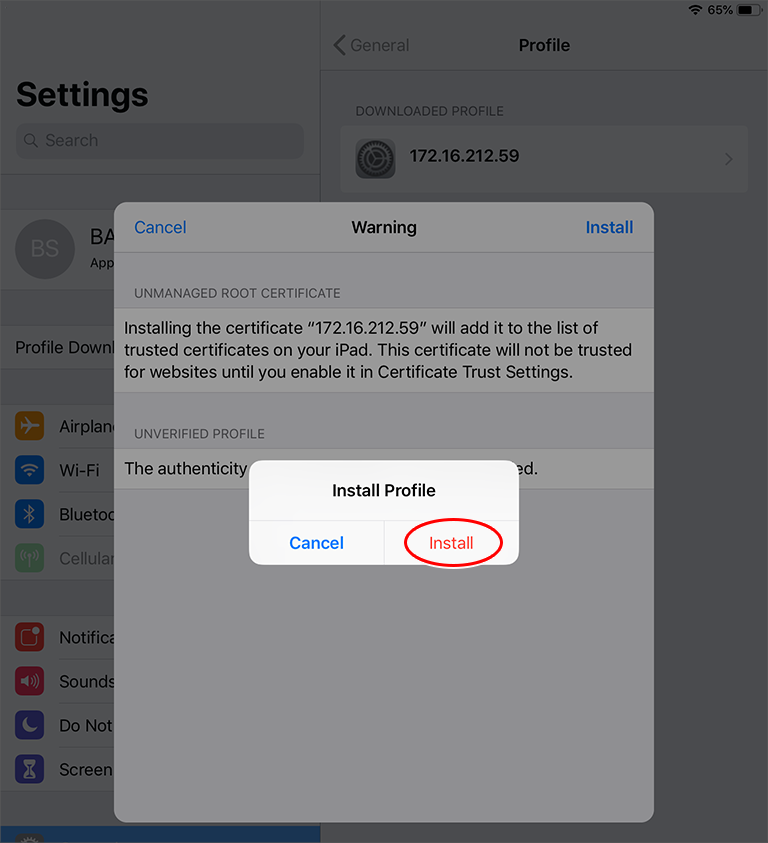
- Tap [Done]. Certificate installation is completed.
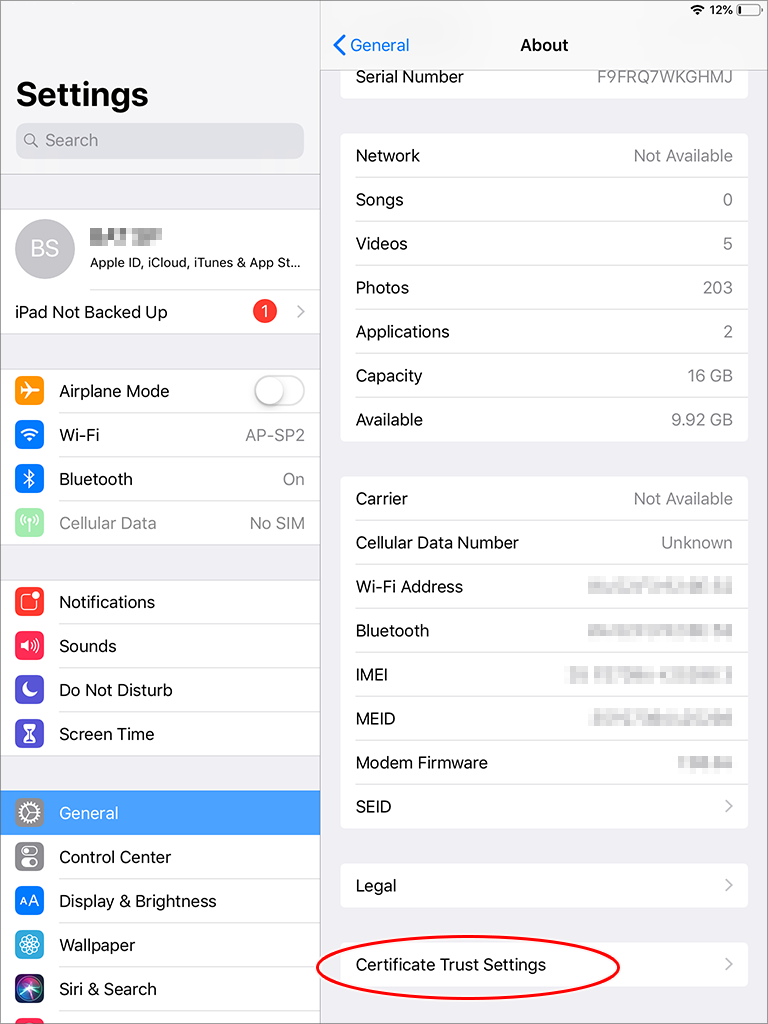
- Next configure the certificate trust settings.
Open the "Settings", and open [General]-[About]-[Certificate Trust Settings].
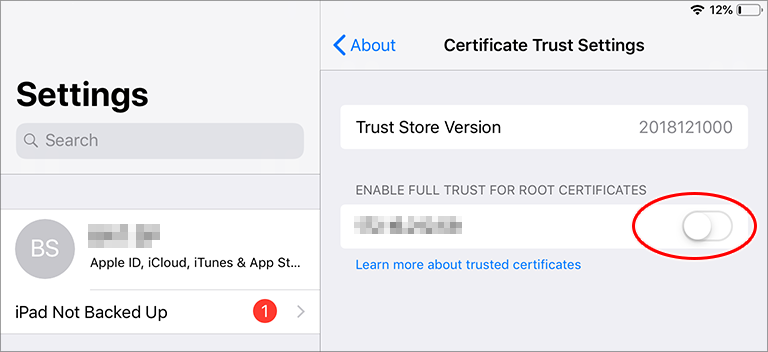
- Turn [ON] the switch of the installed certificate.
- Check the warning message. If there are no problems, tap [Continue].
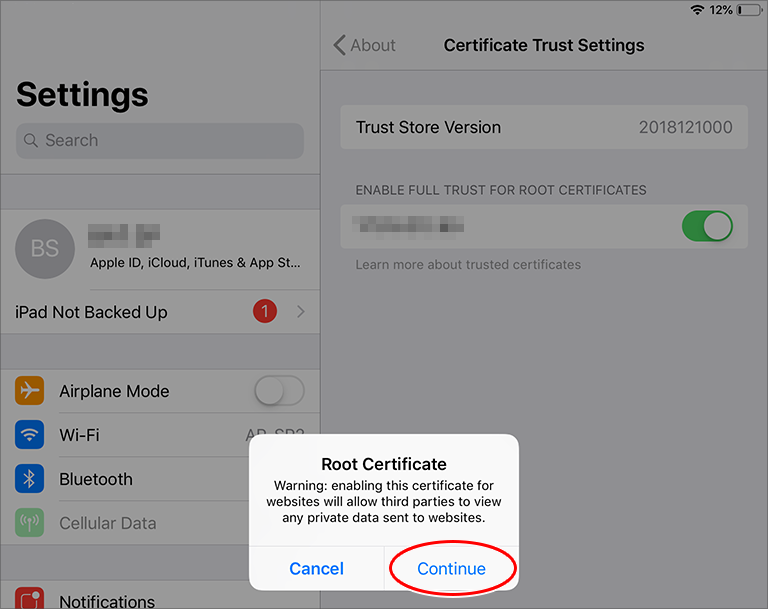
- Certificate settings are now completed.
Turn on the printer power again, and check that it is possible to access the printer web screen with an address beginning with "https:⁄⁄"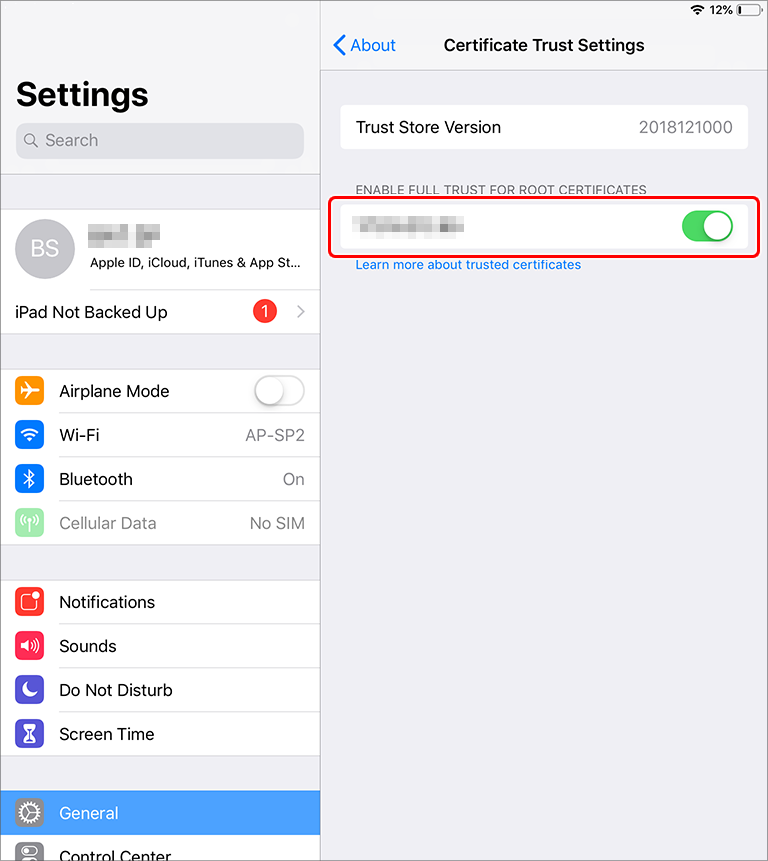
Android(Google Chrome)
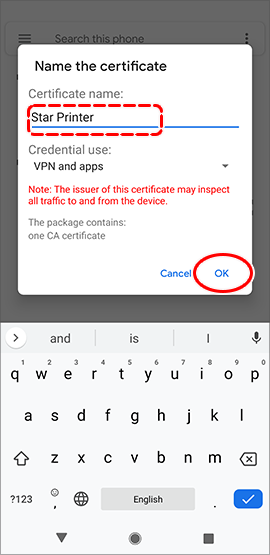
- When the certificate is downloaded, the following message will appear.
Specify the certificate name (any name) and tap [OK].
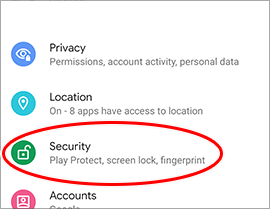
- Open the "Settings", and tap "Security".
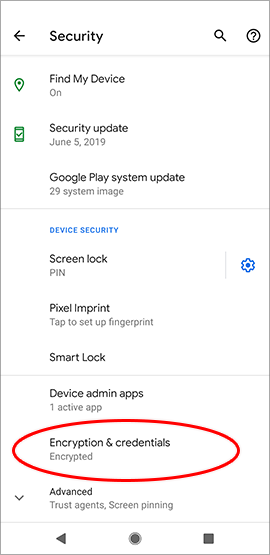
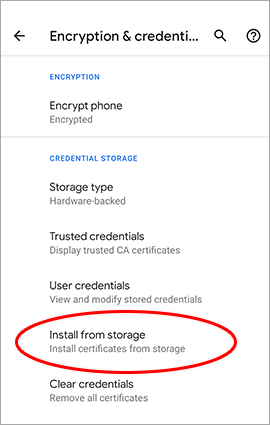
- Tap "Encryption & credentials".
- Tap "Install from strage".
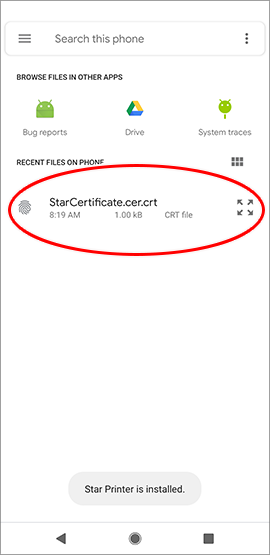
- Tap the downloaded certificate file “StarCertificate.cer.crt”.
The certificate will be installed.
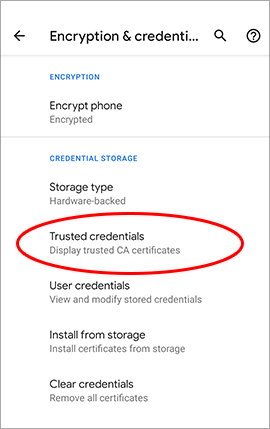
- From [Settings] - [Security] - [Encryption & credentials], open "Trusted credentials" and check the certificate status.
- Open the “USER” tab and tap the installed certificate information.

- The contents of the installed certificate are displayed.
Certificate install is now completed.
Turn on the printer power again, and check that it is possible to access the printer web screen with an address beginning with "https:⁄⁄"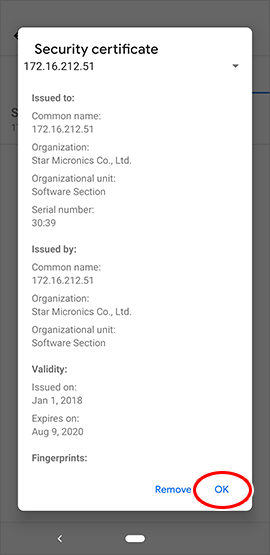
Launching the Star webPRNT Browser by URL scheme (iOS/Android)
You can launch the Star webPRNT Browser by URL scheme. Also, by specifying the URL you want to open, the launched the Star webPRNT Browser will open the specified page.
If you just want to launch the the Star webPRNT Browser, please specify (A) for iOS and (A)-(B) for Android.
If you want to launch the Star webPRNT Browser then open the specified URL, please specify (A)-(E) entirely.
The URL of (E) should be percent encoded. For example, if you want to open https://starmicronics.com/, the URL you need would be webprnt://starmicronics.com/open?url=https%3A%2F%2Fstarmicronics.com%2F.

- webprnt://
- starmicronics.com
- /open
- ?url=
- [URL] - The URL you want to open via the Star webPRNT Browser
Star webPRNT Browser (iOS/Android) User Agent
With the Star webPRNT Browser, the following character string is included in the user agent in order to distinguish it from ordinary browsers. Use the following character string when you want to distinguish Star webPRNT Browser from ordinary browsers.
StarWebPRNTBrowser/X.X.X
* X.X.X. contains the version name. (Example: For version 3.4.0, “StarWebPRNTBrowser/3.4.0”)
Request Related to Version Update of the iOS Star webPRNT Browser
In accordance with instructions from Apple* , the browser engine for the iOS Star webPRNT Browser will be changed from UIWebView to WKWebView.
The above change will be made starting from iOS Star webPRNT Browser Ver. 3.6.0 (to be released in June 2020).
As a result of this change, there may be some differences in some elements such as web content rendering results and JavaScript behavior. Please be aware of this.
At the same time, when using the updated iOS Star webPRNT Browser (Ver. 3.6.0 and later), please change to the following JavaScript library versions.
Printing will not be possible with JavaScript library versions earlier than those listed below.
| StarWebPrintTrader.js | Ver.1.0.1 and later. |
|---|---|
| StarWebPrintExtManager.js | Ver.1.2.0 and later. |
* Included in the package for StarWebPRNT_WebContents_V1.6.0.zip and later.
Download StarWebPRNT_WebContents from the following website.
| https://developer.apple.com/news/?id=12232019b |
Precautions when printing from websites that are not HTTPS communication.
If you are using the following browsers on a website that is not encrypted (HTTPS communication), you cannot print.
Please use SSL/TLS encrypted communication (HTTPS communication).
- Google Chrome 94 or higher
- Microsoft Edge (Chromium version)
- Star webPRNT Browser for Android
When using a LAN printer that supports the Star webPRNT function
- Publish web content over HTTPS.
- Please refer to here for how to set up HTTPS communication for printers and browsers.
If you are using Star webPRNT Browser for Android
- Publish web content over HTTPS.
- Change the print destination as follows.
http://localhost:8001/StarWebPRNT/SendMessage
↓
https://localhost:8001/StarWebPRNT/SendMessage