Use Star webPRNT
Star webPRNT can be used to achieve multi-platform printing via a web browser from a broad range of PCs, tablets, and other devices.
For details about Star webPRNT, refer to the Star webPRNT User’s Manual.
mC-Print3 supports the Star webPRNT functions and allows them to be used without any modifications.
However when performing HTTPS encrypted communication using SSL/TLS, it is necessary to configure the settings for use of certificates at the printer and client web browser.
* The need for SSL settings varies depending on the application that is used. If you are unsure, please contact the application vendor.
The setting method varies depending on the type of certificate that is used.
When using a self-signed certificate
When using a CA-signed certificate
SSL/TLS settings Self-Signed Certificate
Setup is performed from the printer settings screen (Web Configuration).
1. Open the printer settings screen
- Connect the printer to the same network as the host device that will be used for setup. Connect LAN Cable
- Check the printer IP address. Check Printer IP Address
- Open the printer settings screen (Web Configuration) via a web browser such as Google Chrome or Safari. Open Printer Settings Screen
2. Create a self-signed certificate
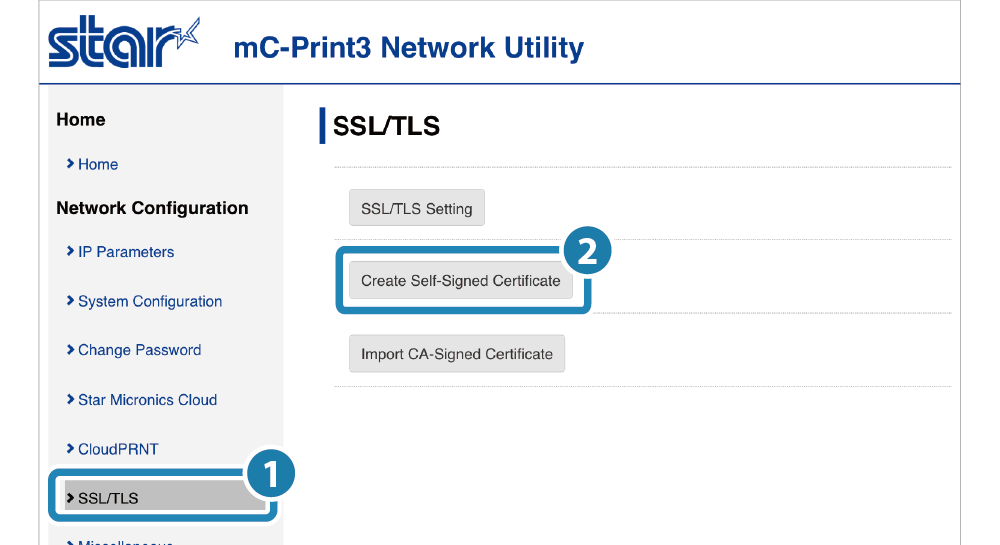
- From the menu or the menu button
 at the top left of the screen, open [SSL/TLS]
  and tap [Create Self-Signed Certificate]
  .
.
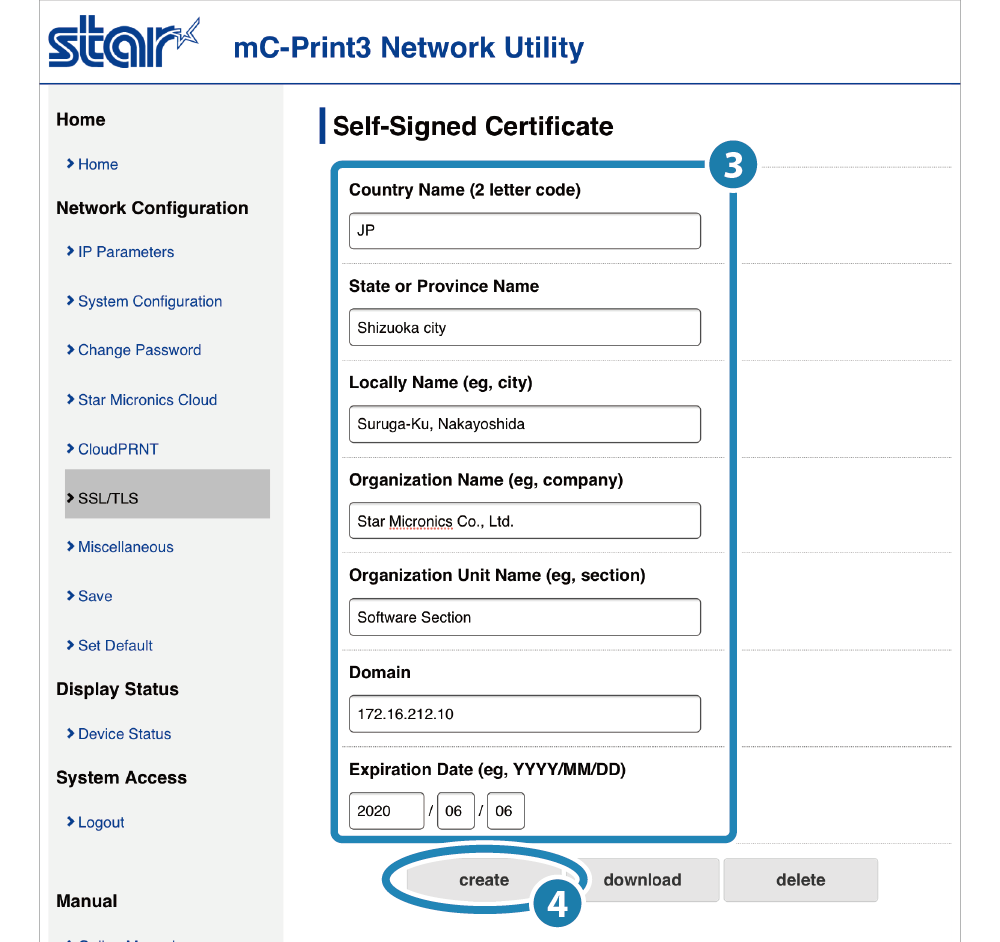
- Refer to the contents of the table below and enter the certificate contents
 , then tap [Create]
  .
.
| Maximum number of characters | Example | |
|---|---|---|
| Country Name | 2 | JP |
| State or Province Name | 128 | Shizuoka city |
| Local Name | 128 | Suruga-ku, Nakayoshida |
| Organization Name | 128 | Star Micronics Co., Ltd. |
| Organization Unit Name | 128 | Software Section |
| Domain (printer IP address) | 128 | 172.16.212.104 |
| Expiration Date | 2015/01/01 - 2049/12/31 | 2020/06/06 |
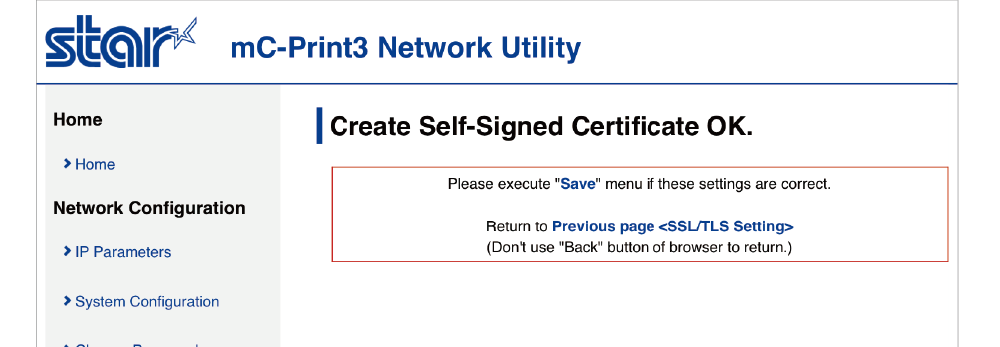
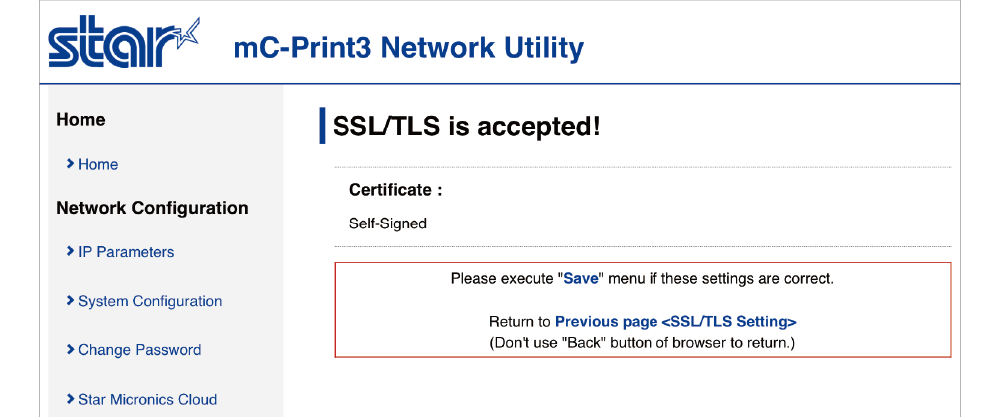
- When certificate creation is successful, a screen appears to indicate success and recommend saving.
For now, continue to the next step without saving.
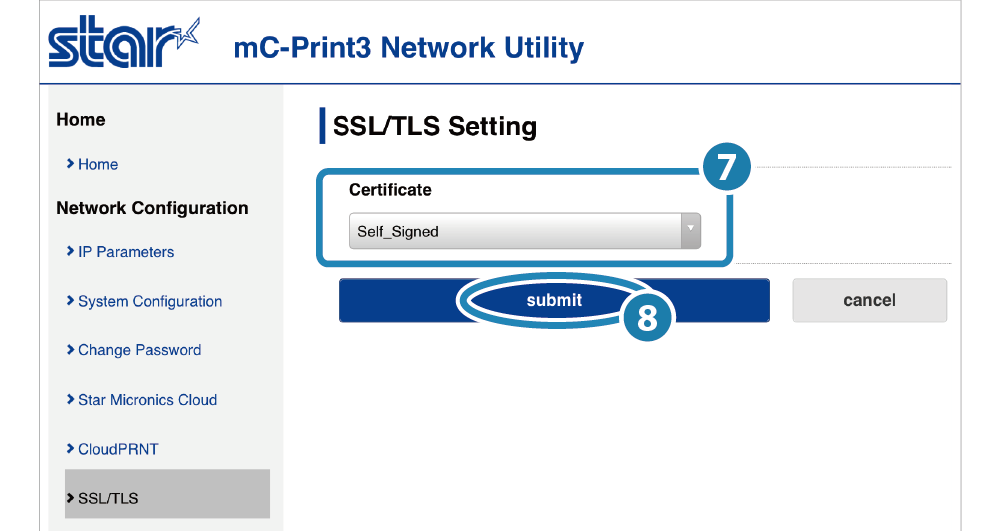
3. Enable the printer self-signed certificate setting
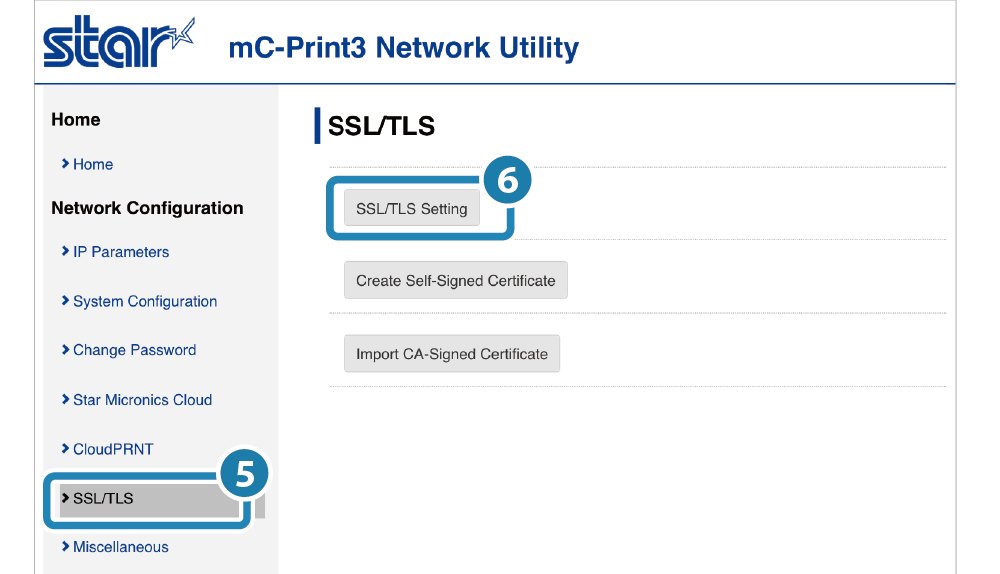
- From the menu or the menu button at the top left of the screen, open [SSL/TLS]
 and tap [SSL/TLS Setting]
  .
. - Set “Self_Signed”
 for the certificate and tap [submit]
  .
. - A screen appears to recommend saving.
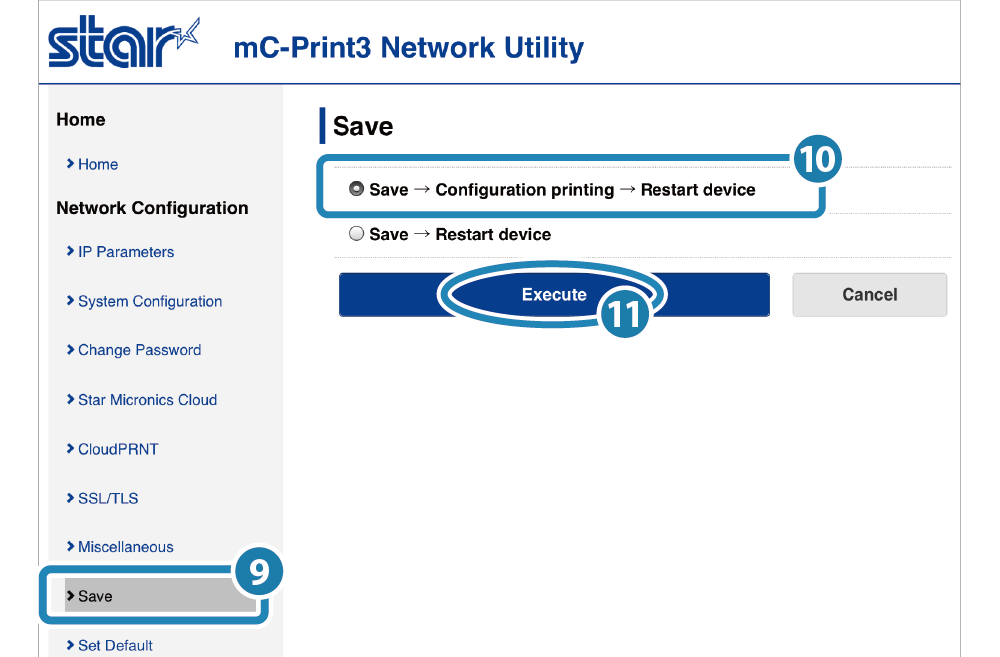
4. Save settings to printer
- From the menu or menu button at the top left of the screen, open [Save]
 , select Save Configuration printing Restart device
  , and tap [Execute]
  .
. - The settings are saved to the printer and are printed out.
If the **Network Configuration** ⟨⟨SSL/TLS⟩⟩ items in the printout are those shown below, then the printer settings are completed.Certificate : Self-Signed Self-signed Certificate : Exist
5. Import a certificate to the web browser
- The certificate that was created at the printer must be imported to the client terminal web browser.
For details about the web browser setting method, refer to the Star webPRNT User’s Manual.
Star webPRNT User’s Manual (Certificate Setting Method)
SSL/TLS settings CA-Signed Certificate
Upload a server certificate that was created externally and signed by a CA (Certificate Authority), together with a private key, to the printer. At the browser, you must register the CA (Certificate Authority) as a "Trusted Root Certification Authorities". Configure the settings if necessary.
The printer settings are configured from the printer settings screen (Web Configuration).
1. Prepare the server certificate and private key
- Prepare a server certificate file signed by an external CA (Certificate Authority) and a private key file.
Each of the files must satisfy the following requirements.Encoding type Base64 (file extension: PEM) Certificate file type PKCS #1 Key length Firmware Ver. 1.5 or earlier: RSA 1024 bits
Firmware Ver. 1.6 or later: RSA 2048 bits or 1024 bits - The firmware version is shown in the title section of the printer information (page 1) that is printed using the Self-Printing function. Test Printing
- Firmware update can be performed using the dedicated app. Use App
2. Open the printer settings screen
- Connect the printer to the same network as the host device that will be used for setup. Connect LAN Cable
- Check the printer IP address. Check Printer IP Address
- Open the printer settings screen (Web Configuration) via a web browser such as Google Chrome or Safari. Open Printer Settings Screen
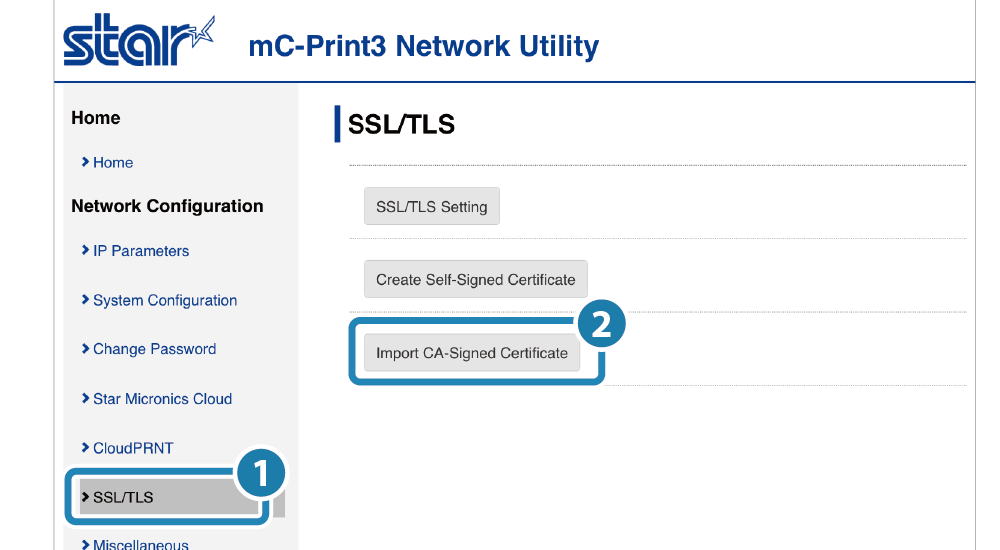
3. Upload the server certificate and private key to the printer
- From the menu or the menu button at the top left of the screen, open [SSL/TLS] and tap [Import CA-Signed Certificate] .
- Tap [Browse..] in the “Import CA-Signed Certificate” section, then select the certificate file that was prepared in step 1 and tap [upload] .
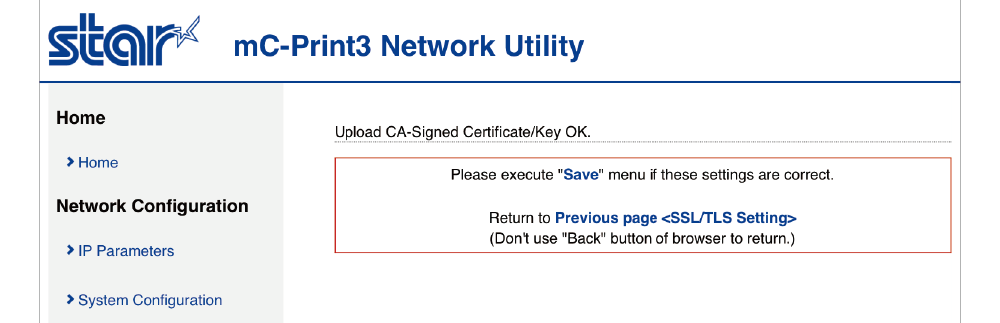
- When certificate upload is successful, a screen appears to indicate success and recommend saving.
Tap [Previous page ⟨SSL/TLS⟩]. - Tap [Browse..] in the “Import CA-Signed Private Key” section, then select the private key file that was prepared in step 1 and tap [upload] .
“No file selected” is displayed in the “CA-Signed Certificate” section however there is no problem. - When private key upload is successful, a screen appears to indicate success and recommend saving.


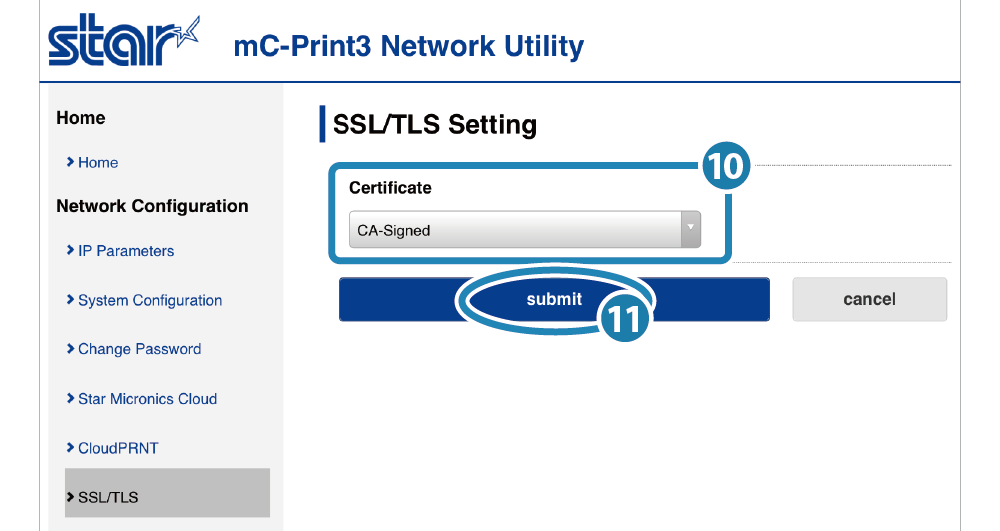
4. Enable the printer CA-signed certificate setting
- From the menu or the menu button at the top left of the screen, open [SSL/TLS] and tap [SSL/TLS Setting] .
- Set “CA-Signed” for the certificate and tap [submit] .
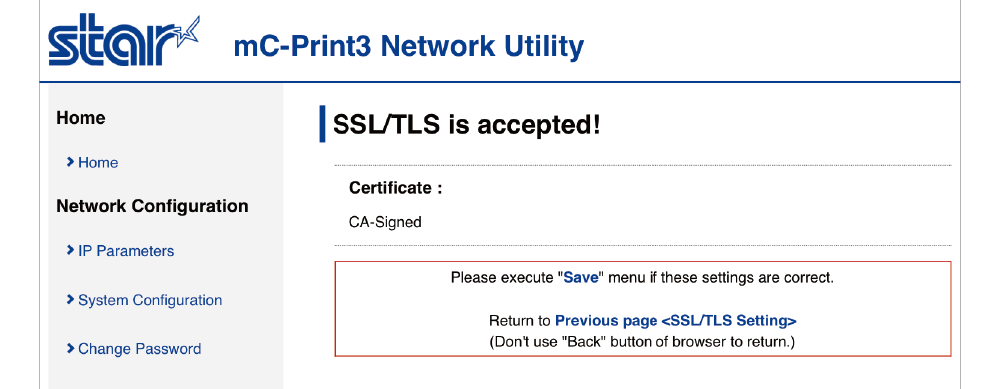
- A screen appears to recommend saving.

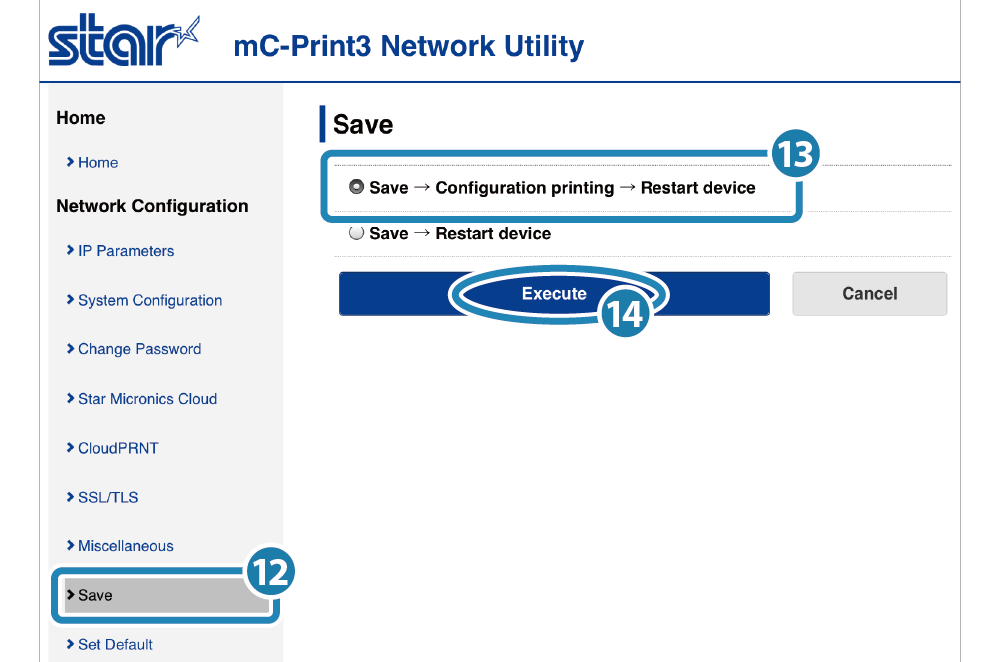
5. Save settings to printer
- From the menu or menu button at the top left of the screen, open [Save]
 , select Save Configuration printing Restart device
  , and tap [Execute]
  .
. - The settings are saved to the printer and are printed out.
If the **Network Configuration** ⟨⟨SSL/TLS⟩⟩ items in the printout are those shown below, then the printer settings are completed.Certificate : CA-Signed CA-Signed Certificate : Exist
6. Import the certificate to the web browser
- The certificate that was created at the printer must be imported to the client terminal web browser.
For details about the web browser setting method, refer to the Star webPRNT User’s Manual.
Star webPRNT User’s Manual (Certificate Setting Method)