Use Star Micronics Cloud Services
If you connect the printer to Star Micronics Cloud Services, helpful cloud services for operating your store is available for free.
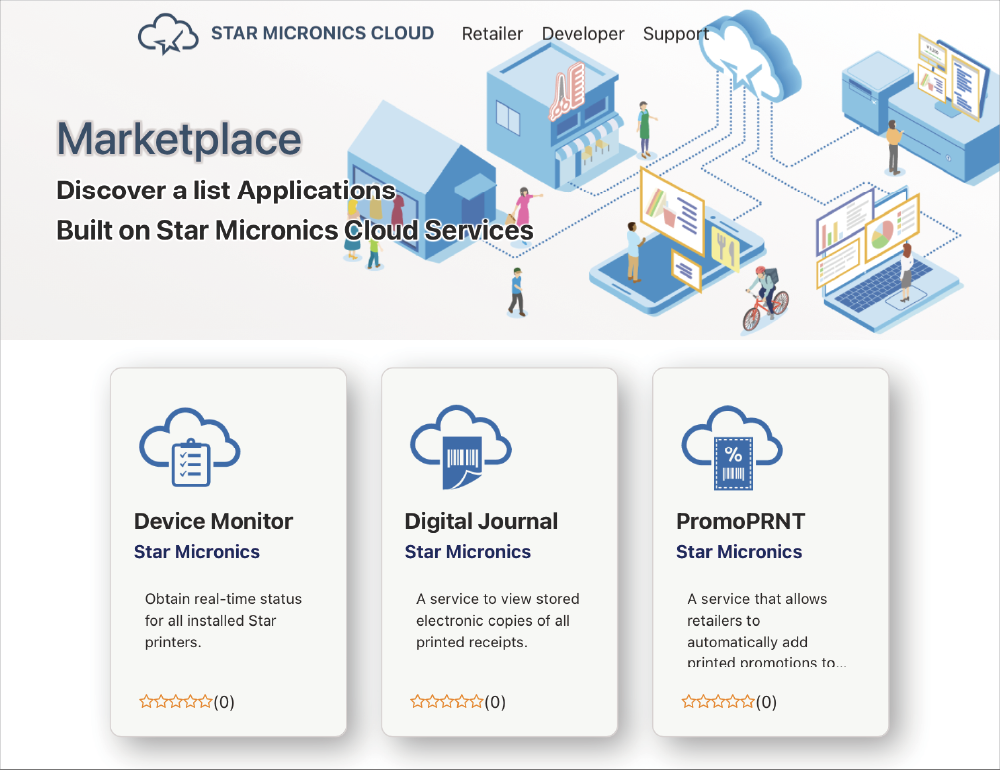
Services for stores
- You can check the printer status and the number of receipts in the graph.
- You can check the digitized receipt data in the cloud at any time.
- You can configure the setting for issuing paper coupons and manage the schedule in the cloud.
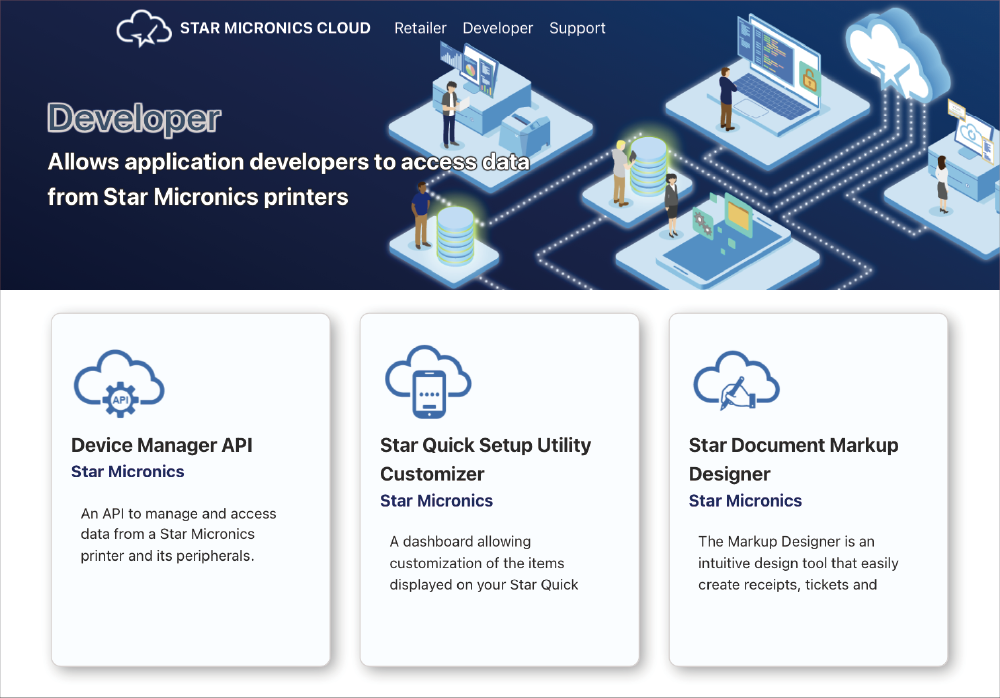
Services for developers
- The printer status and receipt printing data can be acquired by webAPI.
- The printer settings can be configured remotely by webAPI.
- The Start Quick Setup Utility display items can be customized.
A wide range of other services will be also available.
For details, please access the following website.
Setup Procedure
Follow the procedure below to perform setup.
1. Connect the printer to the Internet
2. Create a Star Micronics Cloud Services account and register a printer
3. Use Star Micronics Cloud Services
1. Connect the printer to the Internet
- Connect the printer to a network which is connected to the Internet. Connect LAN Cable
2. Create a Star Micronics Cloud Services account and register the printer
There are multiple ways to create an account and register a printer. Perform account creation and printer registration work to suit your environment.
Create and register using the printer setup screen (Web Configuration):
Primarily for users using a PC
Create and register using Star Quick Setup Utility:
Users who have already installed Star Quick Setup Utility
Create and register using a camera:
Primarily for users using a smartphone or tablet
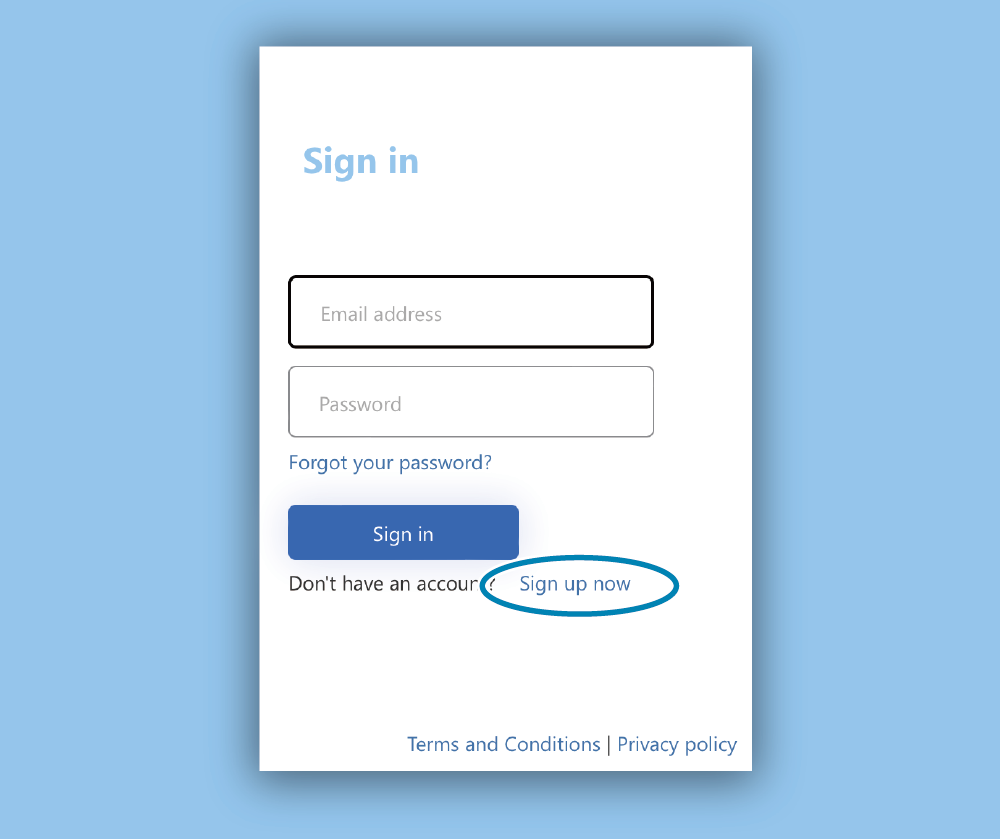
Create and register using the printer setup screen (Web Configuration):
- Check the printer IP address. Check Printer IP Address
- Open the printer settings screen (Web Configuration) via a web browser such as Google Chrome or Safari. Open Printer Settings Screen
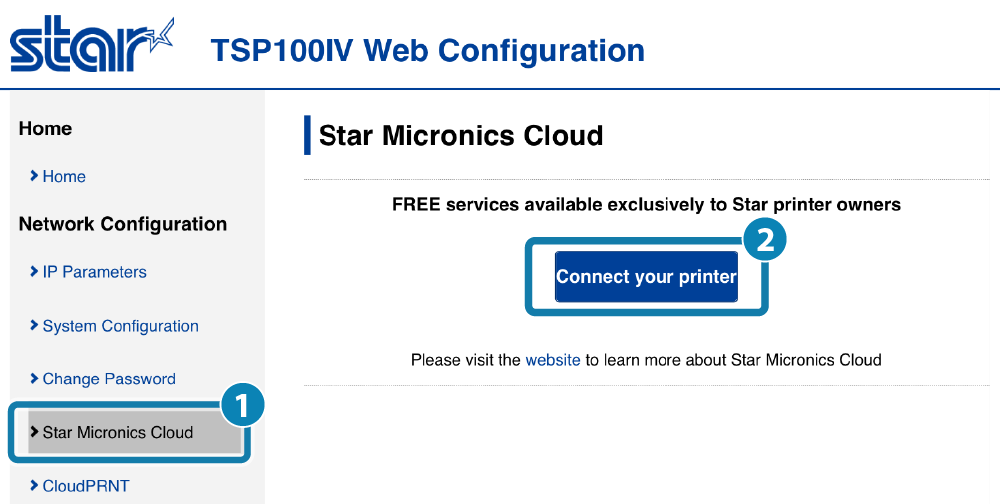
- From the menu or the menu button
 at the upper left of the screen, open [Star Micronics Cloud]
  and click or tap [Connect your printer]
  .
. - By creating an account and signing in from the account creation page of Star Micronics Cloud Services, your printer will be registered in Star Micronics Cloud Services.
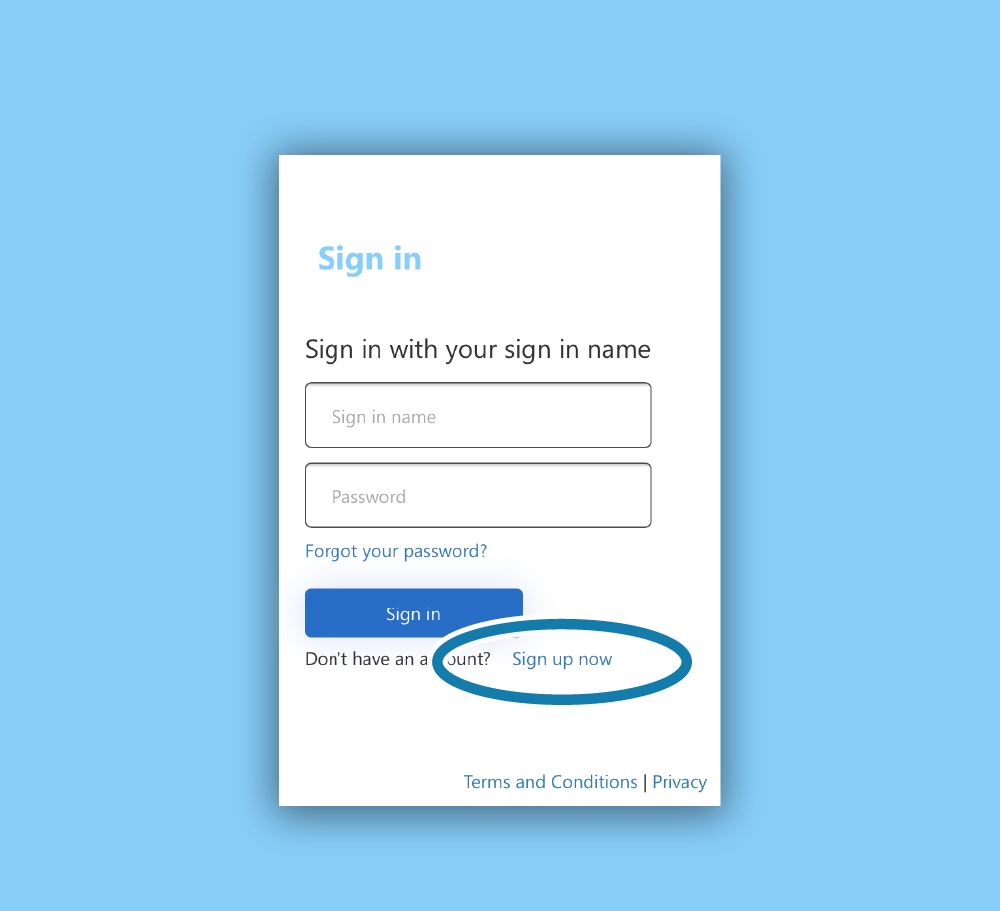
When using for the first time, start by creating an account from “Sign up now”.
Create and register using Star Quick Setup Utility:
- From Star Quick Setup Utility, open [Start Guide (Initial Settings)] - [Use Star Micronics Cloud Services], and tap [Start Registration].
- By creating an account and signing in from the account creation page of Star Micronics Cloud Services, and operating the printer as instructed on the screen, your printer will be registered in Star Micronics Cloud Services.
When using for the first time, start by creating an account from “Sign up now”.
- For details on Star Quick Setup Utility, refer to Use App.
Create and register using a camera:
- Access the following website from a smartphone or tablet that you will use.
Star Micronics Cloud Registration Website
- By creating an account and signing in from the account creation page of Star Micronics Cloud Services, and completing registration work as instructed on the screen, your printer will be registered in Star Micronics Cloud Services.
When using for the first time, start by creating an account from “Sign up now”.
3. Use Star Micronics Cloud Services
- Access Star Micronics Cloud Services website for stores or developers by using a PC*.
* The Star Micronics Cloud web services support only PC browsers. The supported browsers are Chrome, Safari, and Firefox.
Services for stores
Services for developers
Note
Change the DNS server settings if necessary depending on your environment. Advanced Settings (LAN): Setting DNS