Set Up External Devices
This product includes a USB port and a connector for driving external devices as an external device connection.
USB devices can be connected to the USB-A port for charging. You can also connect a USB-connectable product for use with the printer.
You can connect a separately sold melody speaker, buzzer, or cash drawer to the external device drive connector to operate synchronized with the printer.
USB-A port
Connector to drive external device
USB-A port
Connect the cable you use with a tablet or other USB device to the USB-A port to supply power (maximum 1.5A) to the USB device. You can also connect a USB-connectable product* for use with the printer.
* USB-connectable product: BSH-20U, BSH-20B, BSD-40U, BSH-32U, BSH-32B, SCD222U, BCR-POP1, USB HID class (keyboard mode) devices
Caution
Available only if your application (or system) supports barcode reader and customer display. Please check with your application (or system) provider for support status.
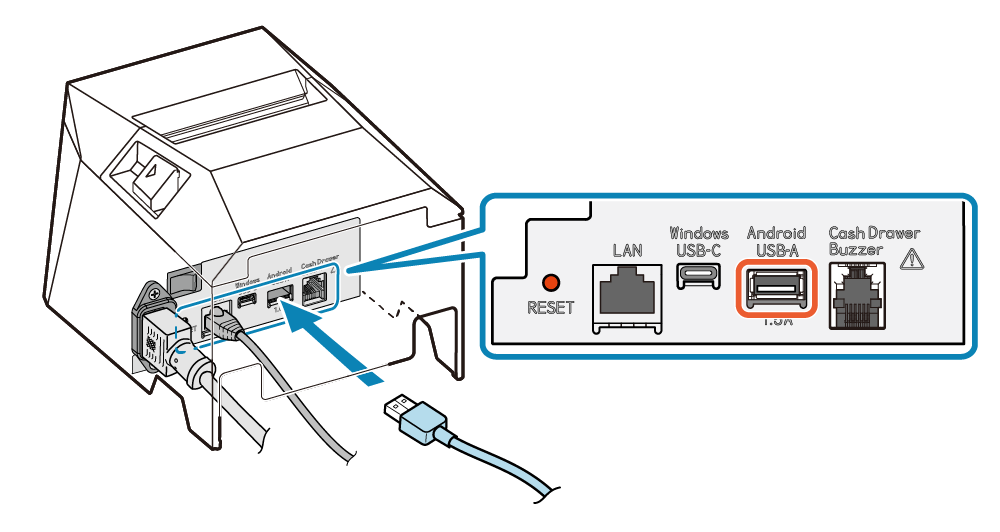
1. Connect the USB cable
- Connect the USB cable connector to the USB-A port (Android USB-A) on the back of the printer.
Note
LED Display
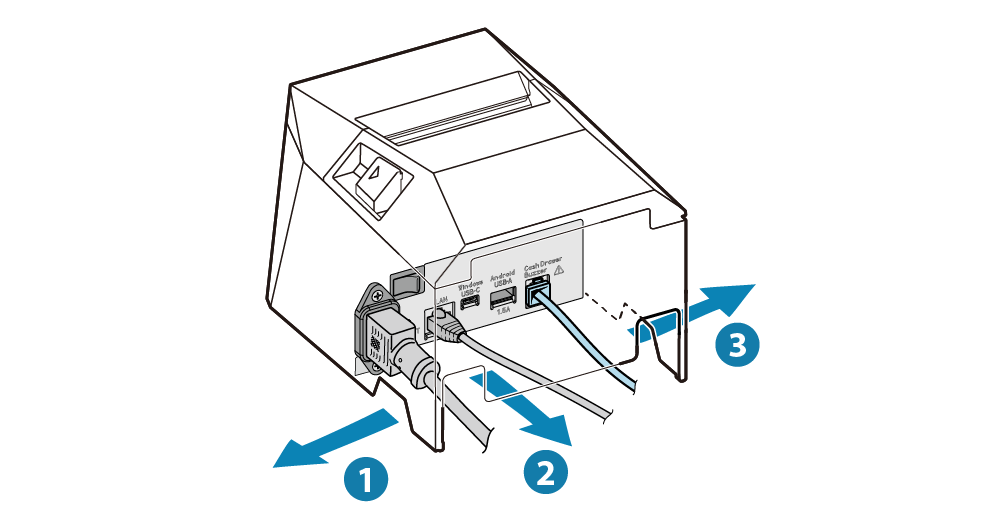
2. Route the cable
- Cable outlets are provided in 3 locations (right, left, and back), and the cable can be routed to suit the location where the device is placed.

Connector to drive external device
If you connect a separately sold melody speaker, buzzer, or cash drawer, you can make the speaker or buzzer sound, or the cash drawer open, synchronized with operation of the printer.
Settings can be performed by using commands or can also be performed by using the dedicated app or software. For details, refer to the command specifications or the corresponding manual.
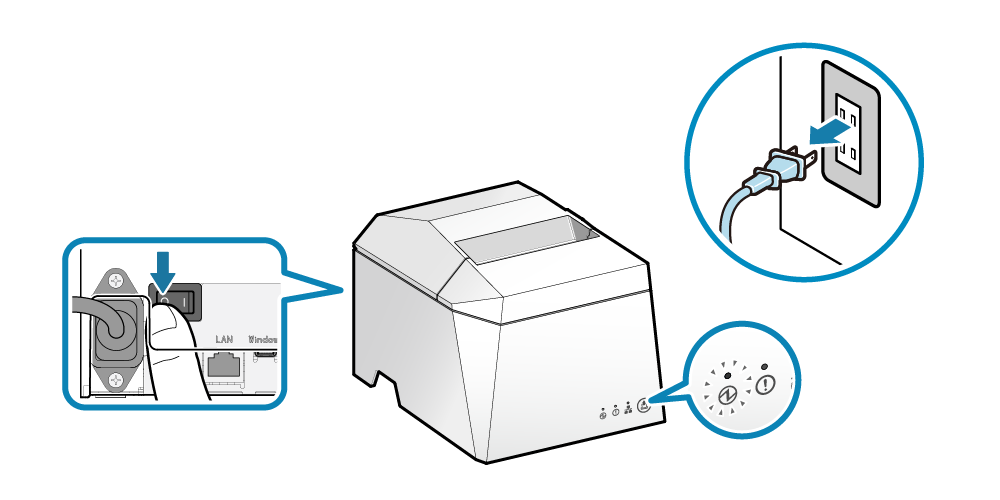
1. Turn the power off
- Turn the power of the printer off, and pull the power plug out of the electrical outlet.
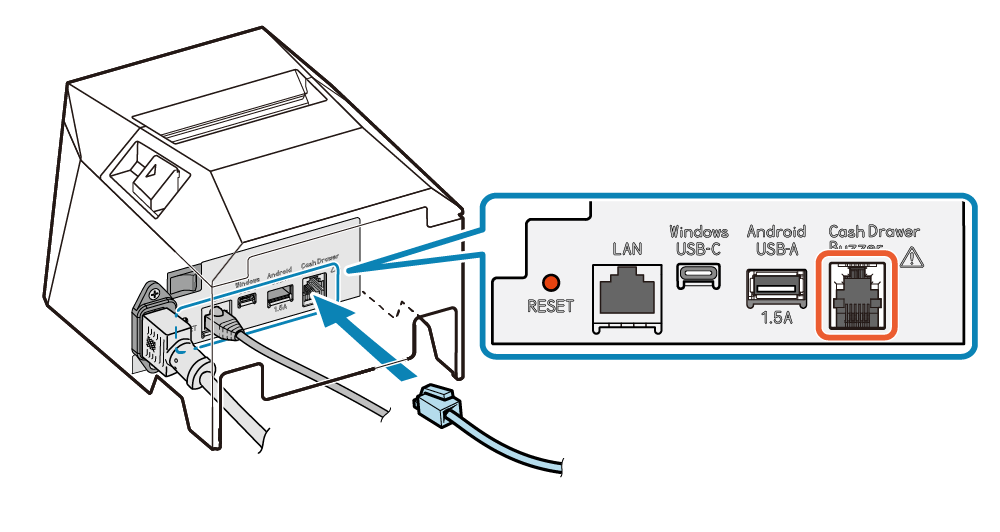
2. Connect the external device cable
- Plug the modular jack to the external device drive connector on the back of the printer.
- Cables are not included in the accessories. Use a commercially available cable or one included with the external device.
3. Route the cable
- Cable outlets are provided in 3 locations (right, left, and back), and the cable can be routed to suit the location where the device is placed.
Caution