Connect Tablet/PC
Connect (Pair) TSP100III with a tablet or a PC.
Check the name of the device beforehand
Depending on the product, the “Device Name” displayed when pairing is different, and can be checked via the printed [Dev Name] in Self-Printing.
iOS
The following steps must be performed after the power of TSP100III has been turned on. Turn power on
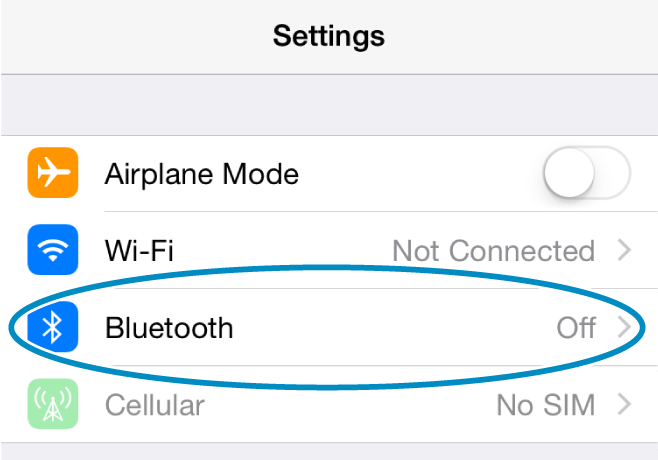
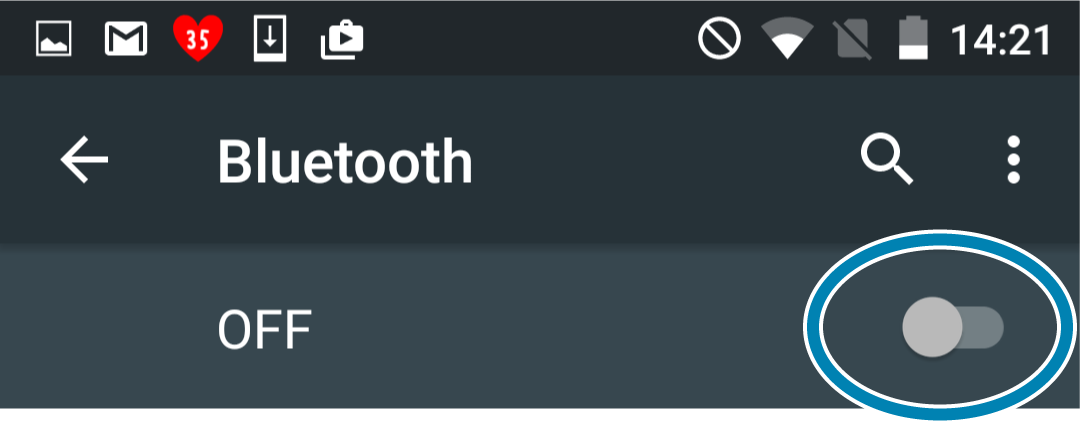
1. Turn Bluetooth on
- Open the setting screen of the tablet and select Bluetooth.
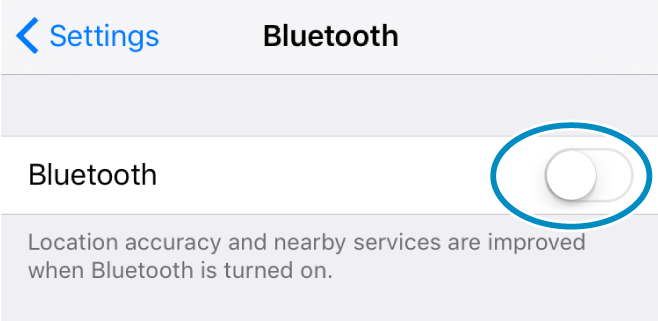
- Turn Bluetooth from Off to On.
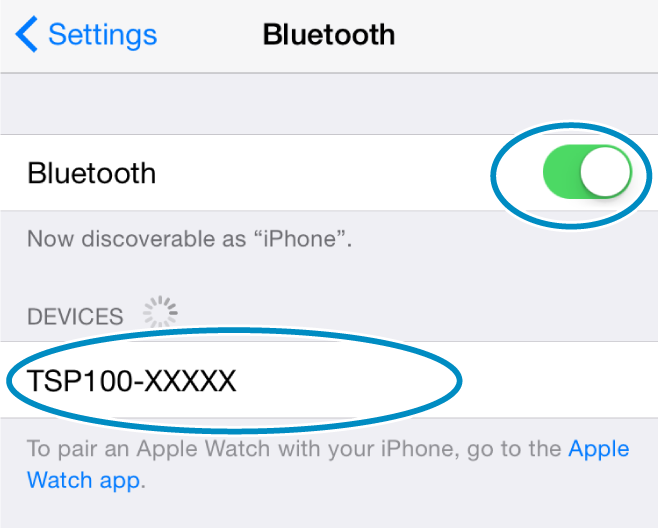
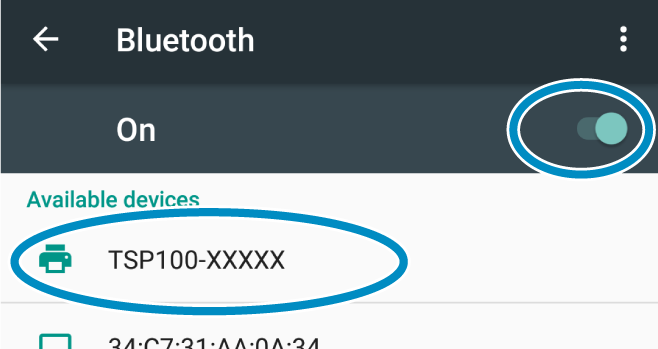
- Select the device name (TSP100-XXXXX) to connect.
If the device name was changed, then select the device name that it was changed to. - If you are unable to connect, please refer to FAQ - Cannot connect the tablet.

2. Confirm that it has connected
- When connection is completed, "Connected" will be displayed next to the device name.

Change [New Pairing Permission] setting from ON to OFF
In order to strengthen security and prevent unauthorized access from devices other than the connected tablet or PC, it is recommended that the following setting changes be made.
- Start "Star Quick Setup Utility" and display [Printer Settings]-[Bluetooth Settings].
- Turn the [New Pairing Permission] setting from ON to OFF, and tap [Apply].
For details on Star Quick Setup Utility, refer to Use App.
Important notes when [New Pairing Permission] is set to OFF
When [New Pairing Permission] is set to OFF, because it is in a state where security is increased, re-pairing with already connected tablets and new pairing with other tablets are not allowed.
If [New Pairing Permission] is set to OFF, you must go to the [Settings] screen for the already connected tablet and perform "Forget Device".
If you accidentally delete the device, then perform Initialize Bluetooth and re-pair the tablet again.
If you wish to perform a new pairing, then change the [New Pairing Permission] setting from OFF to ON in the "Star Quick Setup Utility" [Printer Settings]-[Bluetooth Setting] and tap [Apply].
For details on Star Quick Setup Utility, refer to Use App.
Android
The following steps must be performed after the power of TSP100III has been turned on. Turn power on
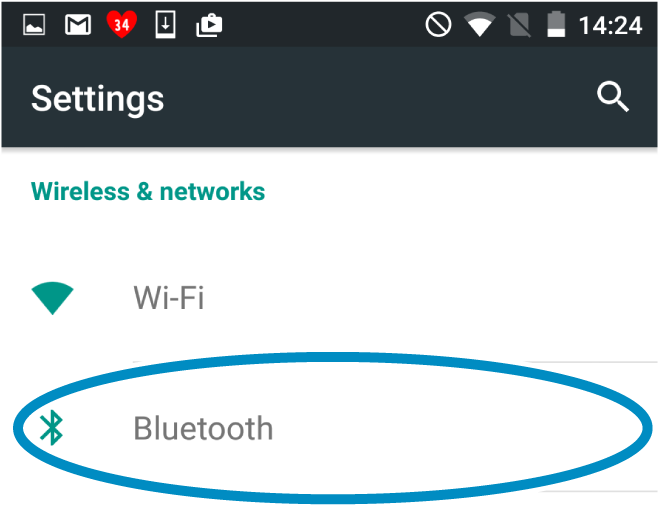
1. Turn Bluetooth ON
- Open the setting screen of the tablet.
- Select Bluetooth.
- Turn Bluetooth from Off to On.
- Select the device name (TSP100-XXXXX) to connect.
If the device name was changed, then select the device name that it was changed to. - If you are unable to connect, please refer to FAQ - Cannot connect the tablet.

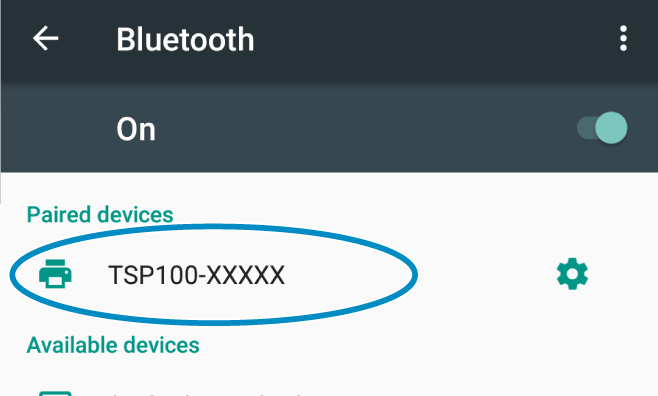
2. Confirm that it has connected
- Once pairing is complete the device name will be displayed under “Paired devices”.
Change [New Pairing Permission] setting from ON to OFF
In order to strengthen security and prevent unauthorized access from devices other than the connected tablet or PC, it is recommended that the following setting changes be made.
- Start "Star Quick Setup Utility" and display [Settings]-[Bluetooth Settings].
- Turn the [New Pairing Permission] setting from ON to OFF, and tap [Apply].
For details on Star Quick Setup Utility, refer to Use App.
Important notes when [New Pairing Permission] is set to OFF
When [New Pairing Permission] is set to OFF, because it is in a state where security is increased, re-pairing with already connected tablets and new pairing with other tablets are not allowed.
If [New Pairing Permission] is set to OFF, you must go to the [Settings] screen for the already connected tablet and perform "Forget Device".
If you accidentally delete the device, then perform Initialize Bluetooth and re-pair the tablet again.
If you wish to perform a new pairing, then change the [New Pairing Permission] setting from OFF to ON in the "Star Quick Setup Utility" [Settings]-[Bluetooth Setting] and tap [Apply].
For details on Star Quick Setup Utility, refer to Use App.
Windows
The following steps must be performed after the power of TSP100III has been turned on. Turn power on
Windows11 / 10
1. Turn Bluetooth ON
Windows11
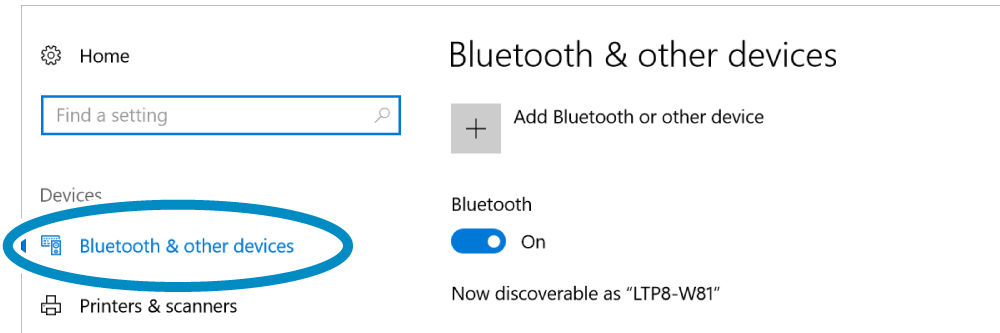
- Open [Settings] from the Windows Start menu, select [Bluetooth & devices] - [Devices].
Windows10
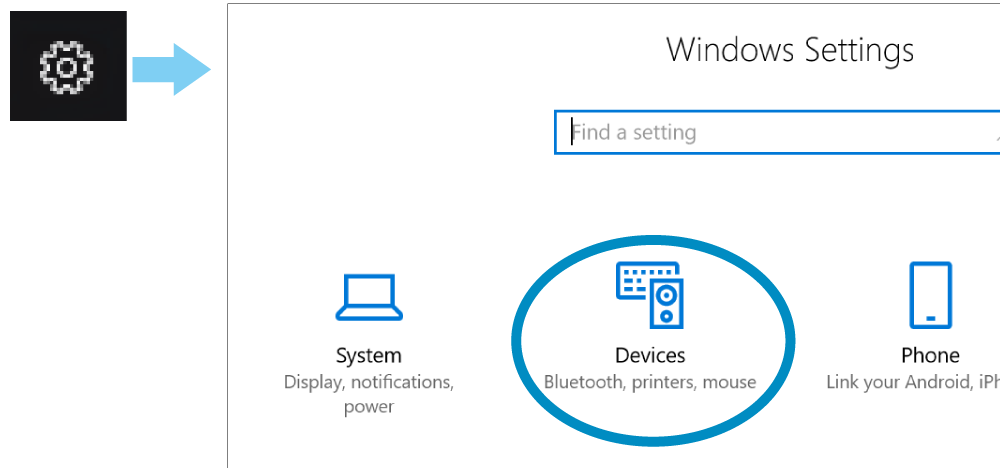
- Open [Settings] from the Windows Start menu, select [Devices] - [Bluetooth].
- Turn Bluetooth On.
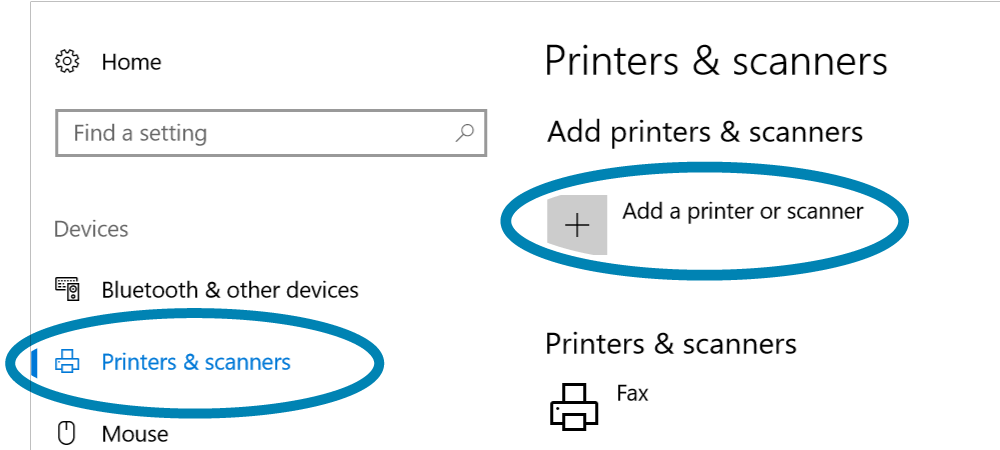
- Select [Printers & scanners] - [Add a printer or scanner].
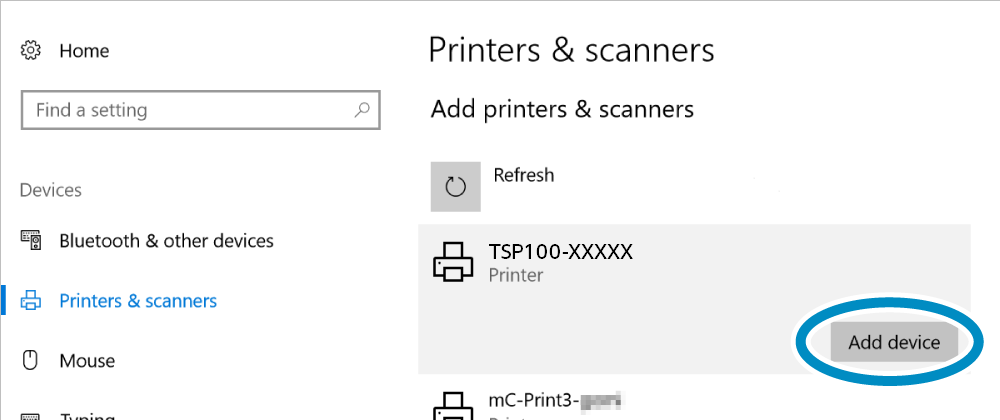
- Select the desired device name (TSP100-XXXXX) , and click or tap [Add device].
If the device name was changed, then select the device name that it was changed to. - If you are unable to connect, please refer to FAQ - Cannot connect the tablet.

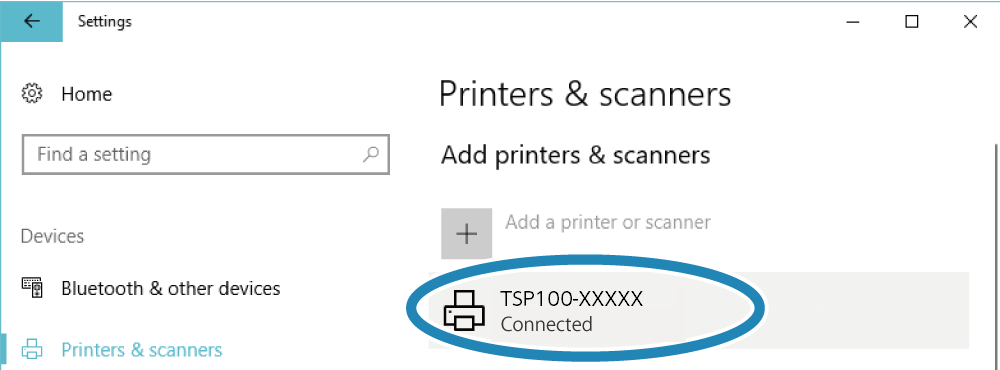
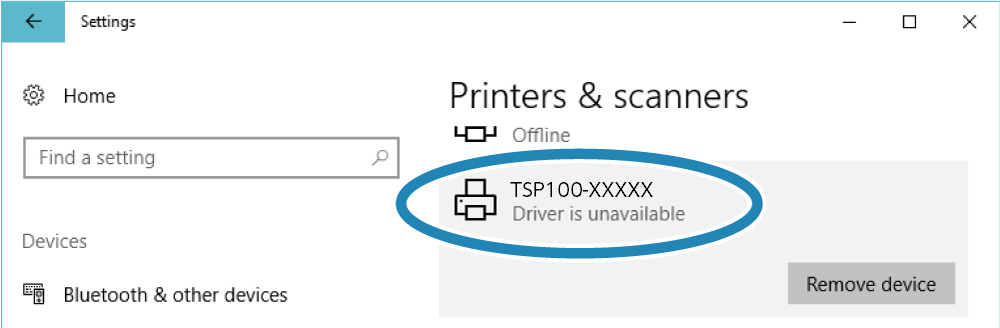
2. Confirm that it has connected
- When connection is completed, "Connected" will be displayed.
Note
After a while, "Driver is unavailable" will be displayed, however pairing is completed.
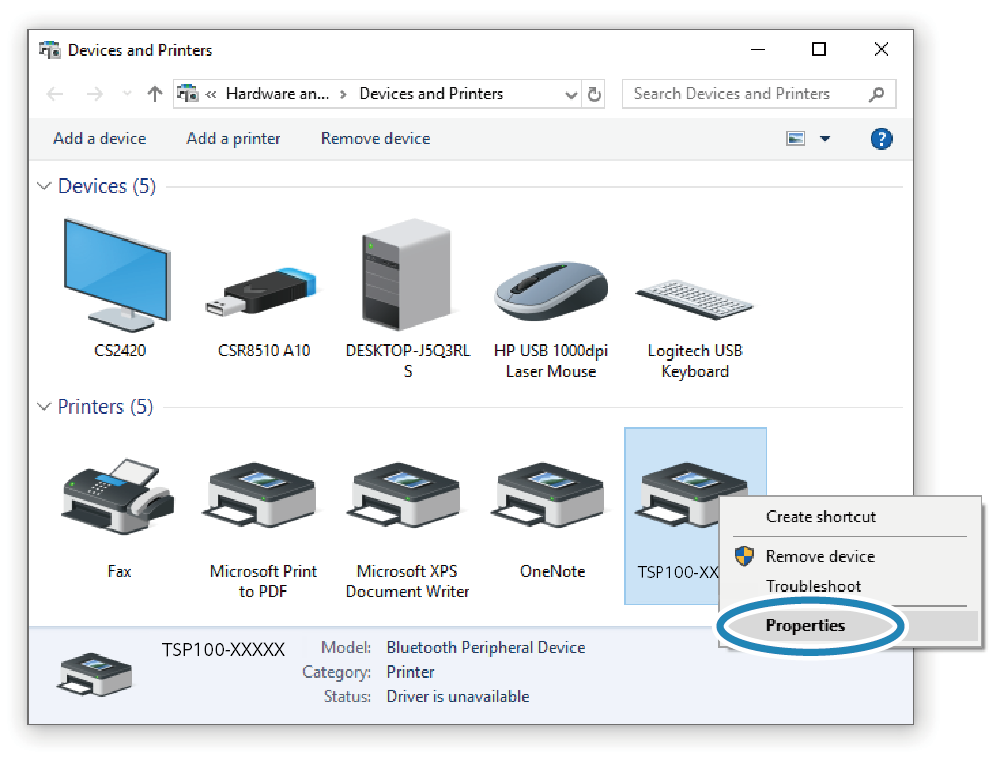
3. Confirm the virtual COM port
- The virtual COM port is required when creating a printer queue using "Star Windows Software".
For details of "Star Windows Software", refer to Use App. - Open [Windows (System) Tools] - [Control Panel] from "All apps" in the start menu, start "Devices and Printers". Select the desired printer, right click and select the "Properties".
- Confirm the connected virtual COM port on the "Hardware" tab.
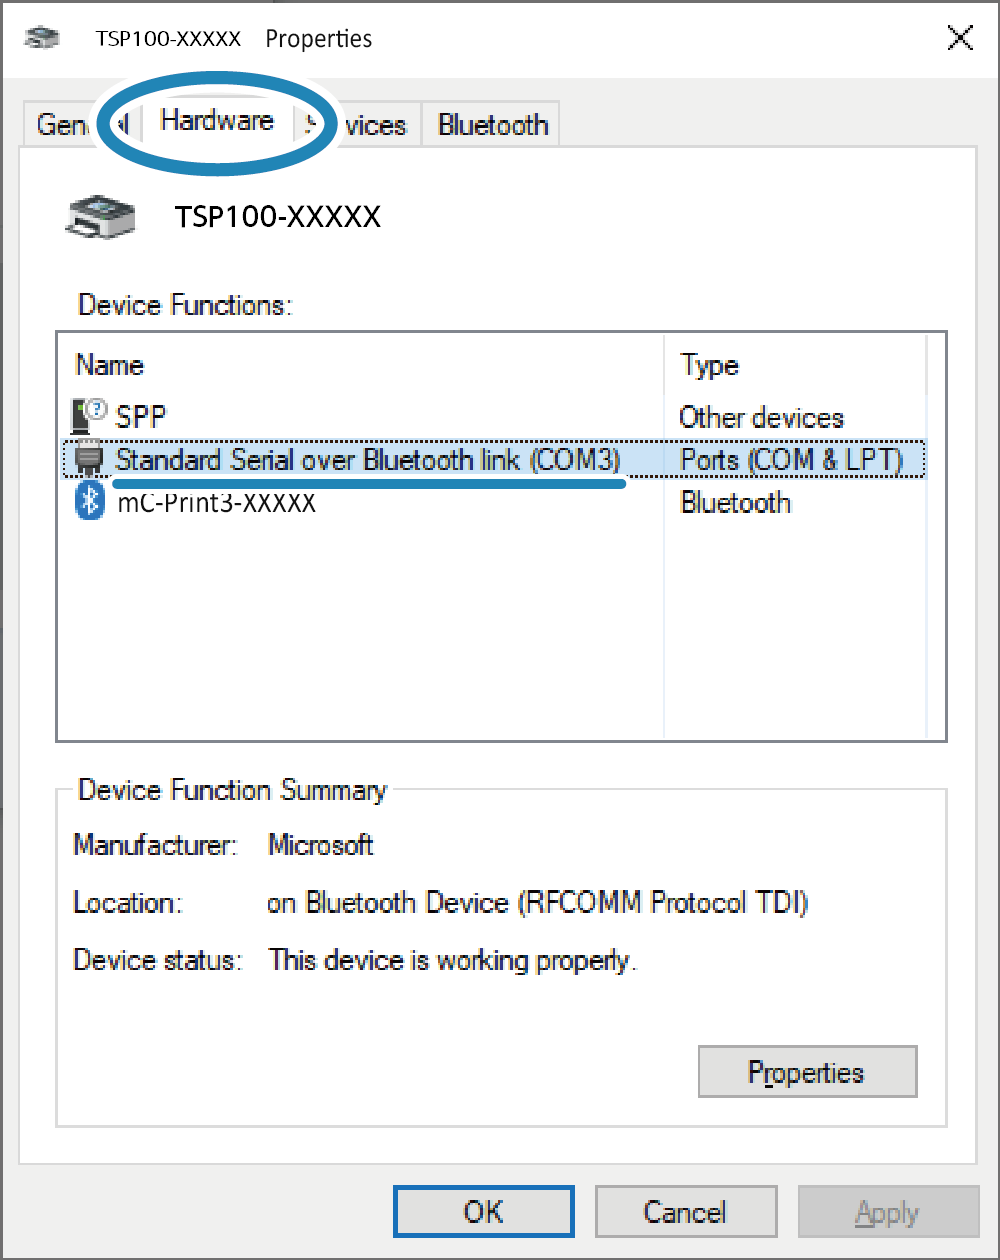
The device name created here cannot be used for the destination specified when printing from a Windows application. Create a separate printer queue using "Star Windows Software".
For details on "Star Windows Software", refer to Use App.
Change the [New Pairing Permission] setting to OFF
In order to strengthen security and prevent unauthorized access from devices other than the connected tablet or PC, it is recommended that the following setting changes be made.
- From the “TSP100 LAN/Bluetooth Setting Tool” select the printer and tap or click on [Configuration].
- Remove the check from “Enable new pairing permission” and tap or click on [Apply].
For details on "TSP100 LAN/Bluetooth Setting Tool", refer to Use App.
Important notes when [New Pairing Permission] is set to OFF
When [New Pairing Permission] is set to OFF, since it is in a state where security is increased, re-pairing with already connected tablets/PCs and new pairings with other tablets are not allowed.
If [New Pairing Permission] is disabled, do not perform “Remove Device” from connected (paired) tablets or PCs.
If you accidentally delete the device, then perform Initialize Bluetooth and re-pair the tablet again.
To perform a new pairing operation, check [Enable new pairing permission] from [Configuration] in the “TSP100 LAN/Bluetooth Setting Tool”, and tap or click on [Apply].
For details on "TSP100 LAN/Bluetooth Setting Tool", refer to Use App.
Windows 7/8.1
1. Pairing
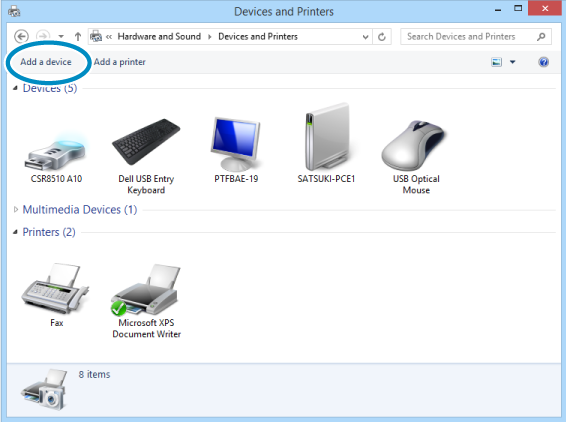
- Open the control panel from the start menu.
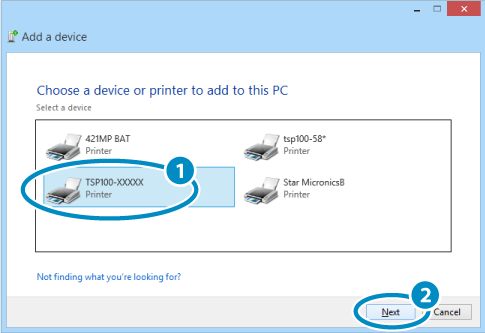
- Start "Device and Printers" and tap or click "Add a device".
- Select the device name (TSP100-XXXXX) to be removed and tap or click "Next".
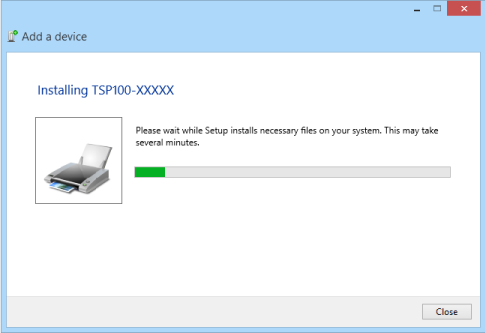
If the device name was changed, then select the device name that it was changed to. - Pairing is then performed.
- If you are unable to connect, please refer to FAQ - Cannot connect the tablet.
2. Confirm that it has connected
- When pairing is completed, the name of device added will be displayed in “Devices and Printers”.
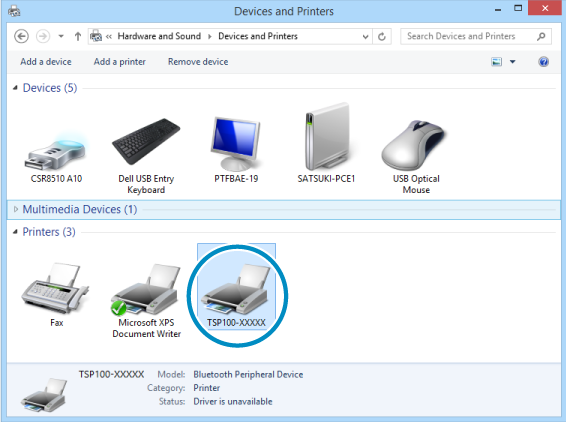
Note
Depending on the display method, "Driver is unavailable" will be displayed, however pairing is completed.
The device name created here cannot be used for the destination specified when printing from a Windows application.
Create a separate printer queue using the “TSP100 LAN/Bluetooth Setting Tool".
For details on "TSP100 LAN/Bluetooth Setting Tool", refer to Use App.
Change the [New Pairing Permission] setting to OFF
In order to strengthen security and prevent unauthorized access from devices other than the connected tablet or PC, it is recommended that the following setting changes be made.
- From the “TSP100 LAN/Bluetooth Setting Tool” select the printer and tap or click on [Configuration].
- Remove the check from “Enable new pairing permission” and tap or click on [Apply].
For details on "TSP100 LAN/Bluetooth Setting Tool", refer to Use App.
Important notes when [New Pairing Permission] is set to OFF
When [New Pairing Permission] is set to OFF, since it is in a state where security is increased, re-pairing with already connected tablets/PCs and new pairings with other tablets are not allowed.
If [New Pairing Permission] is disabled, do not perform “Remove Device” from connected (paired) tablets or PCs.
If you accidentally delete the device, then perform Initialize Bluetooth and re-pair the tablet again.
To perform a new pairing operation, check [Enable new pairing permission] from [Configuration] in the “TSP100 LAN/Bluetooth Setting Tool”, and tap or click on [Apply].
For details on "TSP100 LAN/Bluetooth Setting Tool", refer to Use App.