Paper Setup
Use paper that meets the specifications of the printer. Paper Roll Specifications
1. Turn power on
- Set paper with the power turned on to automatically feed and cue the paper.
- If the printer is out of paper, the Power LED flashes red.
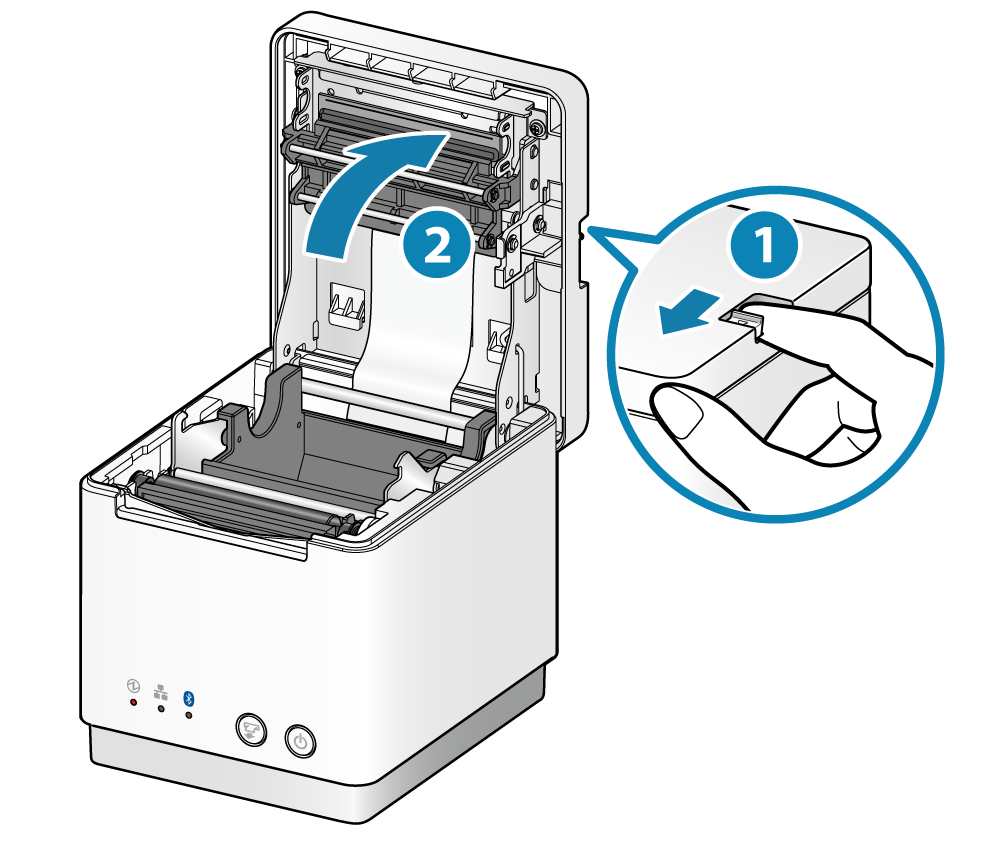
2. Open printer cover
- Pull the opening lever
 to open the printer cover
  .
.
Caution
- When replacing paper, remove the paper core remaining in the paper roll holder.
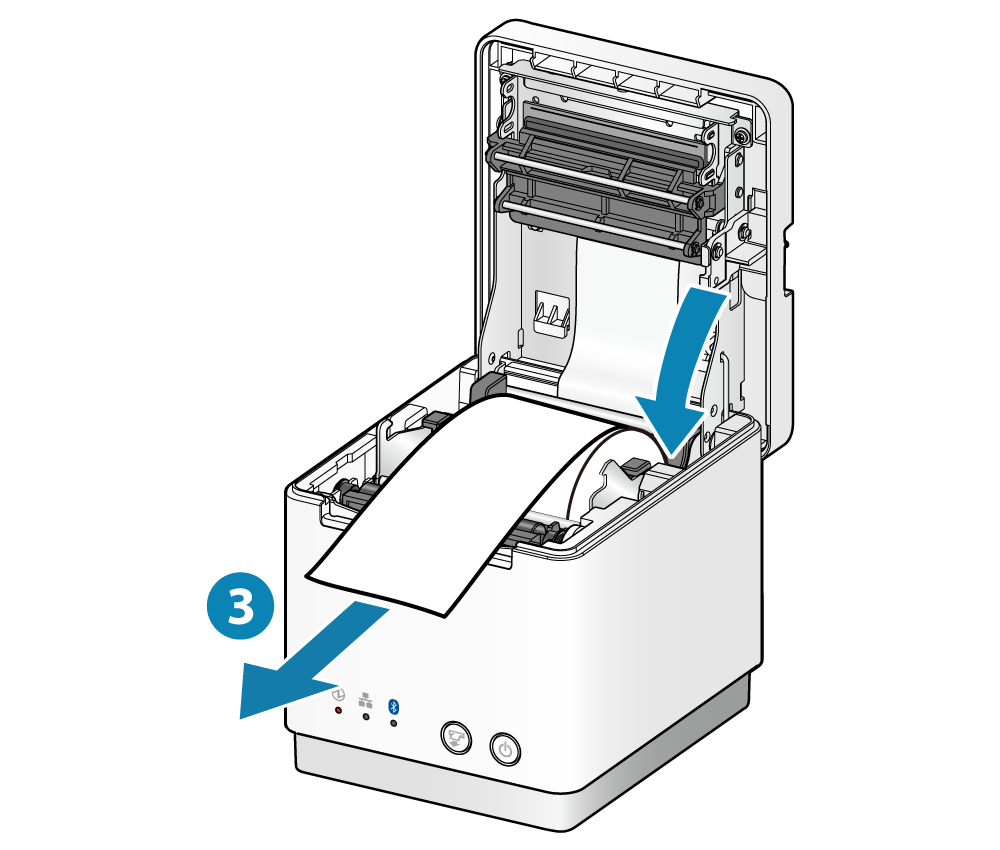
3. Set paper
- Set the paper roll in the direction as shown in the illustration.

Note
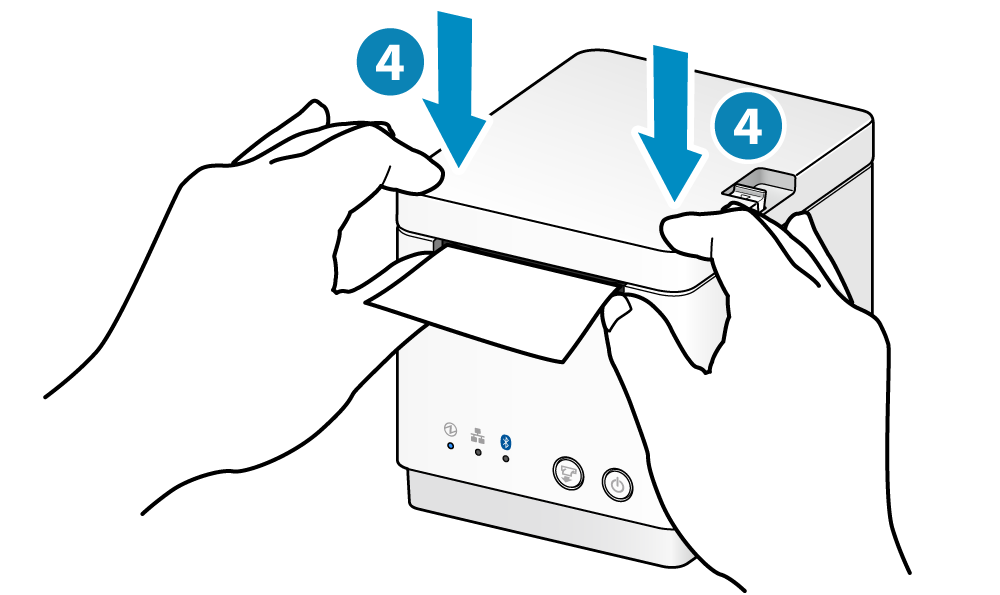
4. Close printer cover
- Pull the end of the paper straight out
 , sandwich the paper and close the printer cover .
 - Press down on both sides of the printer cover as shown below to close the printer cover
 .
.
The setting is completed when the paper is cut automatically.
Note
Paper Roll Specifications
Use paper roll that complies to the following specifications.
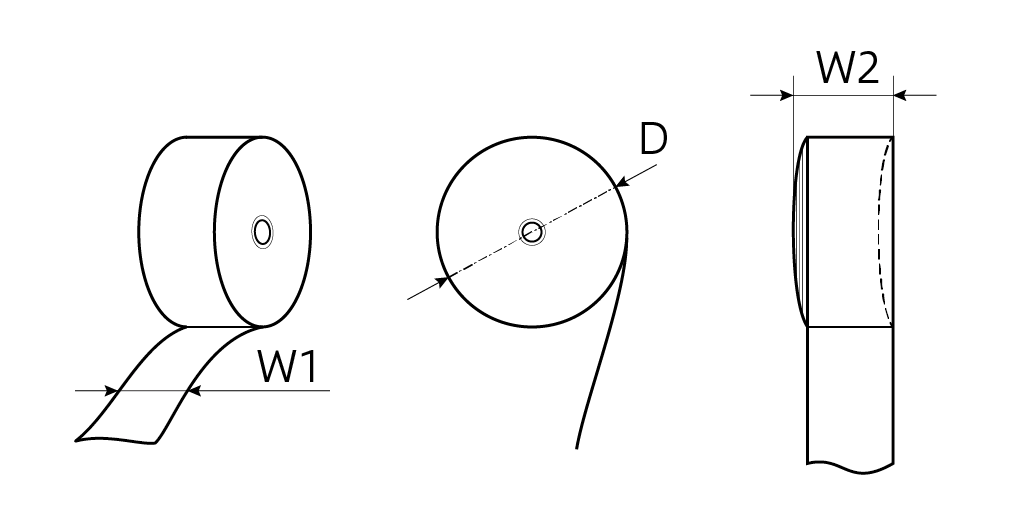
| Paper width (W1) | 57.5±0.5 (mm) |
|---|---|
| Maximum roll diameter (D) | φ50 (mm) |
| Curling dimension (W2) | 58.0 + 0.5, -1 (mm) |
| Paper thickness | 53 to 75 (µm) |
| Axial | Inner diameter: φ12±1 (mm) Outer diameter: φ18±1 (mm) |
| Color surface | Roll exterior |
| Termination process |
For recommended paper rolls, refer to List of recommended paper rolls.