Paper Setup
Use paper that meets the specifications of the printer. Paper Roll Specifications
Caution
There is a printer head inside the printer that becomes hot during printing or right after printing. Do not touch the printer head when opening or closing the printer cover.

1. Turn power on
- Set the paper with the power on to automatically feed or cue paper.
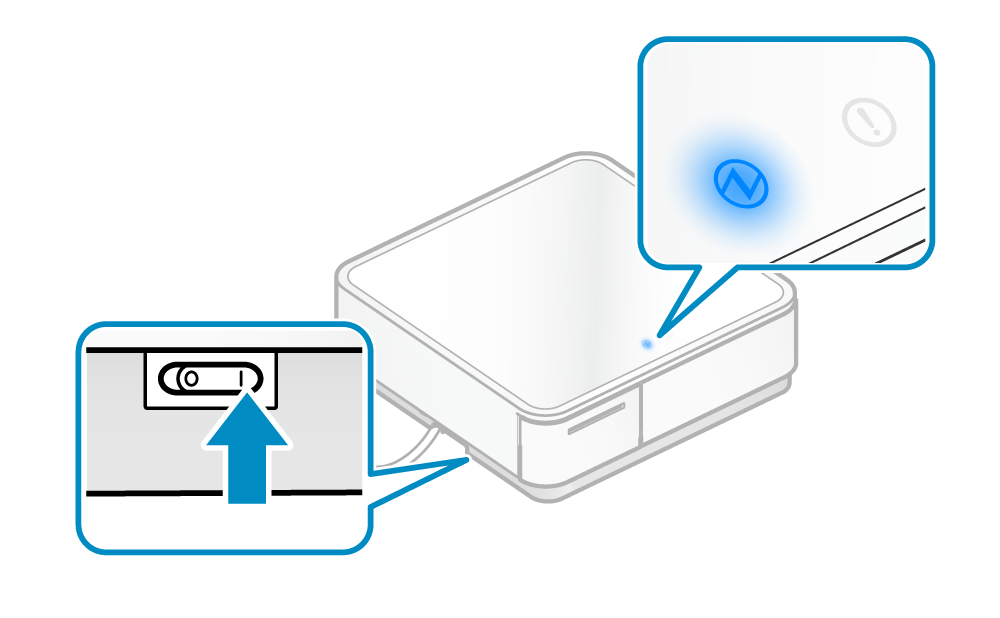
In the POP10CBI, the PowerLED will be displayed in green when Bluetooth is not connected.
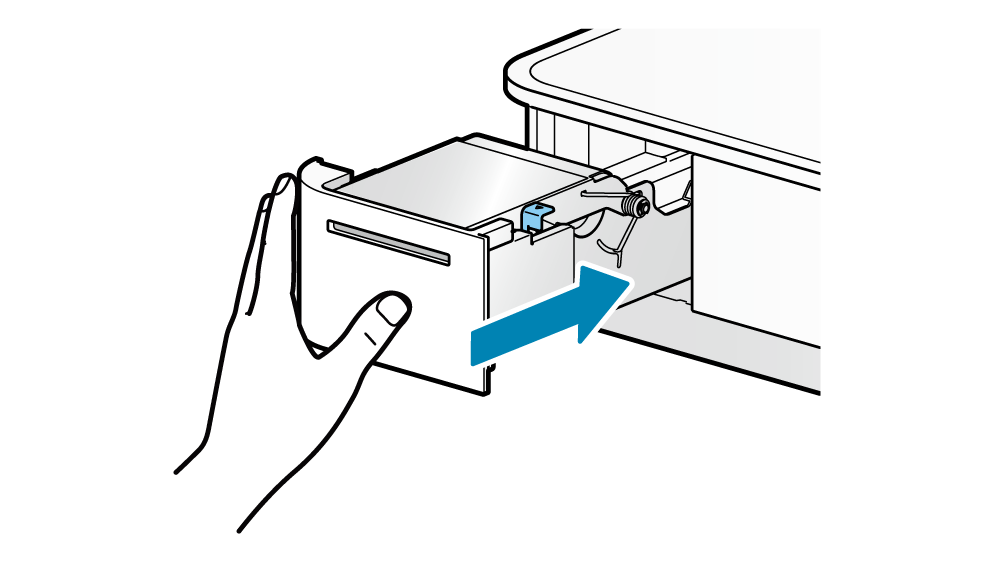
2. Pull out printer
- Push the front face of the printer to unlock
 and pull out the printer
 .
.
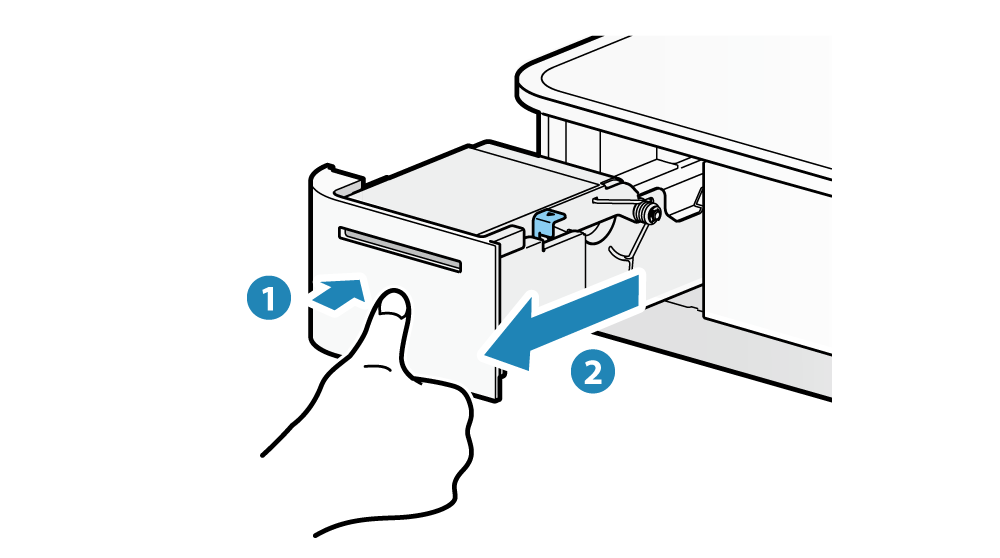
Caution
Pull out the printer fully. It may damage mPOP.
3. Open printer cover
- Pull the cover opening lever forward to open the printer cover.
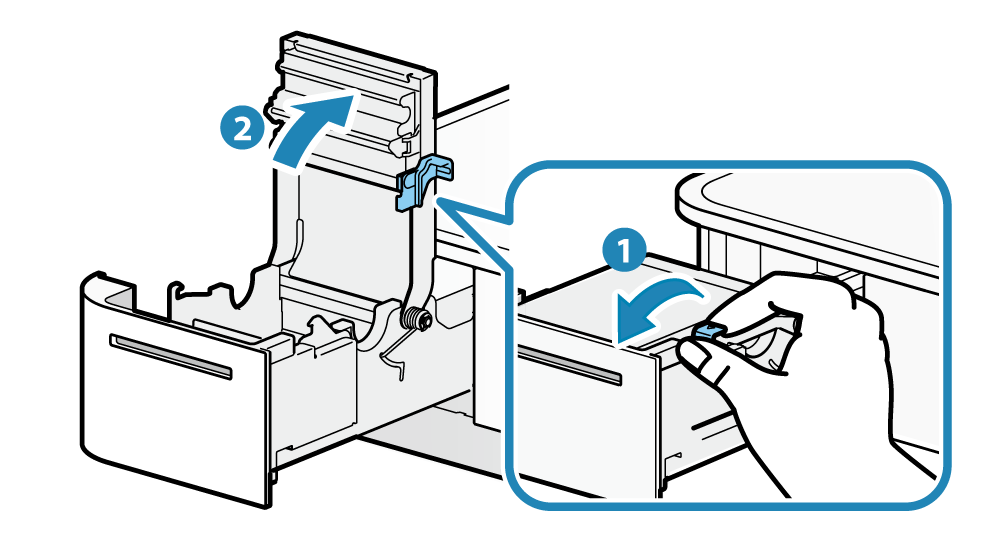
Caution
When replacing paper, remove the paper core remaining in the paper roll holder.
4. Paper setup
- Set the paper roll in the direction as shown in the illustration.

5. Close printer cover
- Pull the end of the paper straight out, sandwich the paper and close the printer cover.
The setting is completed when the paper is cut automatically.
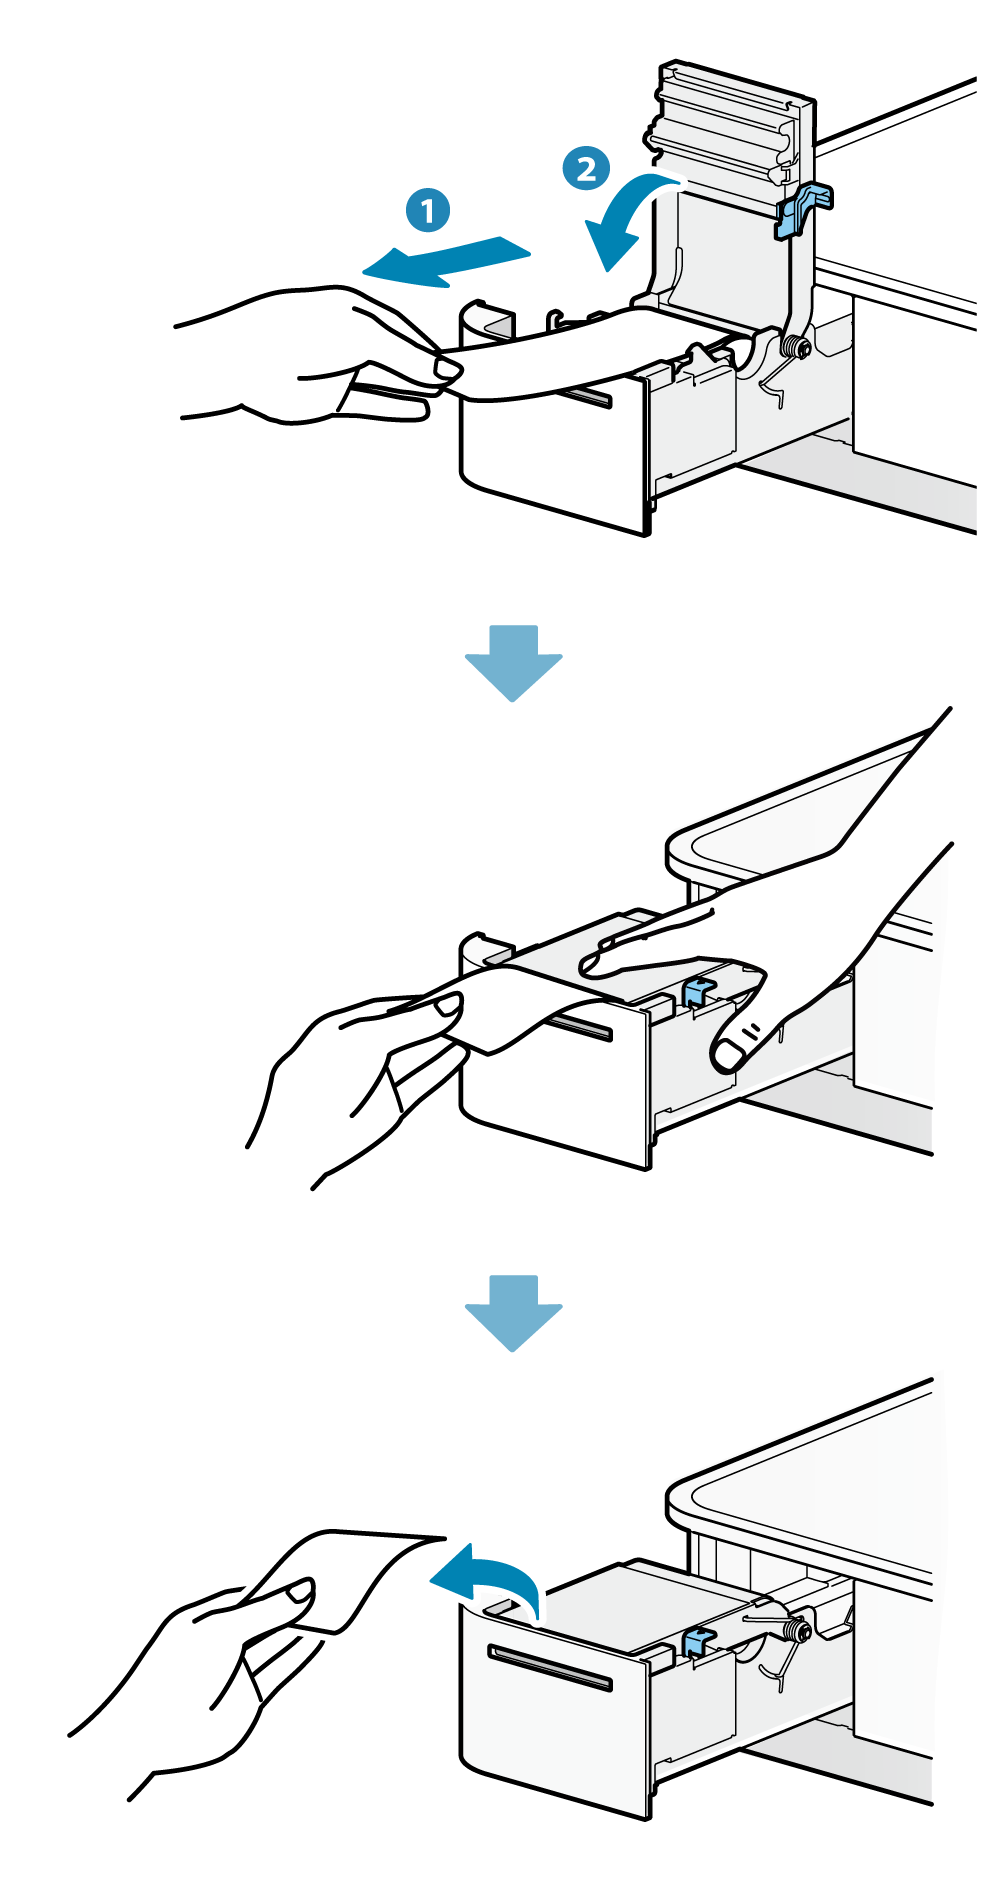
Note
Remove the cut paper. It may cause a paper jam.
6. Return the printer to its original position
- Push the printer until it locks with a clicking sound.
- Confirm that the LED display is in standby.
Paper Roll Specifications
Use paper roll that complies to the following specifications.
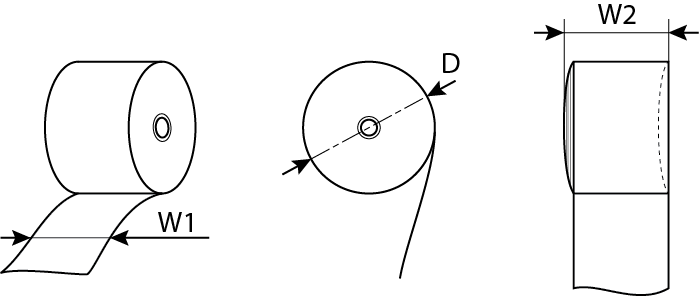
| Paper width (W1) | 57.5±0.5 (mm) |
|---|---|
| Maximum roll diameter (D) | φ50 (mm) |
| Curling dimension (W2) | 58.0+0.5,-1 (mm) |
| Paper thickness | 53~75 (μm) |
| Axial | Inner diameter: φ12±1 Outer diameter: φ18±1 (mm) |
| Thermal Printing Surface | Wound on outside of paper roll |
| Termination process | Do not glue the paper roll and axial wrapper. |
For recommended paper rolls, refer to List of recommended paper rolls.