Set Up mPOP
Secure mPOP to prevent it from falling.
The following steps must be performed when the power of mPOP is off.
Use mounting bracket (included) to secure
Use mount kit (option) to secure
Attach security cable (commercially available)
Use mounting bracket (included) to secure
1. Determine the position it will be secured
- Select a flat location where mPOP will be placed (and secured).
2. Attach mounting bracket
Secure the bracket using the tape affixed to the bottom of the bracket or the accessory screws.
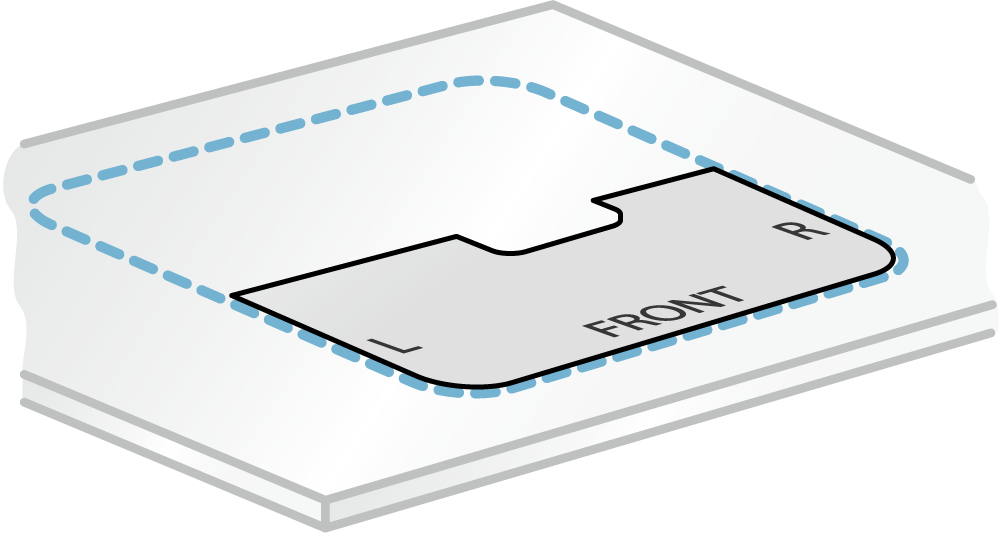
Securing with tape
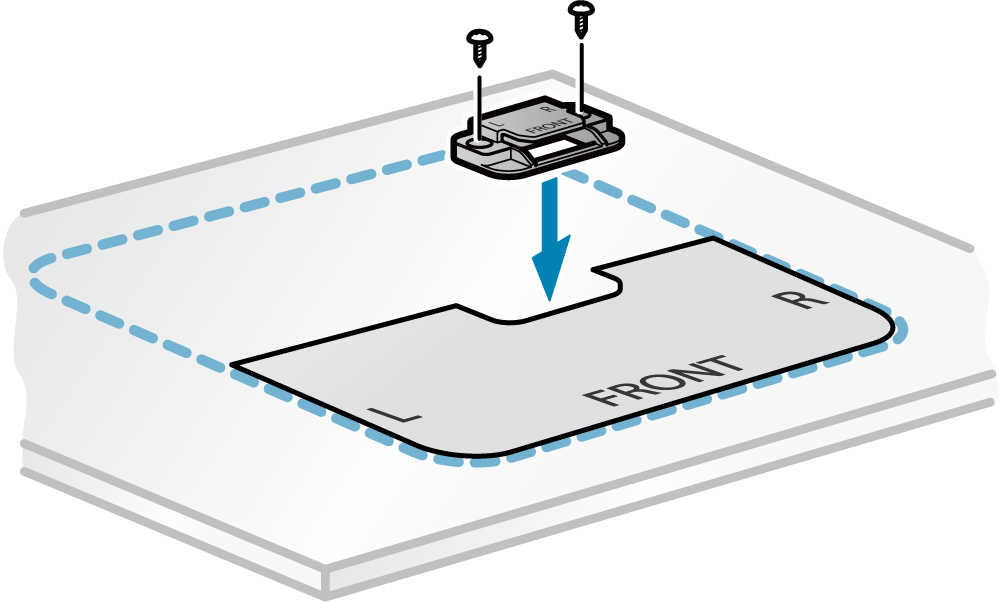
- Place the template so that the front of the board (side with "FRONT") and the front of where it will be positioned are matched.
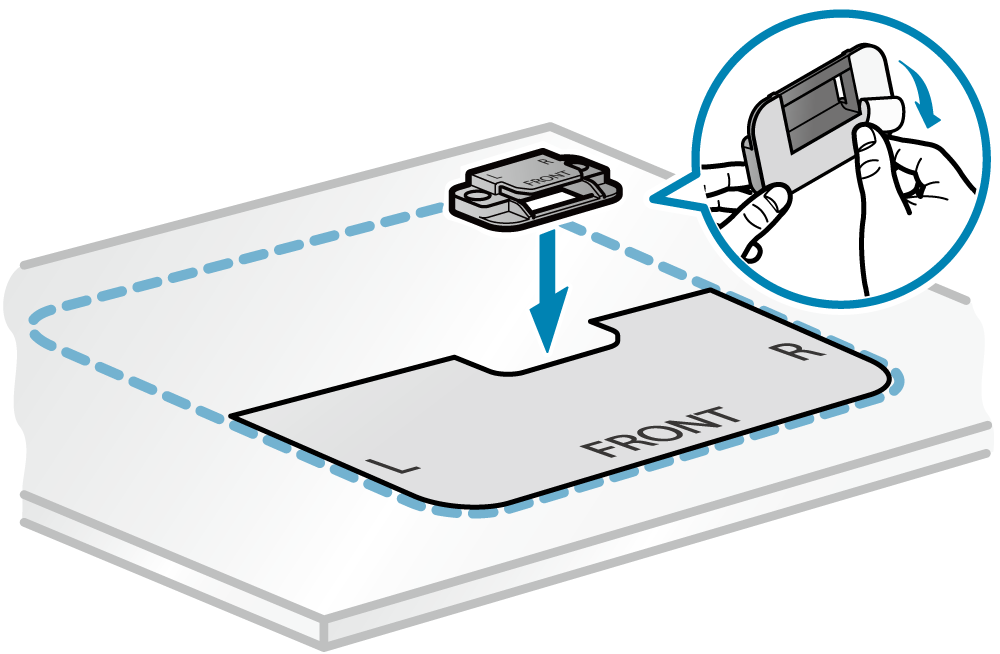
- Position the bracket so that "FRONT" displayed on the bracket and the template are both facing the same direction.
- Peel off the tape releasing paper on the bottom of the bracket and secure the bracket along the template. Be very careful with this step as the adhesive is very strong.
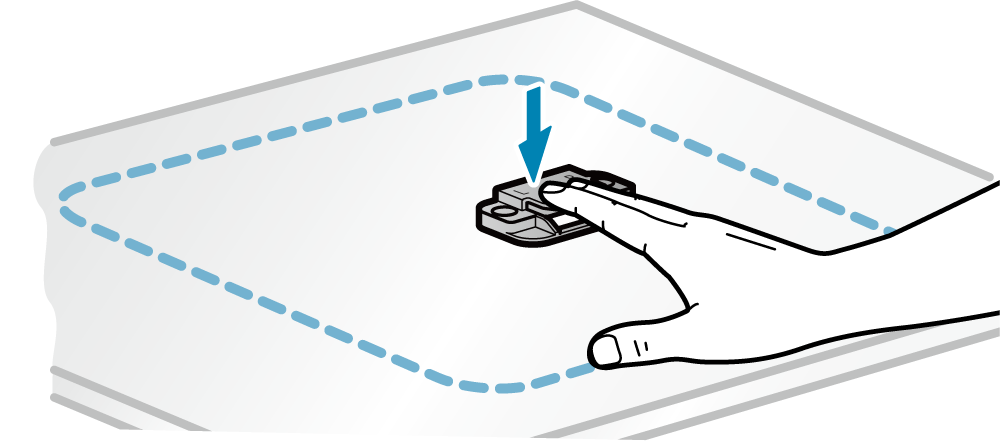
- Hold the bracket down so that the tape adheres firmly to the surface.
- Remove the template
Securing with screws
- Place the template so that the front of the board (side with "FRONT") and the front of where it will be positioned are matched.
- Position the bracket with the template Position the bracket so that the "FRONT" displayed on the bracket and the template are both facing the same direction.
- Secure with two accessory screws.
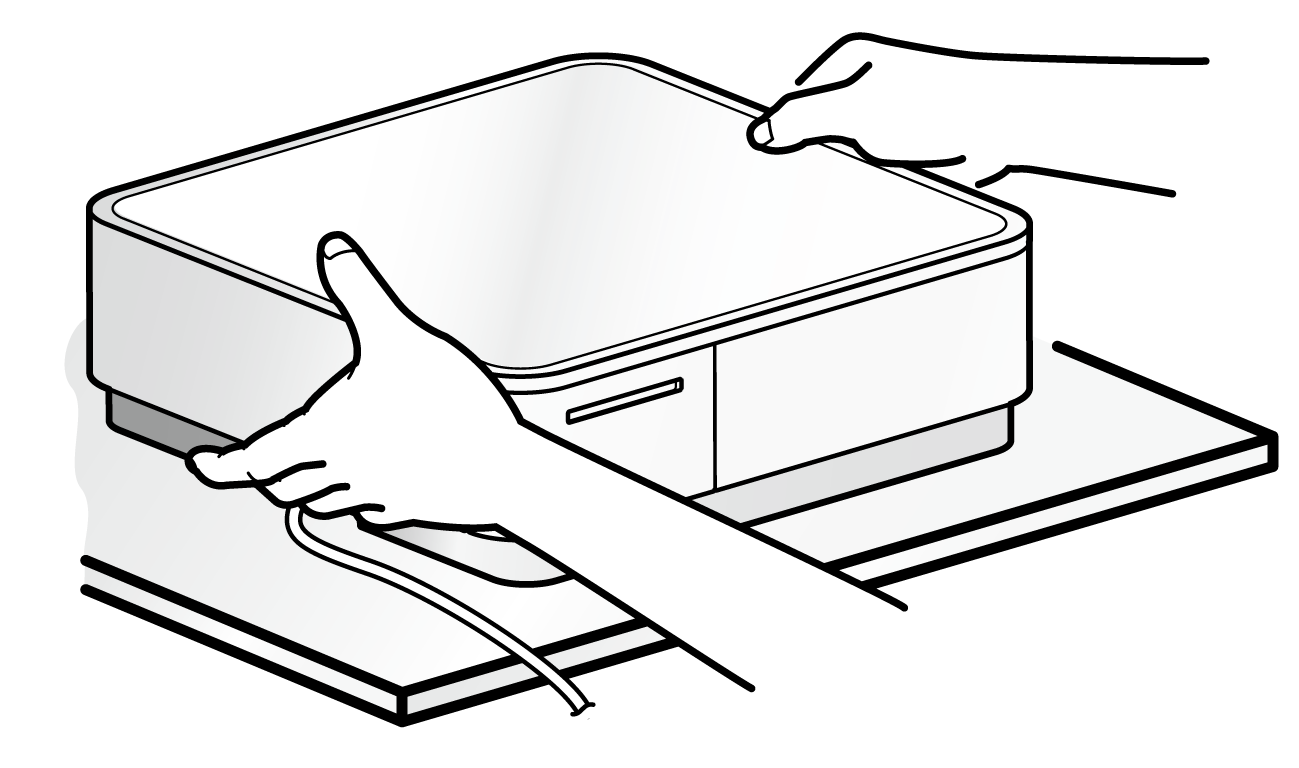
3. Set up mPOP
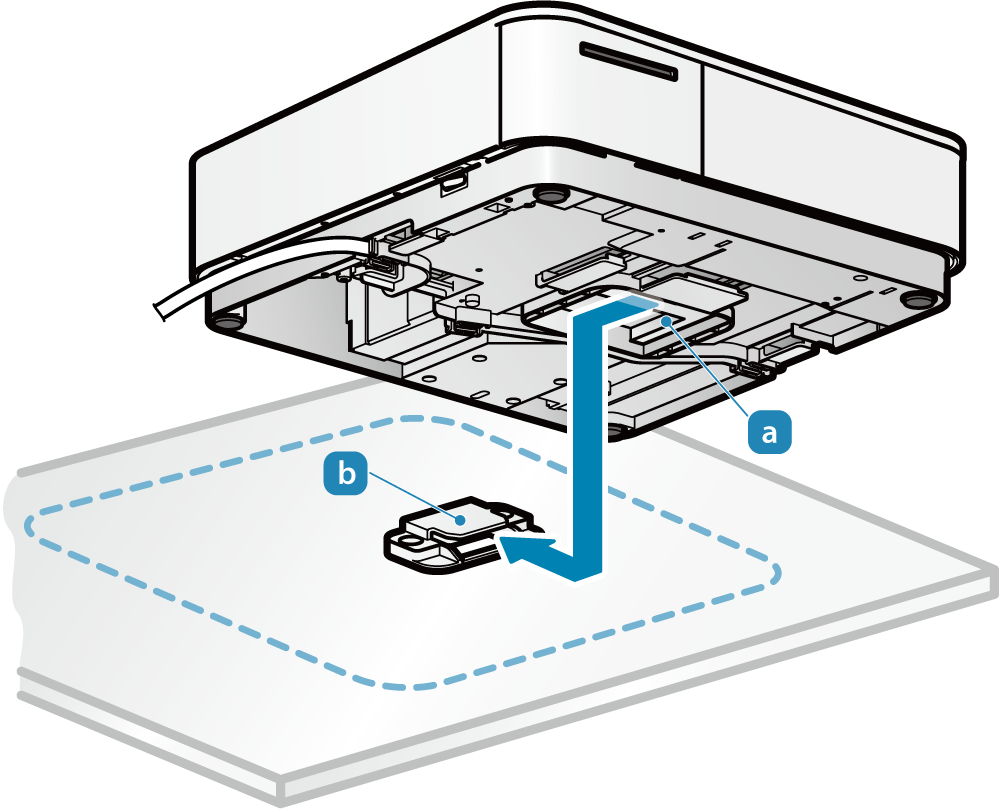
- Confirm the position of the slot for the mounting bracket
 located along the bottom.
 - Position mPOP so that the slot for the mounting bracket is in front of the hook section for the bracket
 .
.
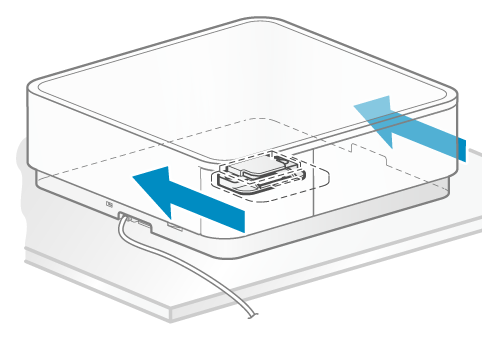
4. Secure mPOP by sliding
- Slide mPOP towards the back so that the bracket hook is inserted in the slot and is secured.
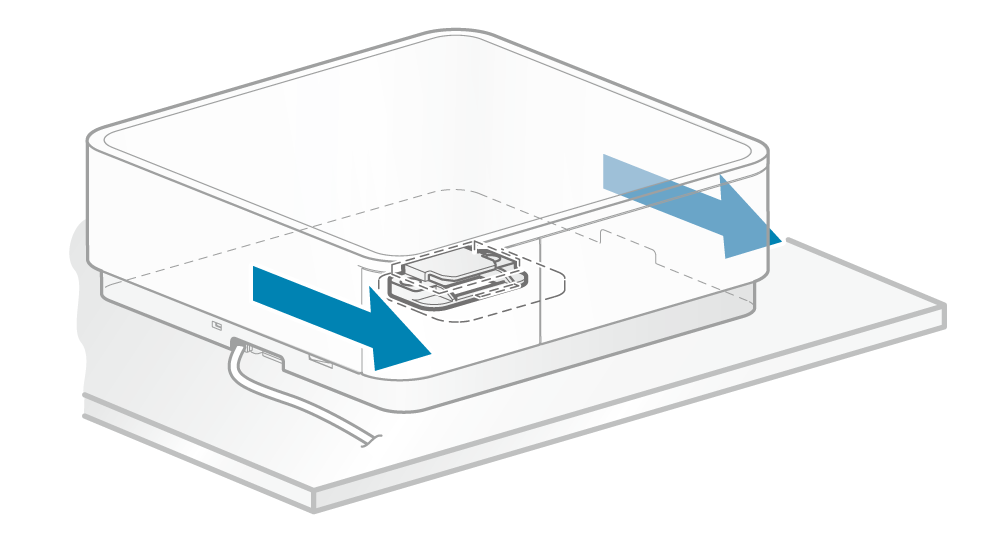
Note: When removing from the bracket
Slide mPOP to the front in order to remove it from the hook section of the bracket.
Use mount kit (option) to secure
Note
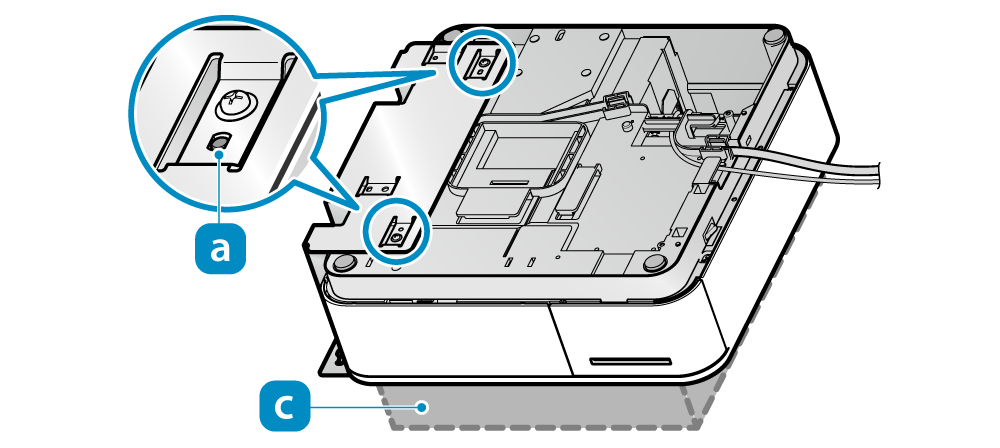
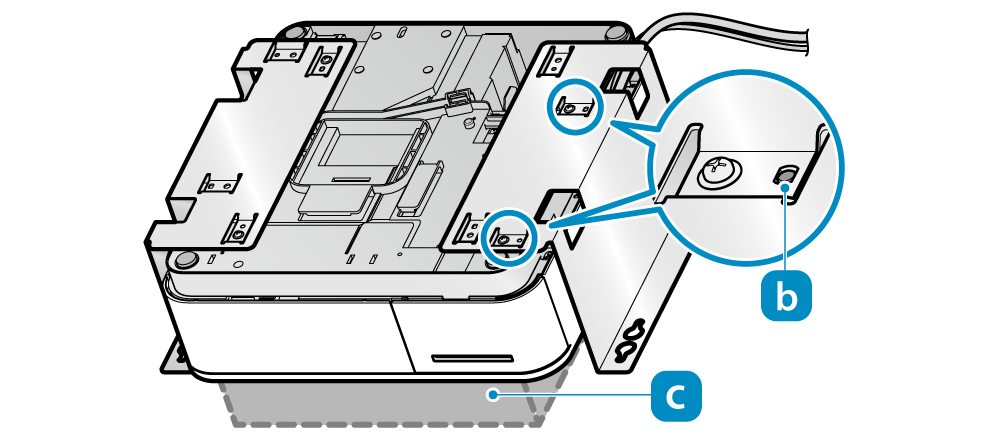
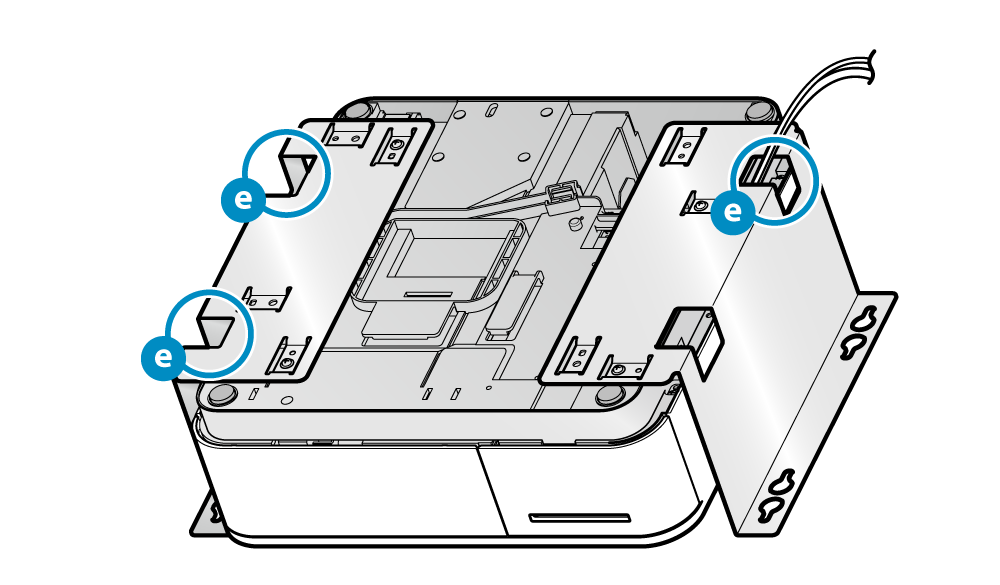
1. Attach mount kit to the mPOP main unit
- Attach the power and USB cables, and wire up the cables so that they exit via the cable outlets on the left/right of the main unit. For details, refer to Wire Cables.
- Paying careful attention to the orientation of the main unit, align the mounting frame holes to the two boss positions and .
- Since the mounting frame projects higher than the main unit, we recommend carrying out the installation work on a support stand
 (with a thickness of at least 30mm).
 - Secure with four small screws (M3-8).

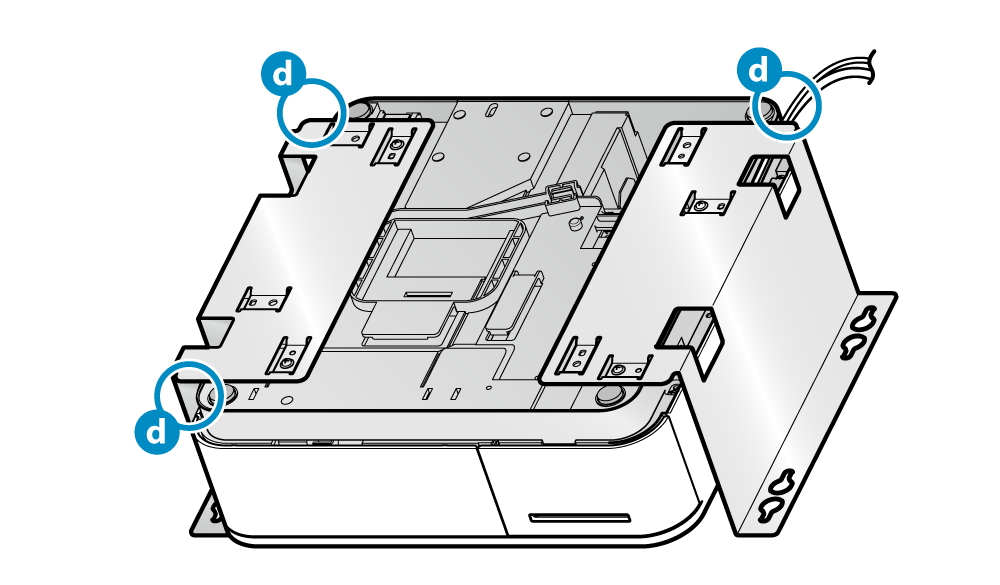
Note
 with the main unit or through the holes in the mounting frame
  .
. Be careful not to cover the hole for the power switch with cables.
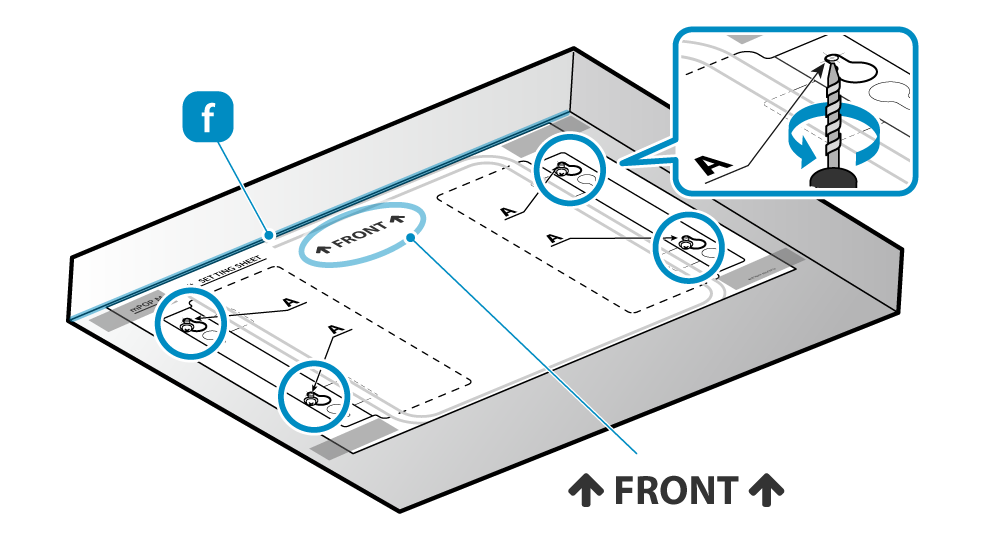
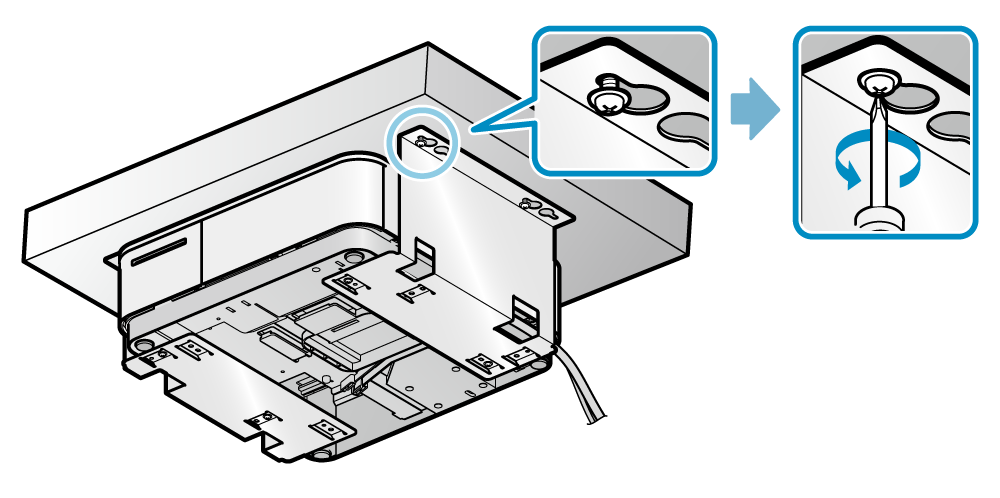
2. Attach mount kit to the tabletop
- Align the edge where the arrows indicate FRONT on the template to the edge
 of the mounting surface (tabletop) where it will be secured and secure it temporarily with a tape or such.
 - Use a drill or such to drill four pilot holes where indicated with A in the template. [Hole diameter: φ3–3.2mm]
- The template can then be removed since it is no longer needed.
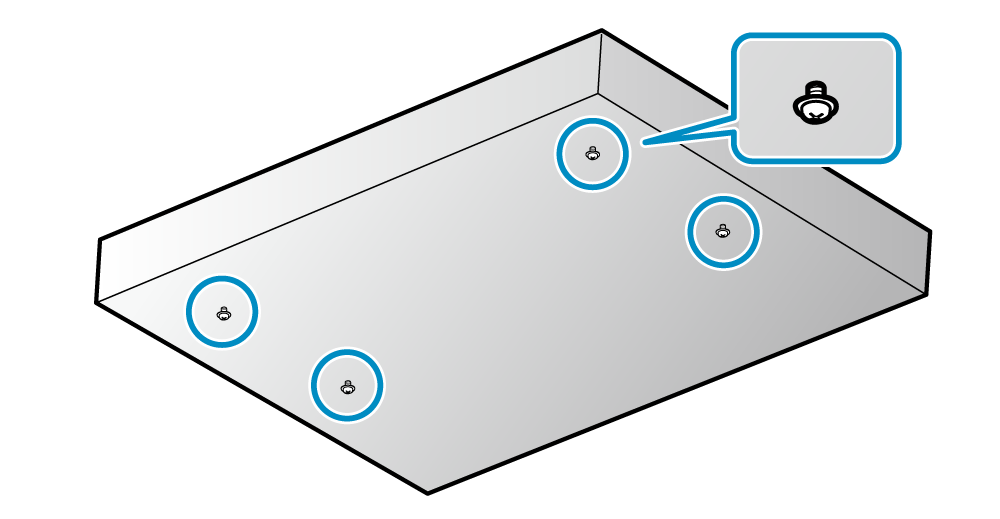
- Screw four large mount kit installation screws (M4-12) halfway into the pilot holes.
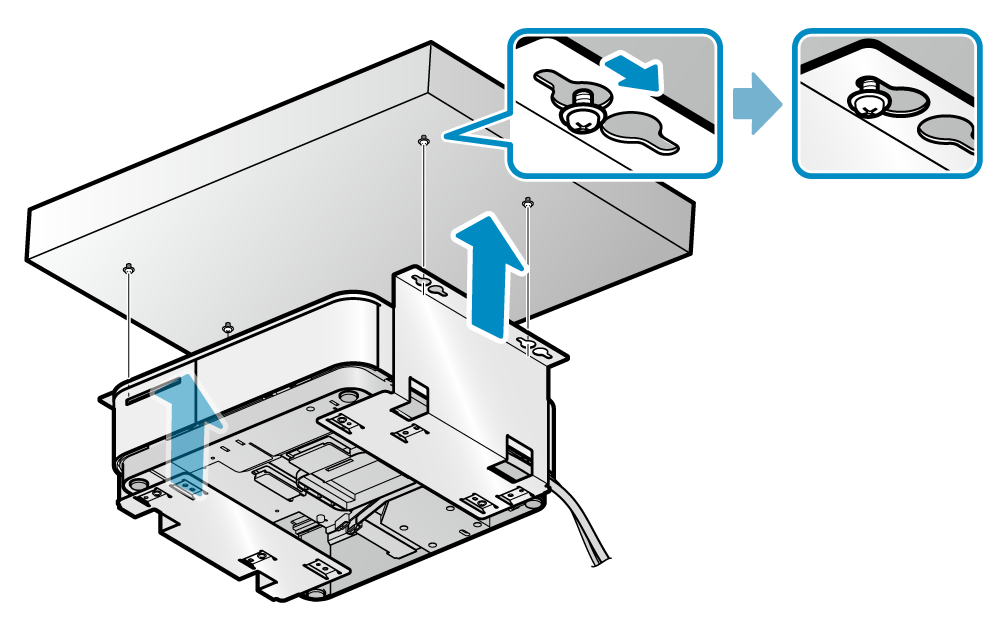
- Checking the front/back orientation of the main unit, place the four large installation holes on the mounting frame over the four half-tightened screws.
- Slide the frame to the back.
- Fully tighten the four half-tightened installation screws to fix in place.
Note
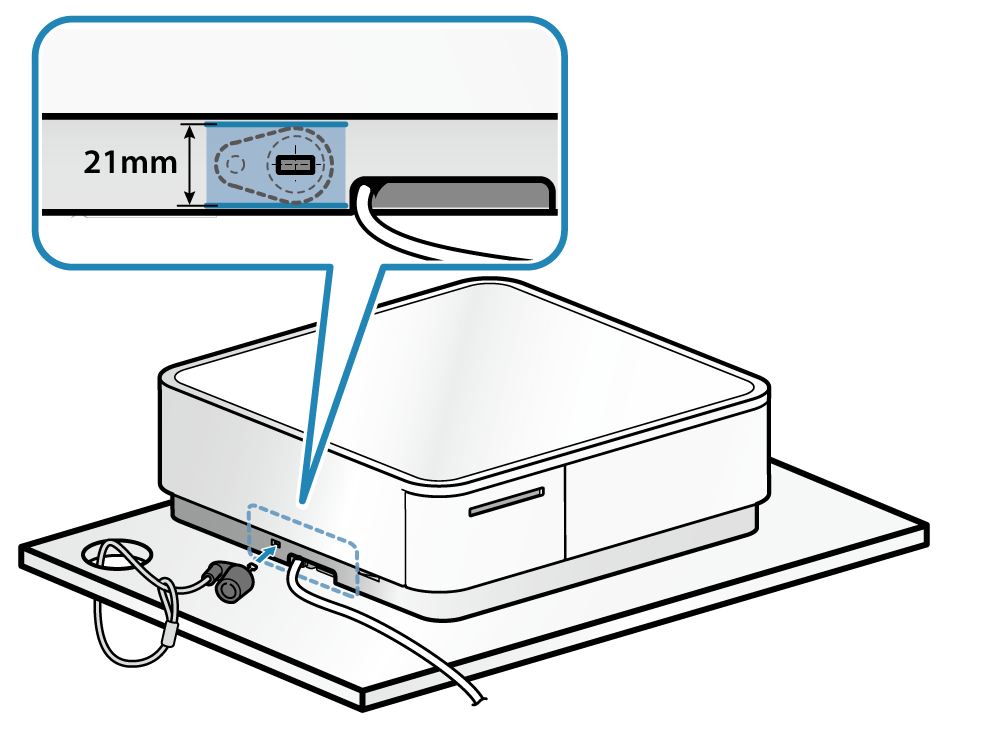
Attach security cable (commercially available)
1. Attach a security cable
- Attach a commercially available security cable to the security slot on mPOP.
Caution